Halloween Birch Tree Watercolor Painting
Printmaking is a fast and fun way to make art and duplicate it as much as you'd like. Crete an everlasting image that could be used over and over again! This Halloween birch tree print is amazing and spooky all at the same time!
Have you ever carved your own stamp? Even if this technique scares you, it's worth it just to give it a try! Carving a rubber block is so satisfying and you end up with a personal stamp that can be used again and again. Choose an image that could be used for many subjects or seasons, for example my birch tree carving is great for all of the seasons, I can simply change the color of the background, add leaves, add snow, etc, the possibilities are endless!
Have you ever carved your own stamp? Even if this technique scares you, it's worth it just to give it a try! Carving a rubber block is so satisfying and you end up with a personal stamp that can be used again and again. Choose an image that could be used for many subjects or seasons, for example my birch tree carving is great for all of the seasons, I can simply change the color of the background, add leaves, add snow, etc, the possibilities are endless!
Halloween Birch Tree Watercolor Print

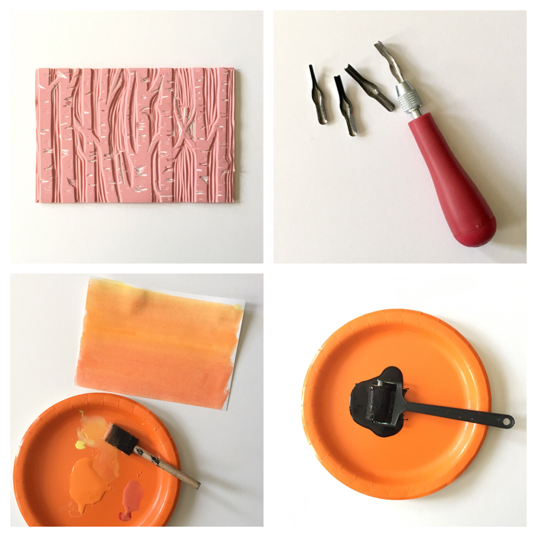
You'll be needing a Speedball Speedy Carve Block found at craft stores, I got mine from Michaels along with the linoleum cutter which is also found at the craft store right near the carve block.
Materials:
Materials:
- Rubber carve block
- Linoleum cutter
- Acrylic paint
- Paint brushes
- Cardstock paper or watercolor paper
- Mini paint roller
Directions:
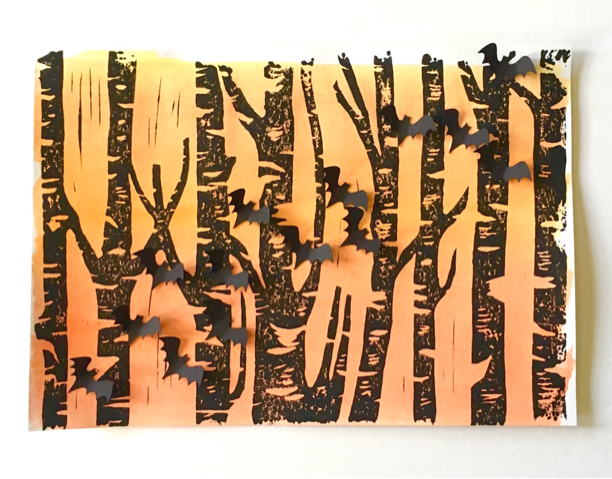
Step 1. You'll first have to carve your rubber block. You can simply draw something onto the block with a pencil and then start carving, you could also print out an image and trace it on. Keep in mind that the parts you carve will translate to negative space on your printed image, parts that you leave un-carved is the surface in which the paint will adhere to.
Step 2. Cut a piece of paper to fit the size of your stamp. My stamp and paper are about 9"x6".
Step 3. Add a generous amount of water to your paint, I use a plate and pour a little water in it and mix. You could always add more water or paint depending on your preference. Paint your background onto the paper and let it dry well.
Step 4. Put black paint in another plate and use a mini roller to apply it to the stamp.
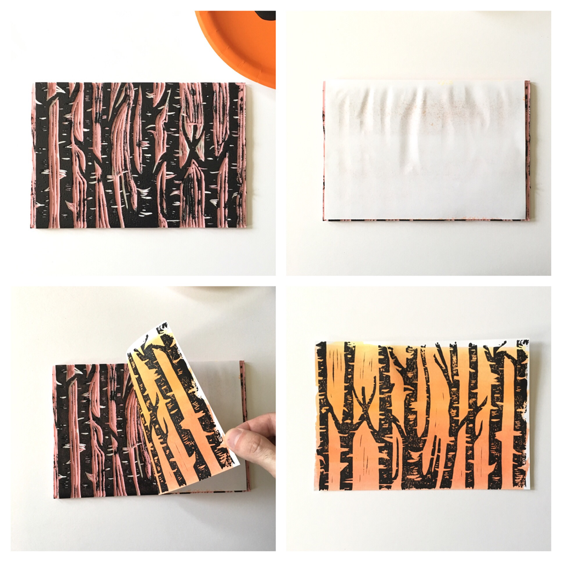
Step 5. Place your paper on top of the block face down. Use a dry foam brush or any flat sided tool to press evenly along your stamp.
Step 6. Peel your print up from the block carefully and voilà!
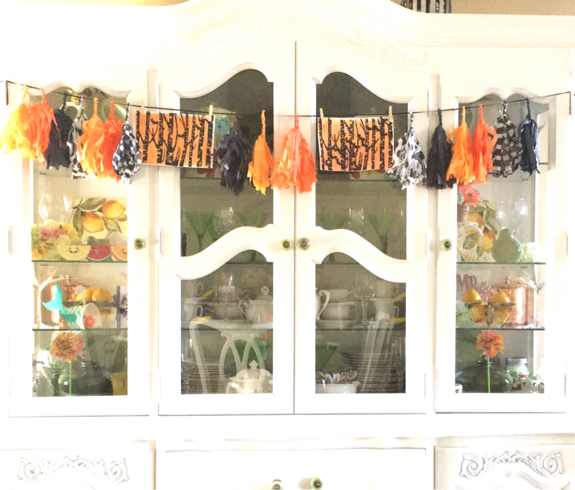
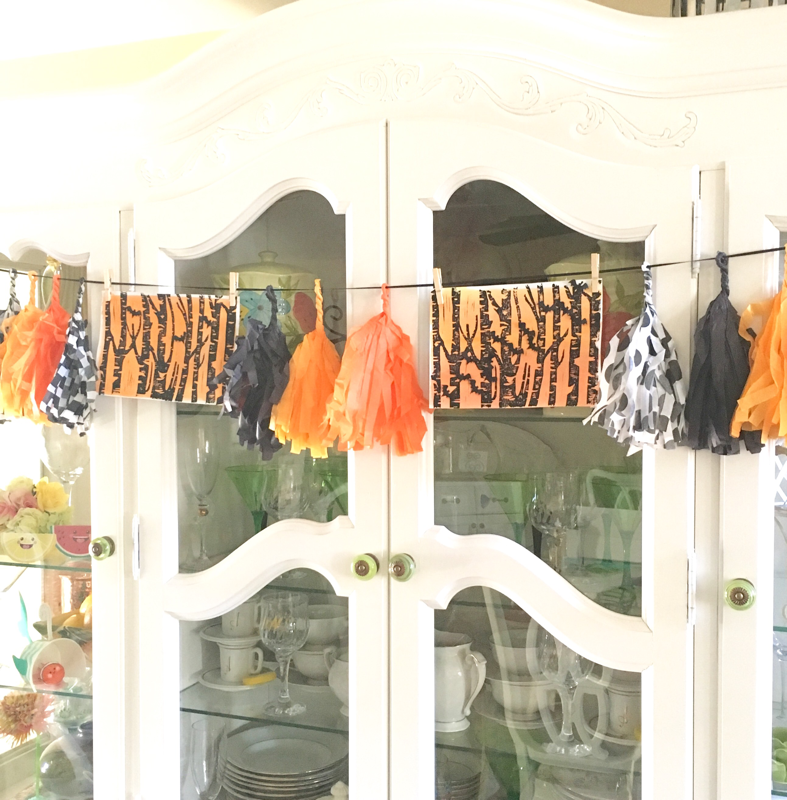
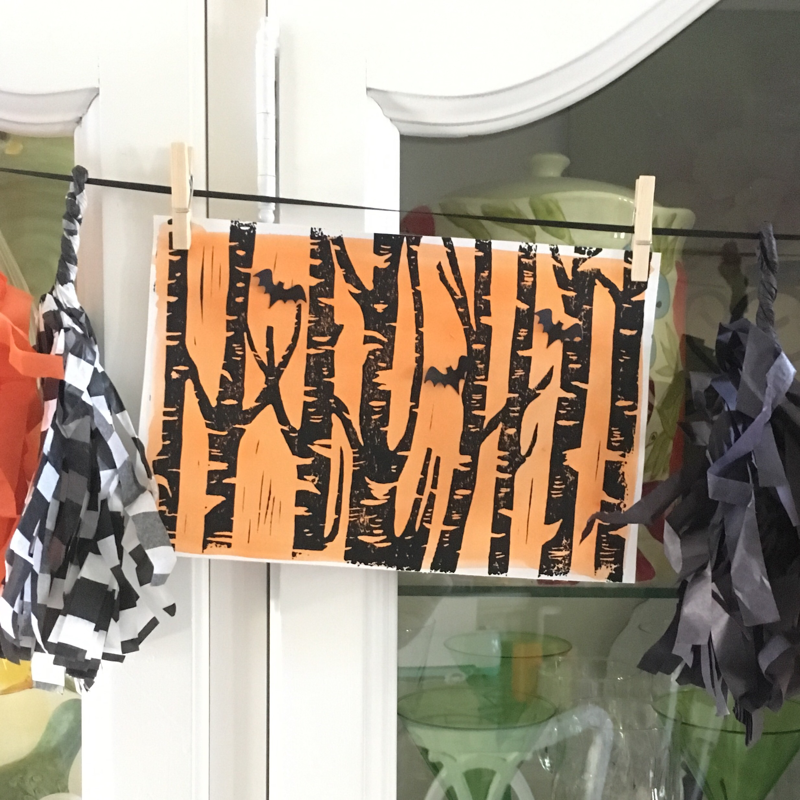
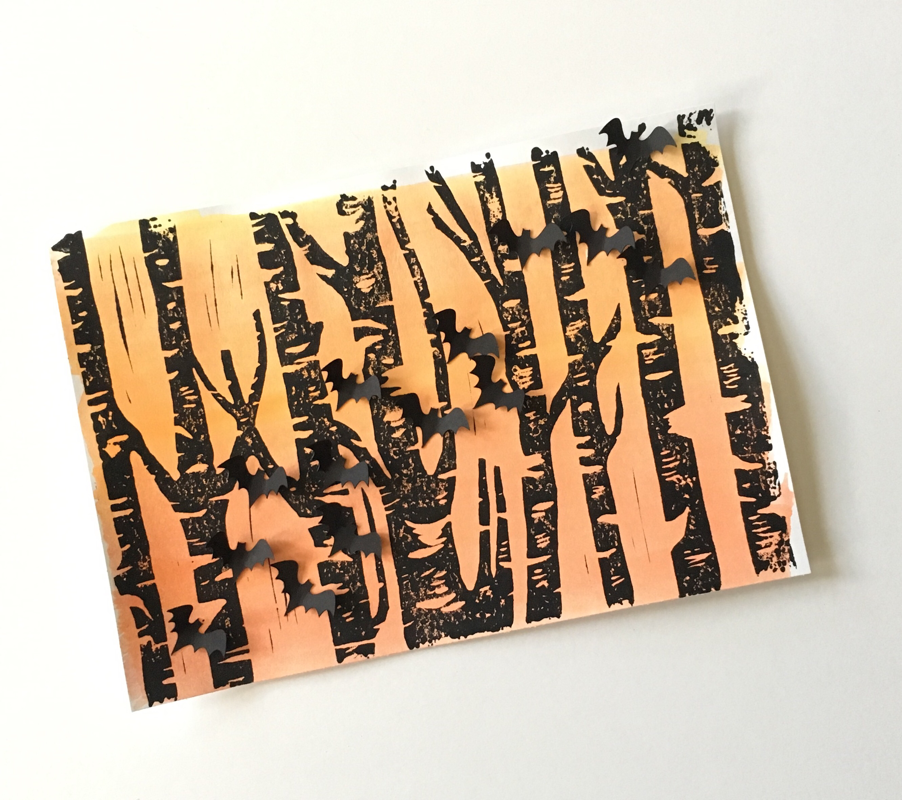
Add any extra details you'd like, I glued on some fluttering bats for a three dimensional quality and extra spooky factor!
Step 6. Peel your print up from the block carefully and voilà!
Add any extra details you'd like, I glued on some fluttering bats for a three dimensional quality and extra spooky factor!