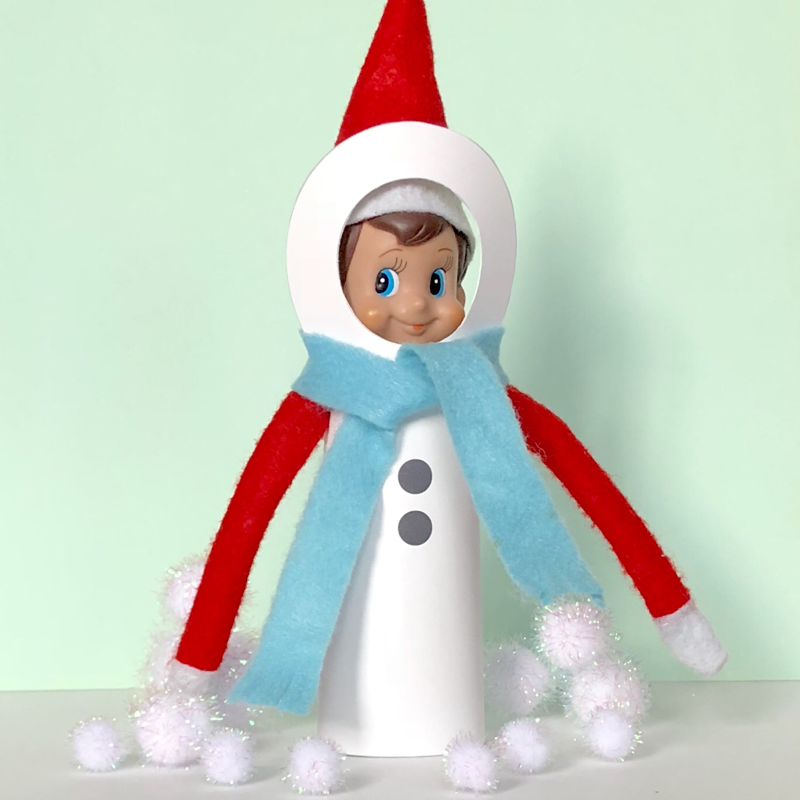
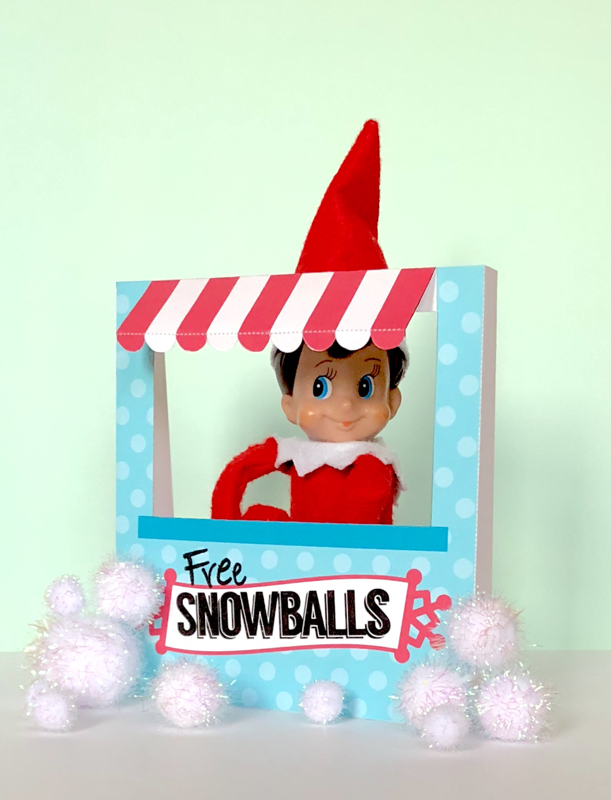
Elf on a Shelf PrintablesMeet Jasper Jingleberry he’s my classroom Elf on a Shelf and he’s here to present to you some nifty printables from the North Pole! Jasper Jingleberry is back for 2017 sporting some sweet treats for your house elf experience. Have you gotten in too deep with this whole Elf on a Shelf fiasco? I know the kids love it but it sure can be a hassle for some parents and family members to put together a new and unique experience each time your elf performs a mischievous act. Well I’ve created some fun paper crafts to help you out, they are sure to wow your little ones this holiday season! If you’re liking what Jasper Jingleberry made here then download it in my shop for instant elvish fun! 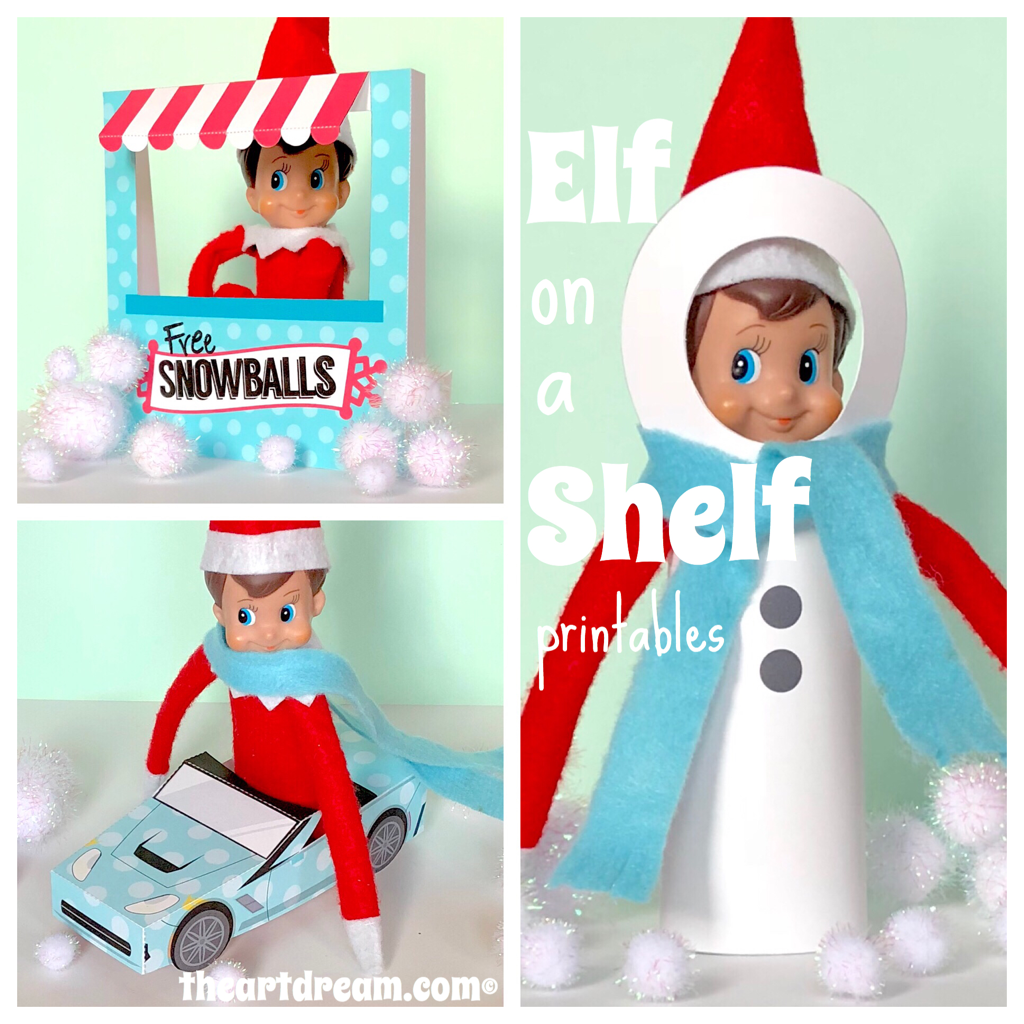 Elf on a Shelf Printables Here I have for you three fun papercrafts to get you started on creating some fun family moments. The kids will be amazed at how well their elf can manage to surprise his onlookers. First you’ll notice the elf giving away free snowballs, what a kind thing to do. I guess he’s gone through the trouble of shaping those snowballs for you haha! Create a lovely scene with pom-poms to get the snowball fight going. Then we have the elf riding around in his cool convertible toy car, he must have borrowed this ride from Santa! Lastly elf is all dressed up in his snowman attire, I think he wants to be a part of that family of snowpeople outside on the front lawn! If you’d like to make these be sure to visit the shop to find the Elf on a Shelf printables! If you are having trouble with the printed size of the image, make sure that you select "fit to page" or "print actual size" in your printer options window. Materials:
Directions: Step 1. Be sure to cut out all of the shapes with a scissor or craft knife. Step 2. For the snowball stand. Score on all of the dotted lines, cut on the solid black lines on either side of the auning. Fold the auning up and glue in place. Bend the sides back. Glue on the extra flaps for support. I folded the extra flaps in half and glued them to the bottom of the side flaps. Step 3. For the car, score on all of the dotted lines, then fold. Apply glue to all of the flaps and glue the flaps to the corresponding side. Glue windshield to the front of the car. Step 4. For the snowman costume, cut out the gray circle where the face should be. Wrap the body of the snowman around a toilet tube and secure with tacky glue. Bend your elf to fit inside of the toilet tube. Glue on the included stick arms if you’d like. Step 5. Make a scarf, sunglasses and other props with felt, foam, pom-poms and pipe cleaners! I hope you have an incredibly magical experience with your little ones while trying out these printables this holiday season! Be sure to share the fun and tell me all about your moments of wonder!
5 Comments
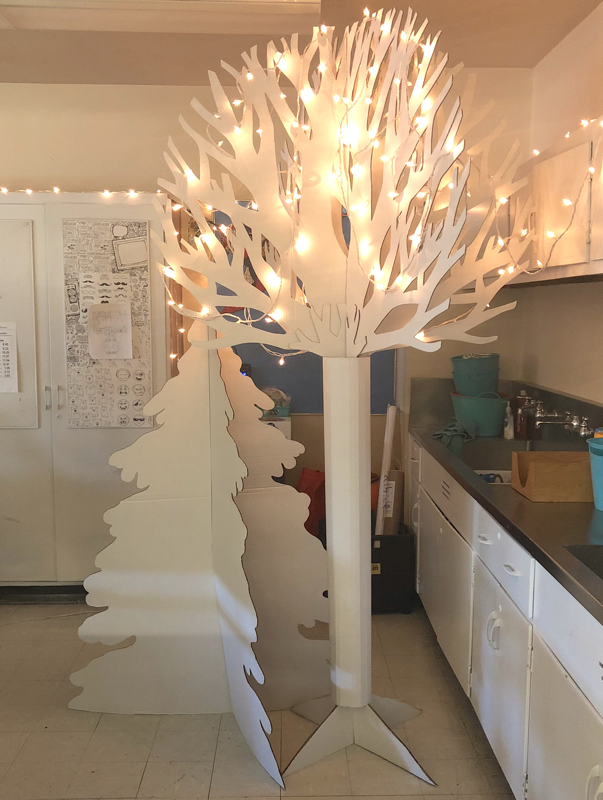
Winter Wonderland Ice Castle & Cardboard TreesThis ice castle created entirely from cardboard and other paper materials is a magical addition to any winter themed room, party or celebration! I had designed and assembled this beauty for a collaborative unit of lessons while I was teaching kids with autism. We displayed their beautiful art work along with this majestic ice castle, it was truly a moment that took everyone’s breath away. All of our students did a fantastic job on their projects as well. 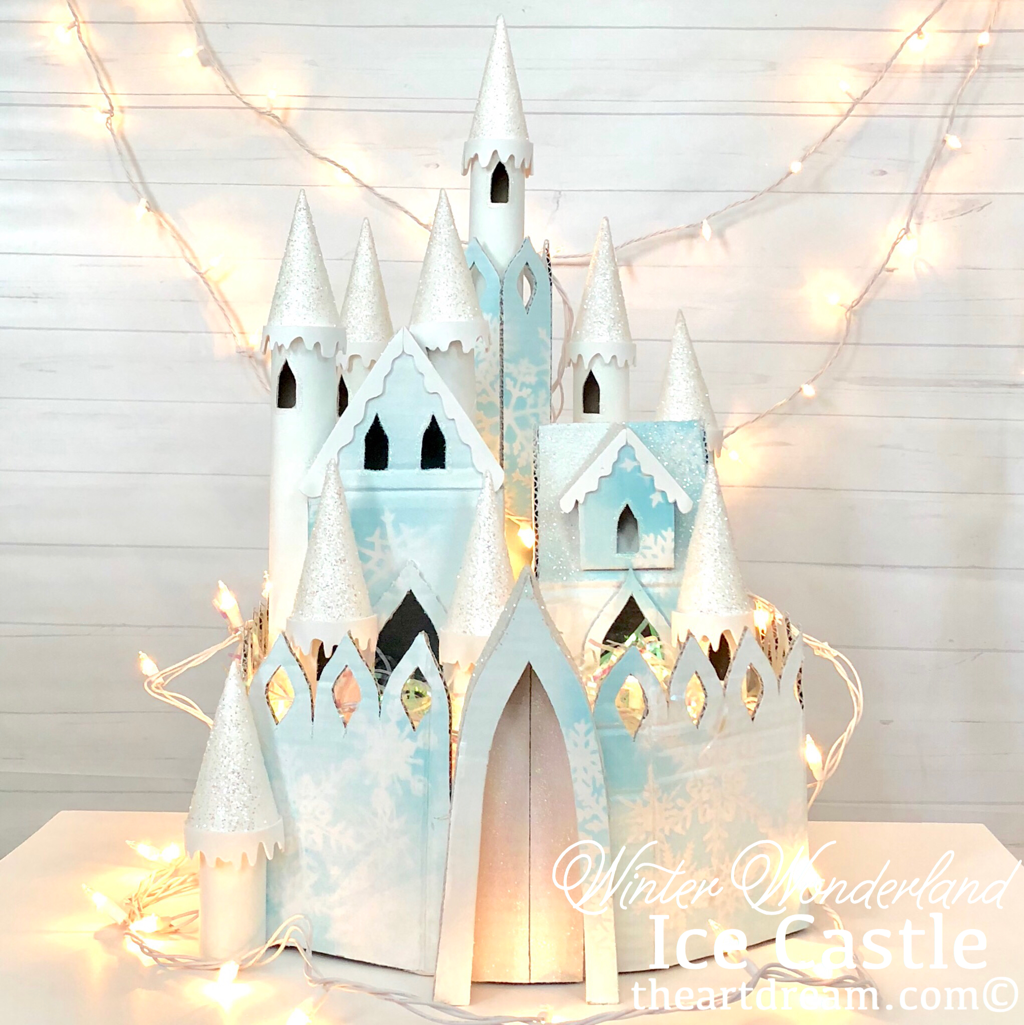 Ice Castle Project I’m sharing this because I’ve decided to display this castle in my classroom to go right along with my winter wonderland theme. I’ve created some large scale trees dripping with white lights to bring the magic of winter into the room. My students love it and I think it’s so important to take the time and really put some care and thought into the appearance of your classroom. I believe that if students get the impression that you pay attention to detail and put an extra amount of effort into the experience then the kids will do the same when it comes to their own work. Think about how you’d feel in an academic setting if the room was bare, neglected or even dirty and dingy? I know I wouldn’t produce my best work because I’d be totally uninspired by the atmosphere. Show kids that you care and I’m sure it’ll go a long way! Check out more of my winter wonderland in the gallery below and be sure to find some inspiration from The Art Dream by looking around on the blog! Take a look at my video of this castle as well, it sure is icy, and pretty! The foundation of the castle is cardboard. The towers are paper towel tubes wrapped with cardstock paper. The turrets are cones made from cardstock paper as well. I added dripping snow around the bottom of the turrets made with white foam. I of course used iridescent glitter to frost the top surfaces. I spray painted parts of the castle and used stencils to get the snowflake appearance. At the very end I placed iridescent shredded paper in the base followed by white string lights! Here are the trees standing tall in my art classroom! They are actually very large and are very majestic! I even created some standing woodland creatures to place around the classroom to fit the narrative. For those I used my Cricut machine to cut out the patterns and then I traced them onto the cardboard and cut them out. My beautiful large winter trees create a frosty environment for a winter wonderland experience!
Black Glue Watercolor PaintingMix black paint with some white glue, outline a drawing and use watercolor paints to fill in the spaces to create a beautiful painting! This is one kind of project that you can whip out anytime, just prepare a half full bottle of white glue by adding in some black craft paint and you have an art project all ready to go when the boredom bug bites! 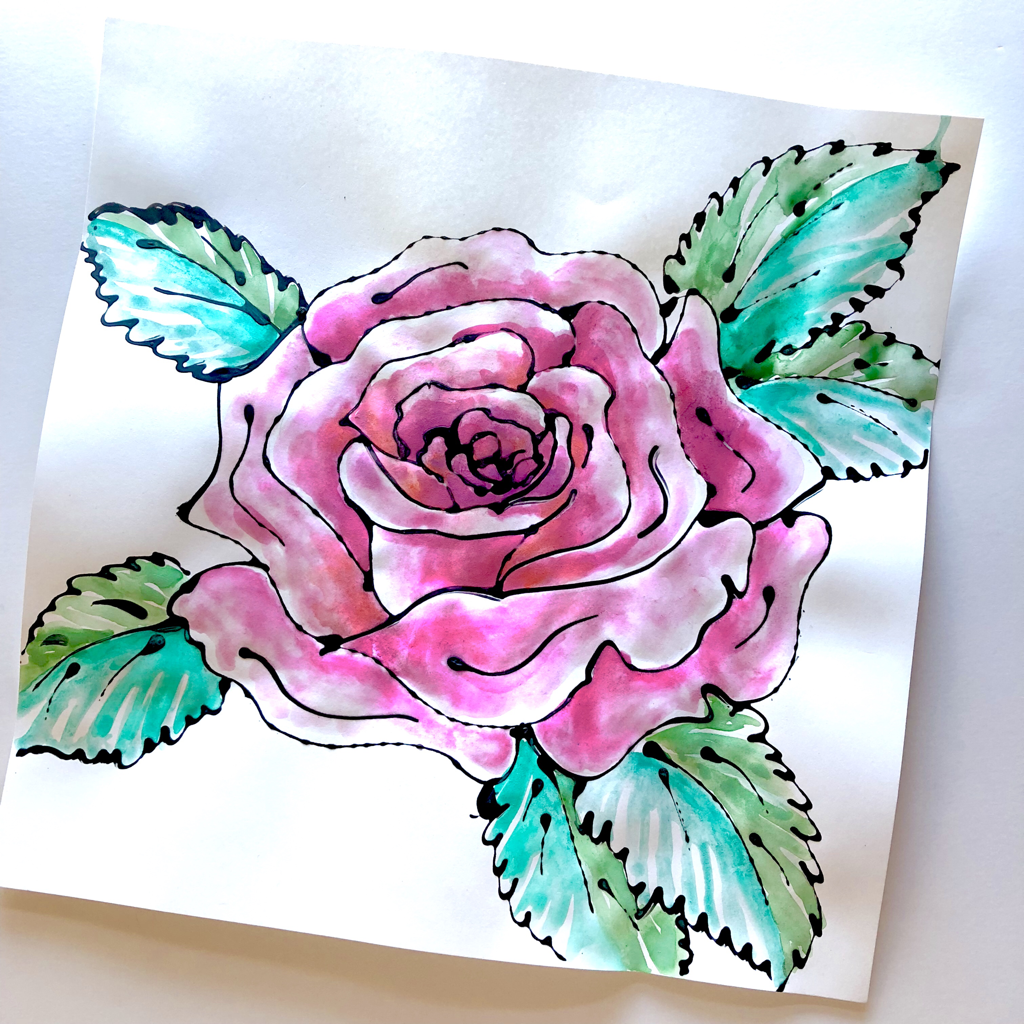 Rose Watercolor Painting Recently I did Halloween watercolor paintings using this technique and I really love it. This is a two part project which is great for the classroom because it will keep the kids busy for a few days. First prepare your glue bottles by pouring in a bit of black craft paint, then give it a good shake to mix it well. You’ll start with a drawing or even a printout, keep it simple though because tracing the drawing with the glue is not precise, you’ll have some bumps and puddling along the way. Trace your outline and then let it dry really well before painting. I like to use watercolor for this type of project but you can use craft paint as well, keep in mind that when normal paper gets wet it wrinkles a bit. If you want a better quality outcome then you should use watercolor paper. For a kids craft though cardstock paper will do just fine. 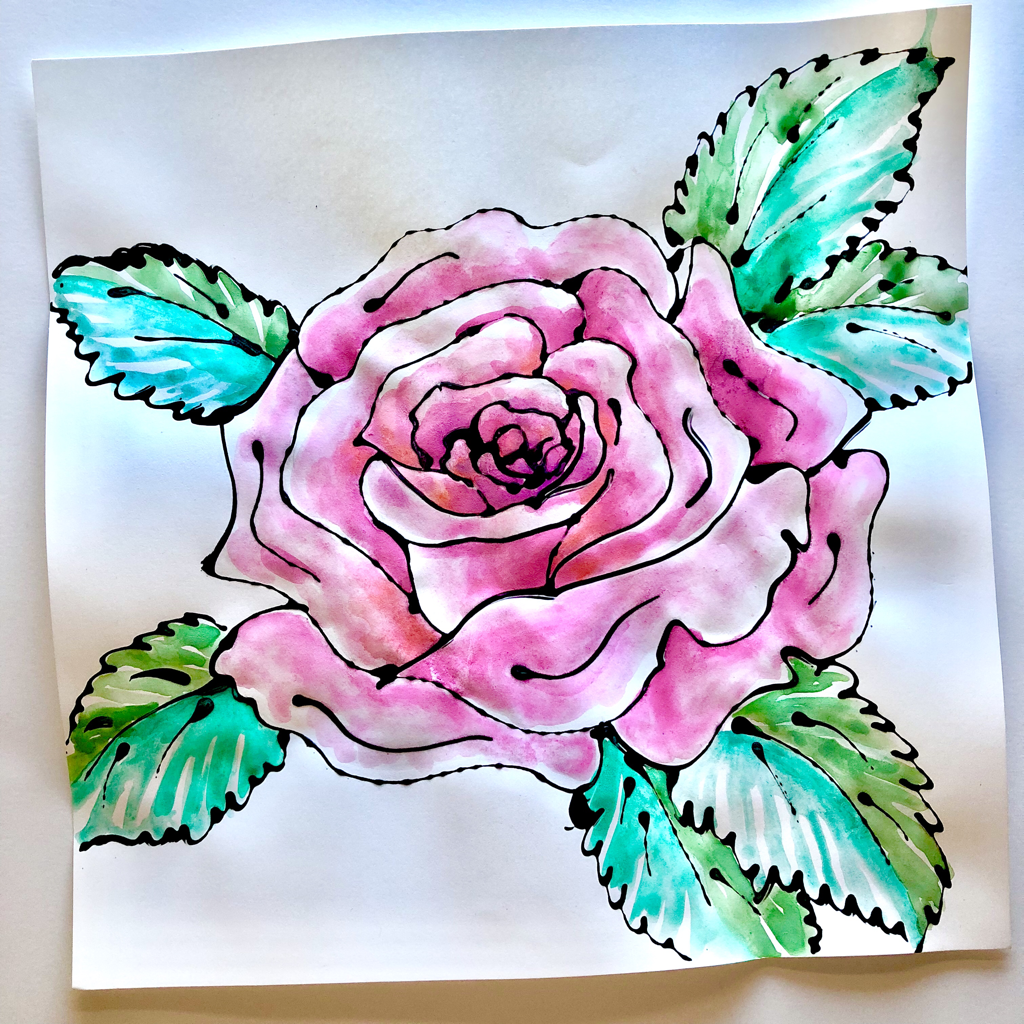 Rose Watercolor Painting This technique can be used anytime of the year for any image, and it’s rustic look pairs greatly with watercolors, remember to be creative and have fun. Add your own details too like glitter, or feathers or foam shapes for dimension!
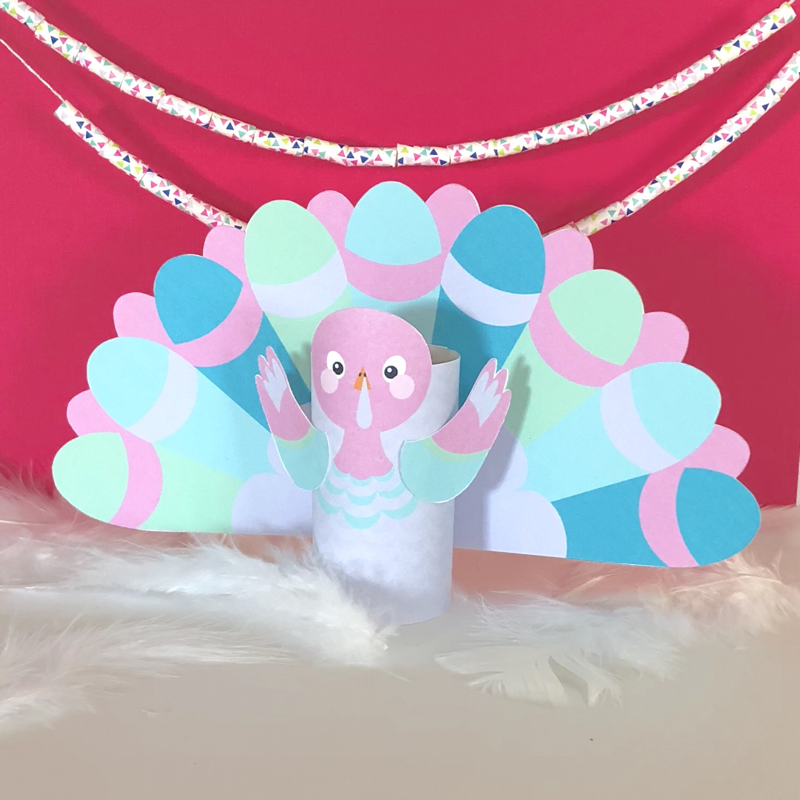
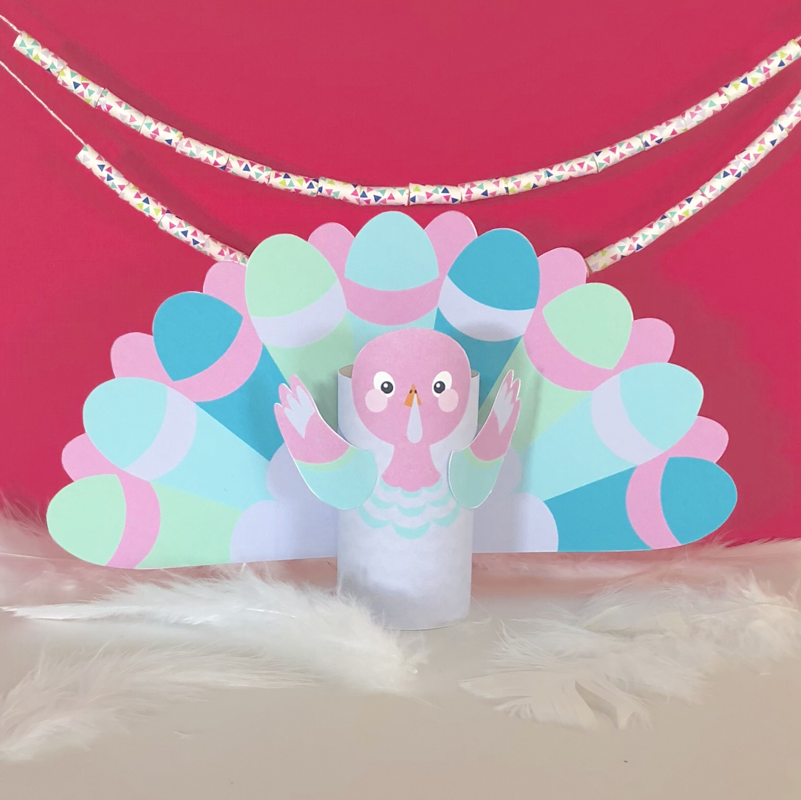
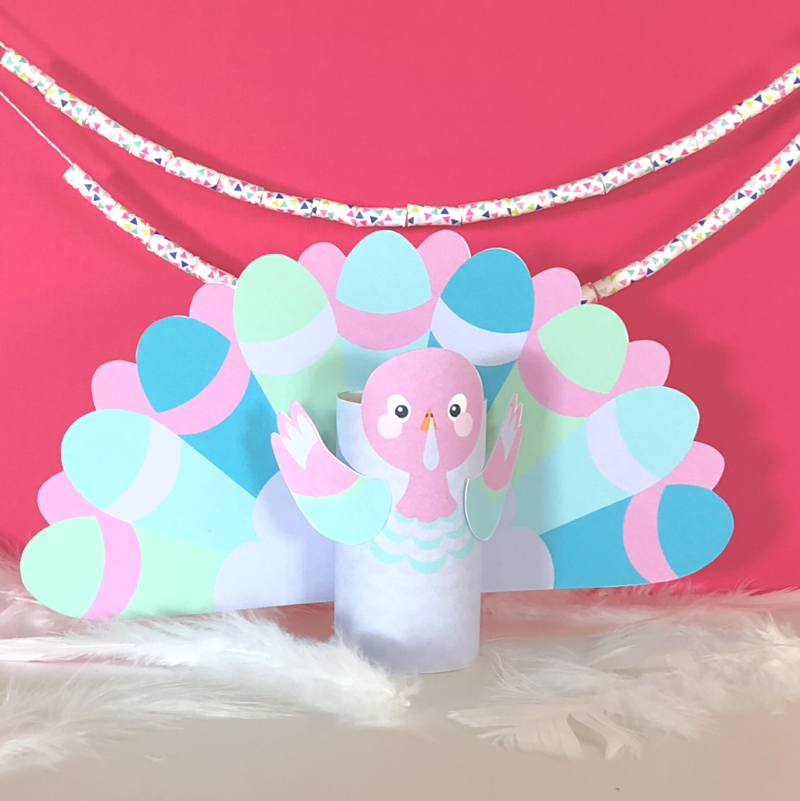
Thanksgiving Turkey Tube CraftWho says turkeys have to be brown?! This one is all dressed up for the holidays and ready to party. Try my fun and brightly colorful turkey tube craft for the kids this Thanksgiving season. When we think turkey we think golden brown, covered in thyme and butter and absolutely delicious, right? Well this turkey is not about that life haha! He’s lucky enough to be the star of the show in his purple, blue and green hues! Have the kids craft their own unique and colorful turkey at the kiddie table this Thanksgiving holiday! 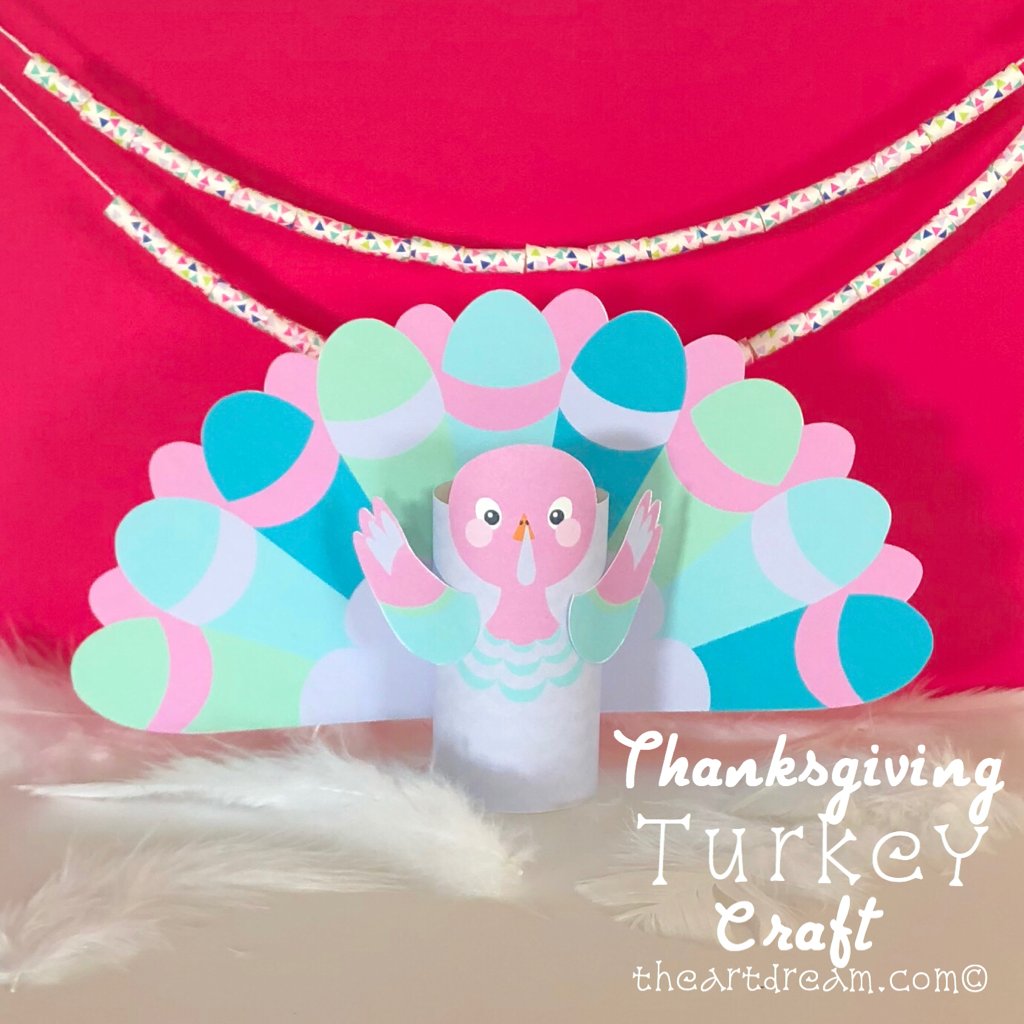 Turkey Tube Craft You’ll need a toilet tube and some other simple arts and crafts materials to put this turkey craft together, plus my free printable download just below! If you like this turkey then check out his cousin here for a more traditional looking version! You should also visit my shop to find some more fun and original paper crafts created by me, The Art Dream! Please right click the files and save them to your computer before printing. If you are having trouble with the printed size of the image, make sure that you select "fit to page" or "print actual size" in your printer options window. Do not print from the open window of your internet browser after clicking on the file, your printout will be very tiny! Materials:
Download the already colored turkey here, if you’d like a black and white color your own version then visit my turkey craft post here.
Directions: Step 1. Cut out the body, wings and tail using your scissors or craft knife. Step 2. Trim your toilet tube so that it matches the height of the turkey's body. Step 3. Wrap the body around the toilet tube, secure with a stapler, glue or tape. Step 4. Glue the wings to the front and the tail to the back. Gobble, gobble! |
AuthorI'm John, an artist and art educator. The Art Dream is here to spark creativity and inspire the little artist inside of you! Archives
October 2021
Categories
Ice Dragon Head Printable
$1.00
Feel the icy breath of this mighty dragon, it’s a dance of fire and ice that’ll leave you in awe. Just add your own streamers to create that blast of blustery snow!
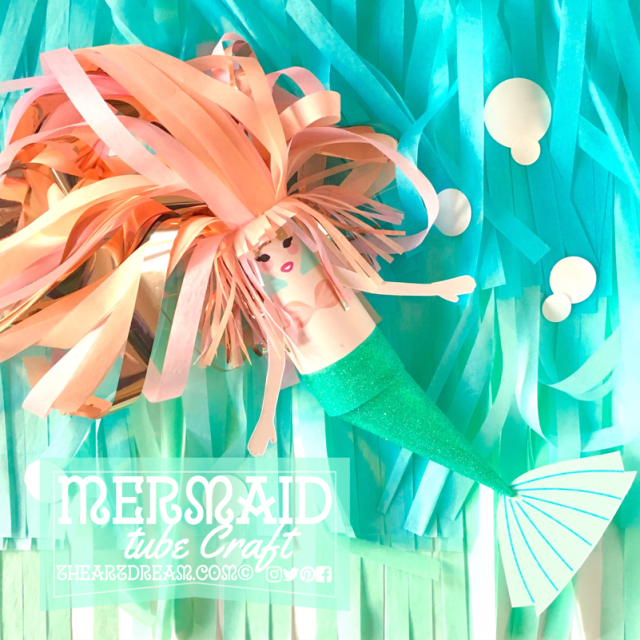
Mermaid Tube Craft Printable
$1.00
Who would dream about the world above the sea when you could dream about the world that is under the sea, where such beautiful creatures like this mermaid must exist! Don't they? I've started your journey of crafting this beautiful sea creature, it's up to you to add magical hair and dress up her fins!
|
||||


 RSS Feed
Proudly powered by Weebly