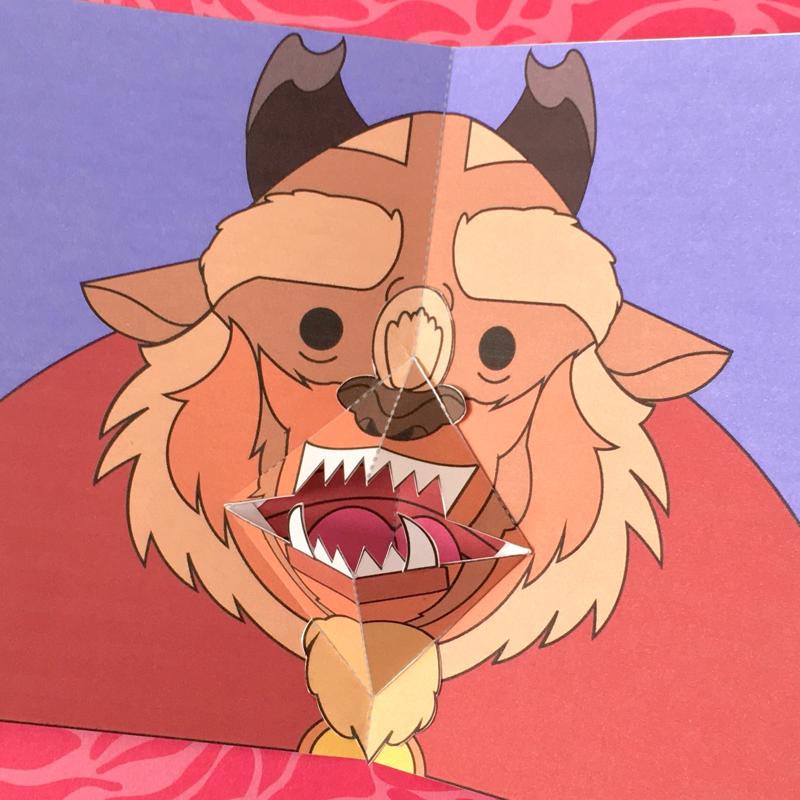
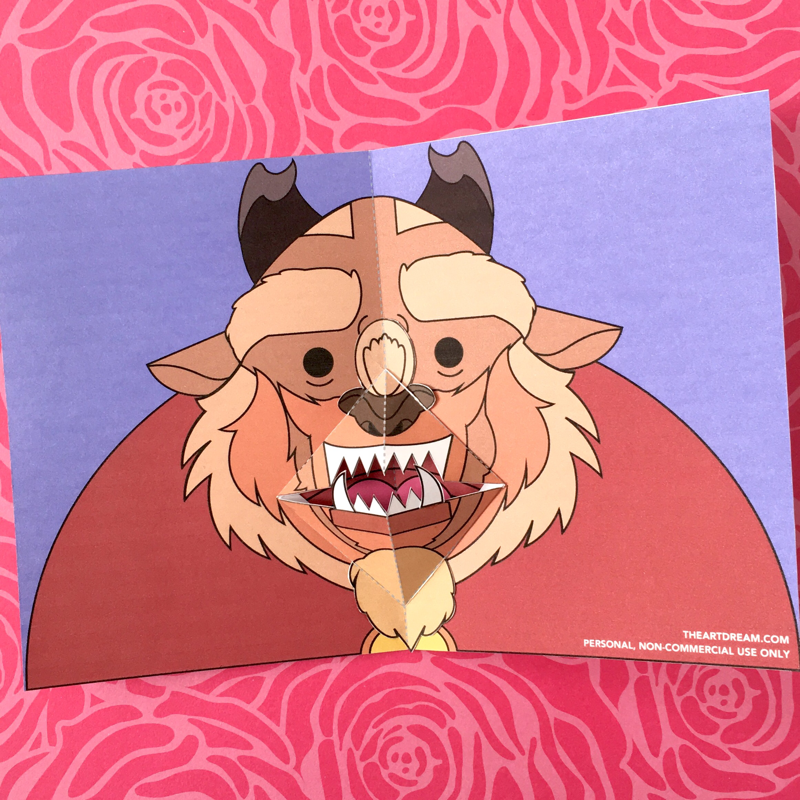
The Beast Pop-Up PrintableThe Beast will make off with your children, he'll come after you in the night... these are the words spoken by Gaston and I think if you know the tale, then you know the Beast is just a little misunderstood haha! This movable Beast pop-up printable goes along with my other Beauty and the Beast printables, he can roar and yell just like he does in the movie, make this papercraft and have the Beast sing a song as old as rhyme. 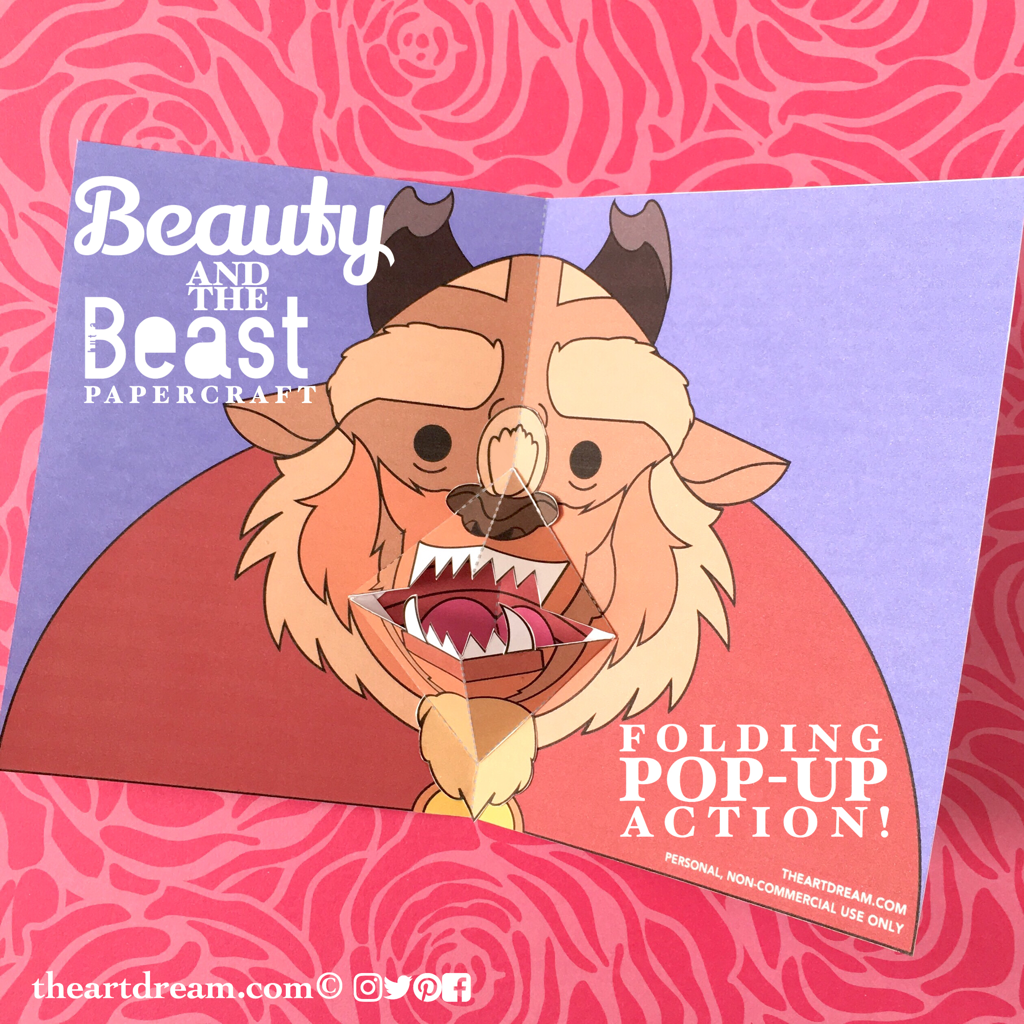 The Beast Pop-Up Printable I'm celebrating the release of the new re-make of the classic tale Beauty and the Beast and this pop-up card is exactly what I had envisioned when thinking how I'd represent the Beast in craft activity form. The Beast was really dealt a hefty curse when the enchantress turned him into a scary monster and everyone who lived in the castle into objects. He was tasked with showing that he is capable of compassion and love, the perfect message to talk about with your children. I think some of these themes reflect a bit of what our country is going through at the moment. Art making and crafting is an activity to benefit from solely on its own, but it becomes even more meaningful if we tie a lesson to it. How great would it be to explain why the Beast is the way he is, what he did to become that way and what changes he has to make in his life to earn trust, respect and love from others! Help the Beast find his way with this fun pop-up printable! And if you like this then check out my shop for more fun original papercraft printables! Before you start just note that the Beast looks really scary without his nose and mouth glued on haha, the inside of his mouth is exposed and it looks a little creepy! Download the free printable below...
You can even try the color your own version...
Materials:
Directions: Step 1. Start by cutting out all of the shapes. Then you'll want to score all of the dotted lines with a bone folder, craft knife or you could even use the corner of a plastic credit card. Step 2. Cut the mouth in half following the black line through the teeth. Step 3. For the Beast's mouth fold all of the flaps back and gently fold on all of the other dotted lines. Notice in the photos how the top of the nose and chin hair are folded in the opposite direcection of the teeth. 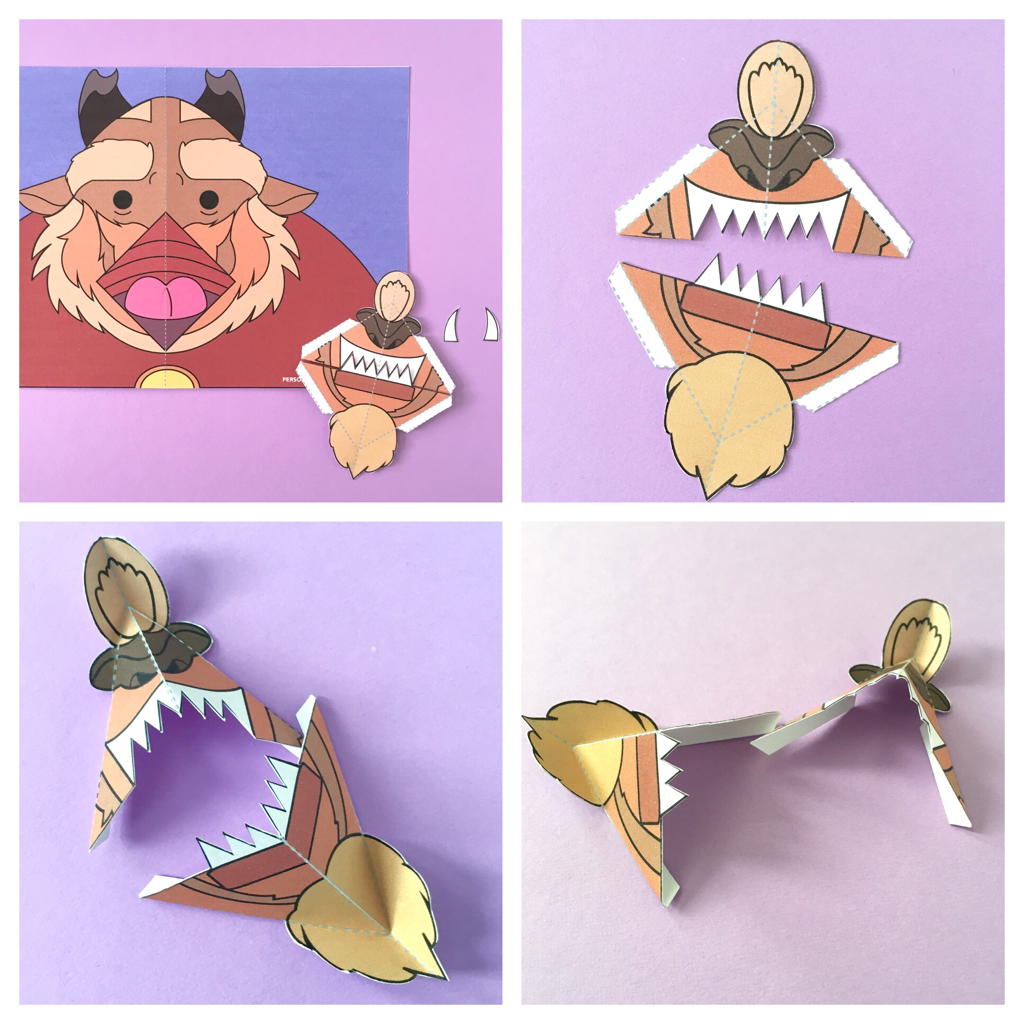 Step 4. Fold the large card in half on the dotted line. Step 5. Next add some glue to the flaps and glue the top of the mouth in place, place the mouth on flat! Also be sure that the vertical folds line up. Glue on the bottom half of the mouth the same way. Step 6. Be sure to glue on the extra teeth as well. 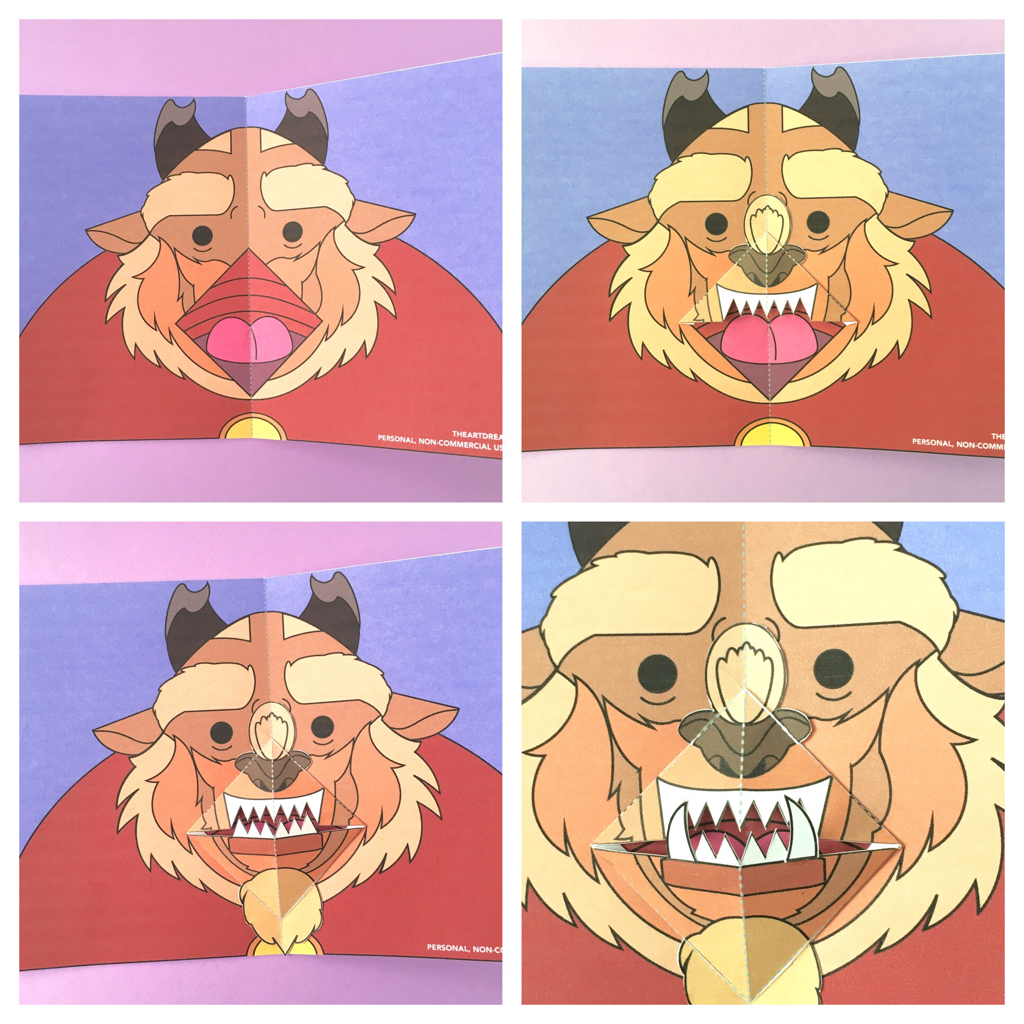 Have fun opening and closing your Beast pop-up!
15 Comments
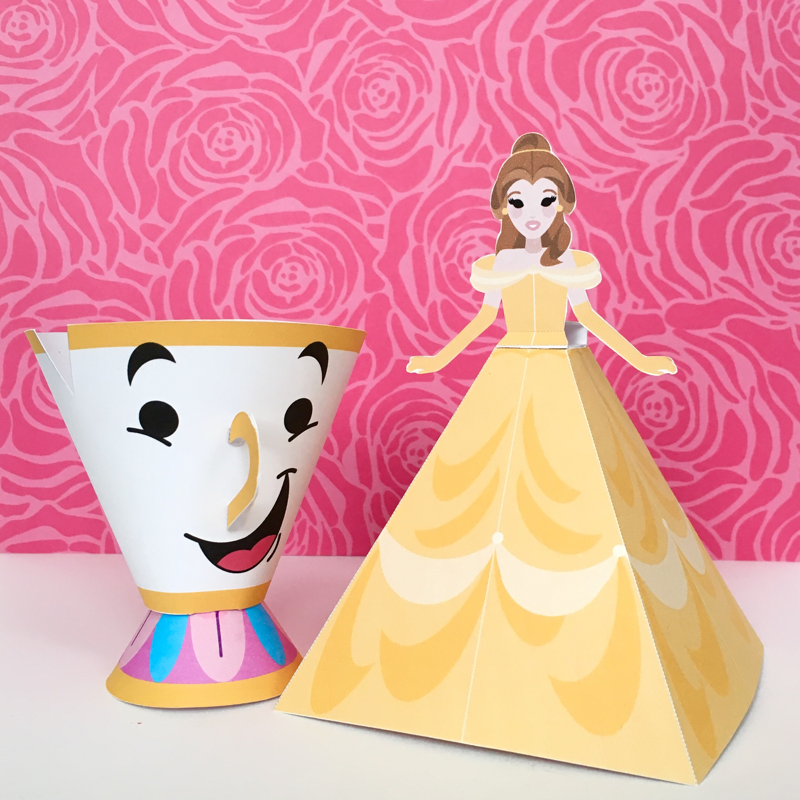
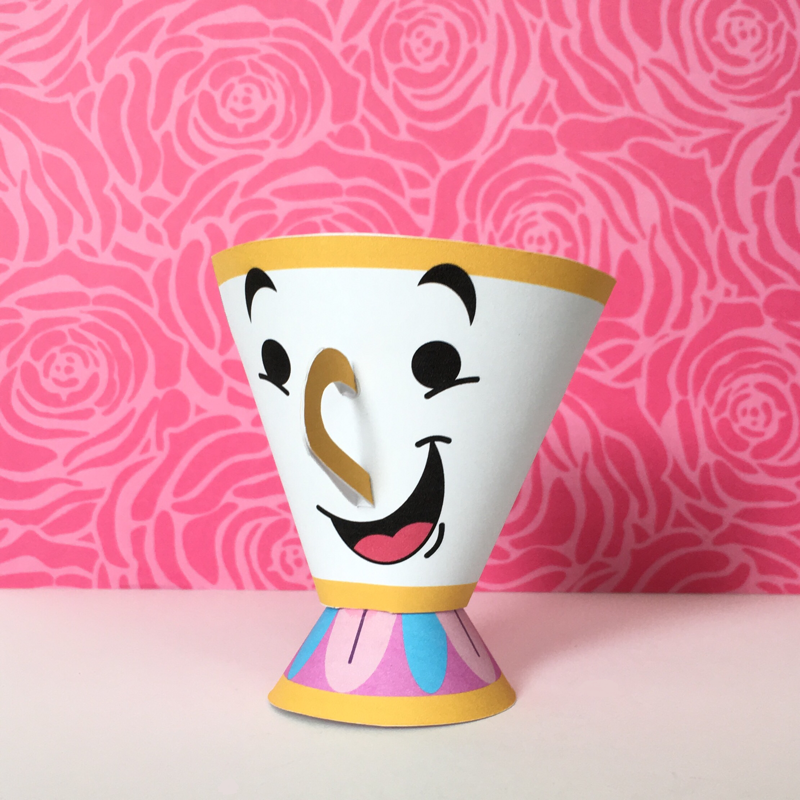
Belle and Chip Papercraft PrintablesA tale as old as time, well, it's just that... an everlasting classic. Beauty and the Beast is a story generations to come will adore. Belle looks beautiful and she's ready for a dance and Chip is right by her side, your little ones will love making these enchanted papercrafts! 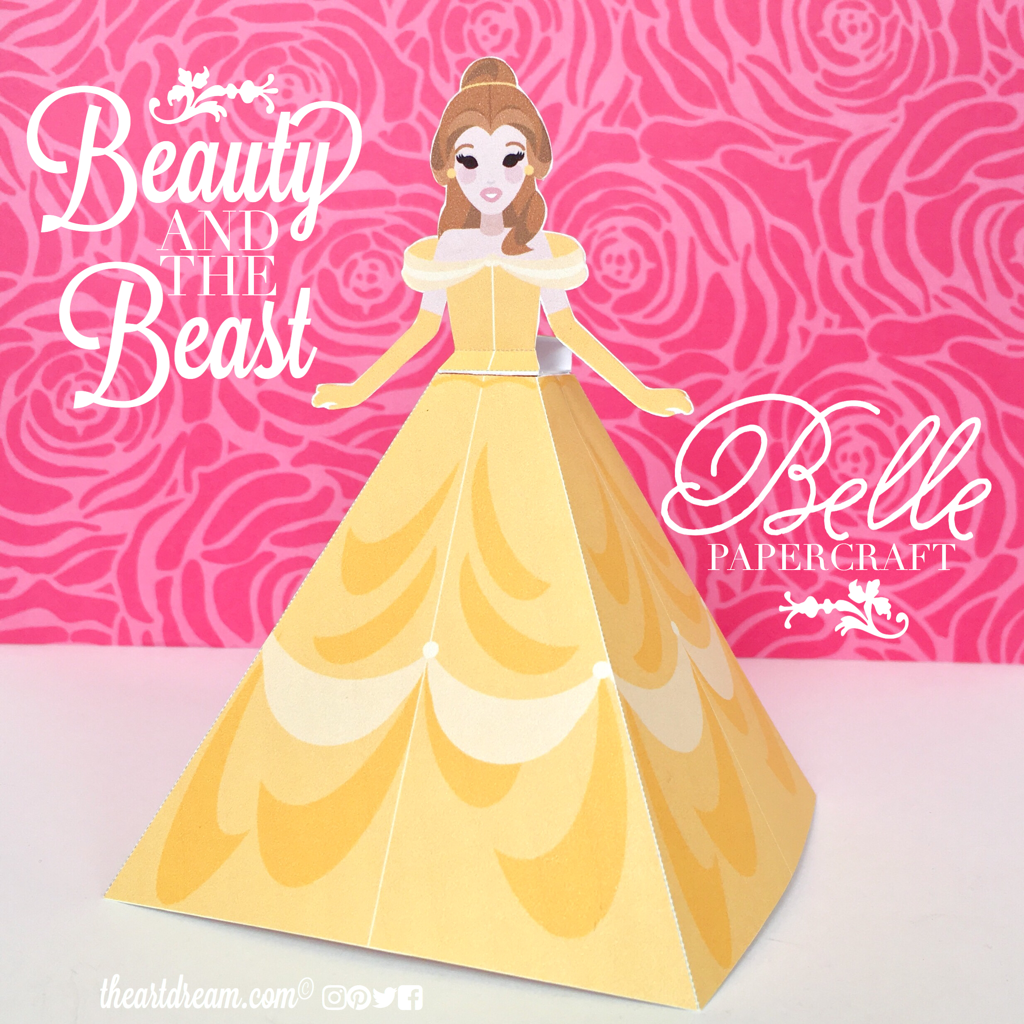 Belle Papercraft Printable Who doesn't love the classic animated Beauty and the Beast movie by Disney of course? I know I do, the beautiful scenery and the music, it's all the perfect recipe for a timeless movie our children will love for years and years to come. And now that the remake is right around the corner all of the nostalgic feelings and memories about this movie are returning. Print out this beautiful Belle papercraft and Chip for a fun evening of enchantment, these crafts are easy enough for children to put together and they will feel the magic once they're standing in 3D. I based my designs on the classic movie, I just find that they are so much more iconic and lovable, how could you not love that bubble blowing little chip. Use these papercrafts for a fun themed party to add that little extra touch of magic! 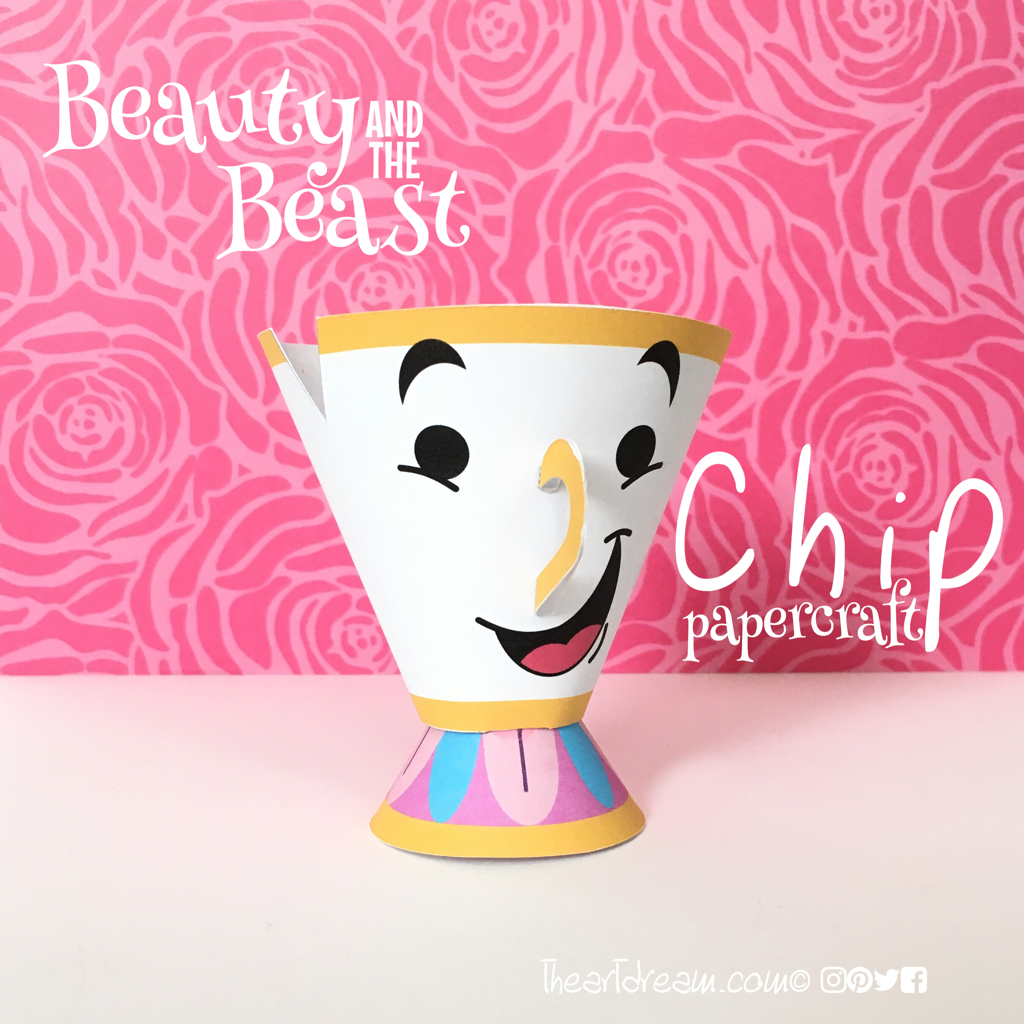 Chip Papercraft Printable Find the free download right below and if you like these then check out some of my original designs in the shop here at The Art Dream!
Materials:
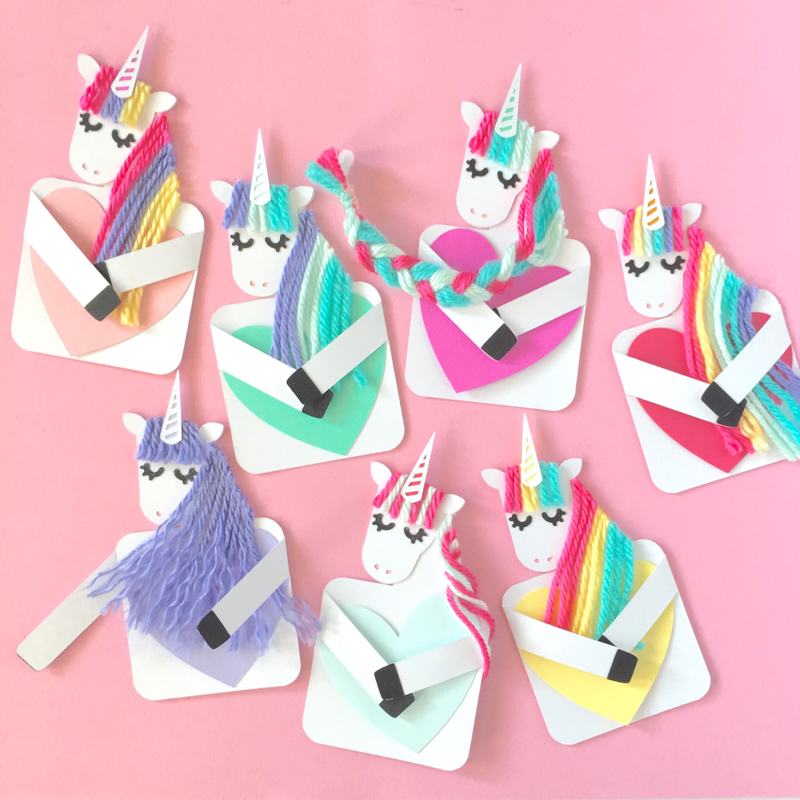
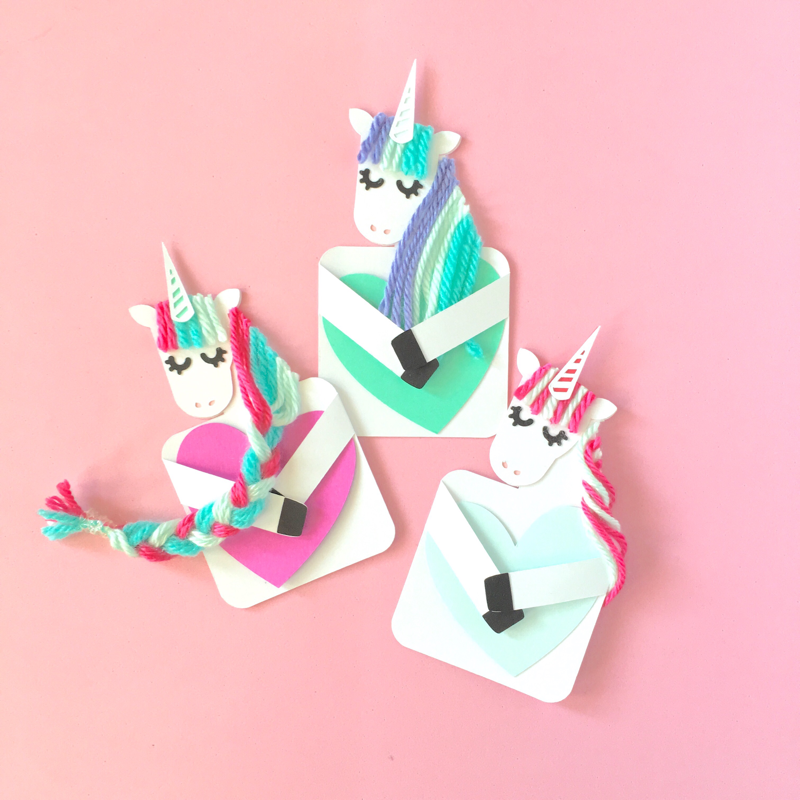
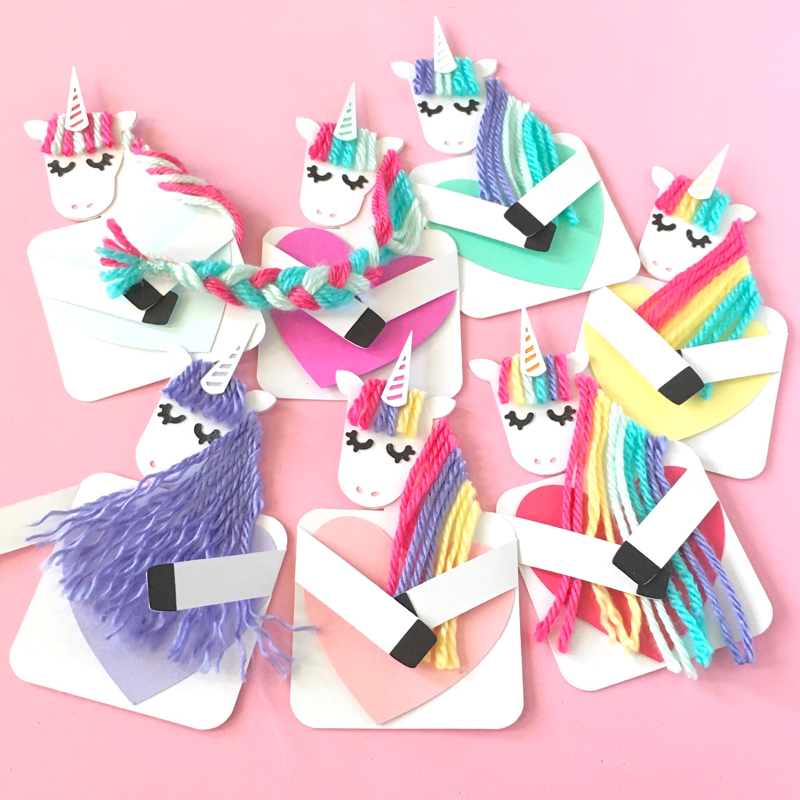
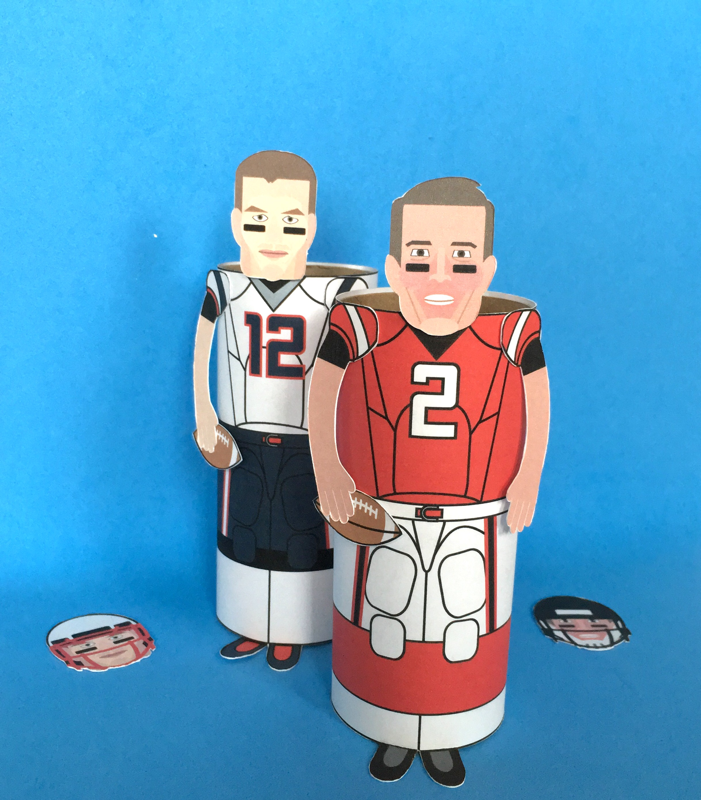
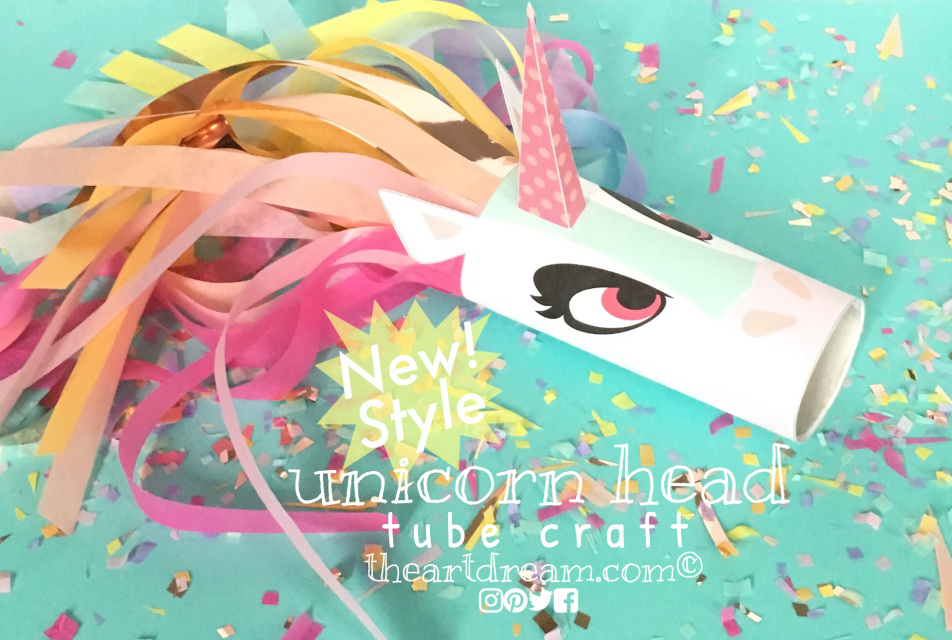
Directions: Step 1. Cut out all of the shapes with a scissor or craft knife. Score all of the dotted lines with the craft knife or you could even use the corner of a credit card. Step 2. For Belle's torso fold on the dotted lines until you form a little box and glue the flap to her back. Step 3. Fold her dress on the dotted lines and glue the flap to the side forming a box. Be sure to glue down all the flaps on the top flap as well. Step 4. Glue her torso to her dress. For Chip... Step 1. Cut out all of the pieces, you don't have to score the dotted lines for Chip. Step 2. Loop the body around and overlap the body and flap, be sure to add glue to the flap. Step 3. Repeat the same process for the bottom and glue the top and bottom together. Step 4. Fold the nose in half and use the white flaps to glue onto Chip's face. Unicorn Card CraftDesign your own fantastical unicorn cards with my template. Make magical unicorns holding hearts as a special note for Valentine's Day, birthday or any celebration! Dazzle your friends with a handmade card with real hair, they will be so impressed. Plus I love the fact that this unicorn card has folding arms that hug a heart, write something inspiring or encouraging and share the message with a loved one. Get the template here at hellowonderful.co! 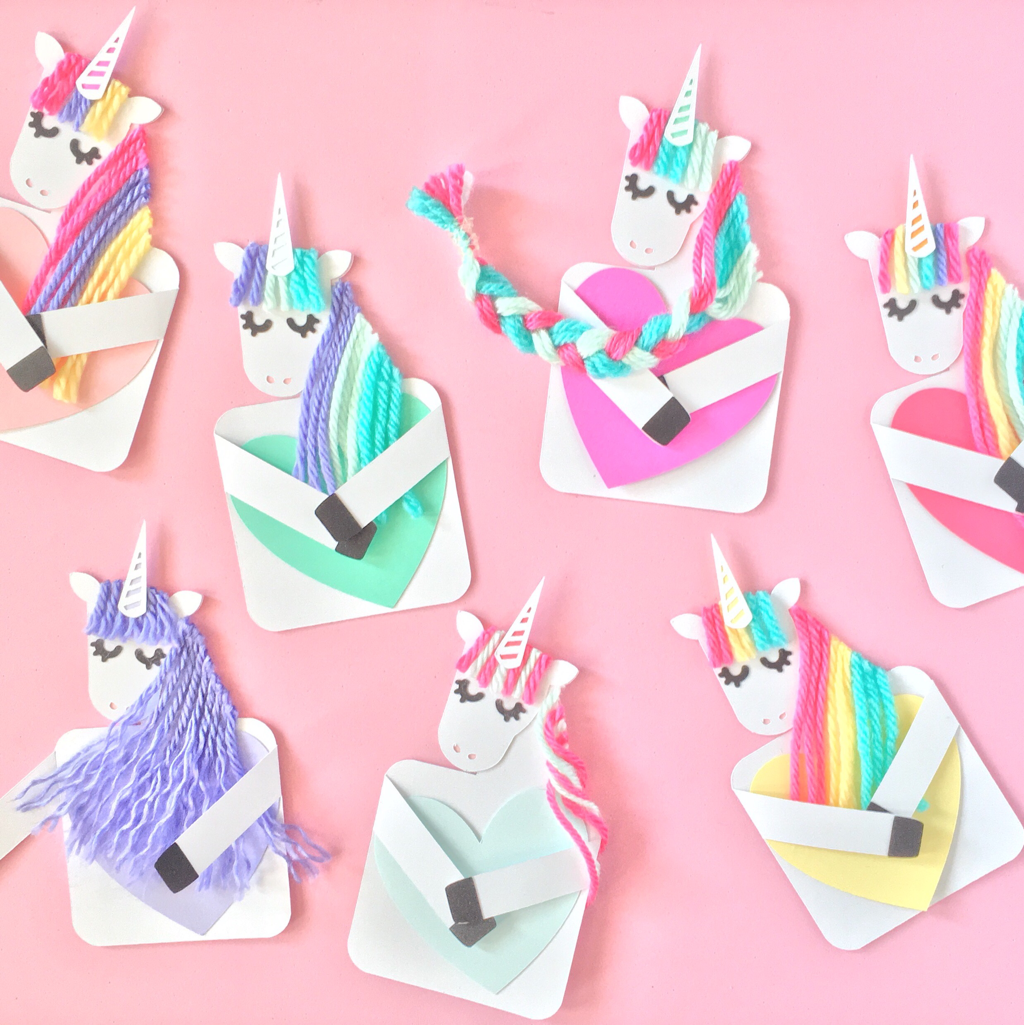 Unique Unicorn Cards Just take a look at what a great job Agnes from hellowonderful.co did! Didn't they come out great? Plus check out the little video she made as well... it's so fun! 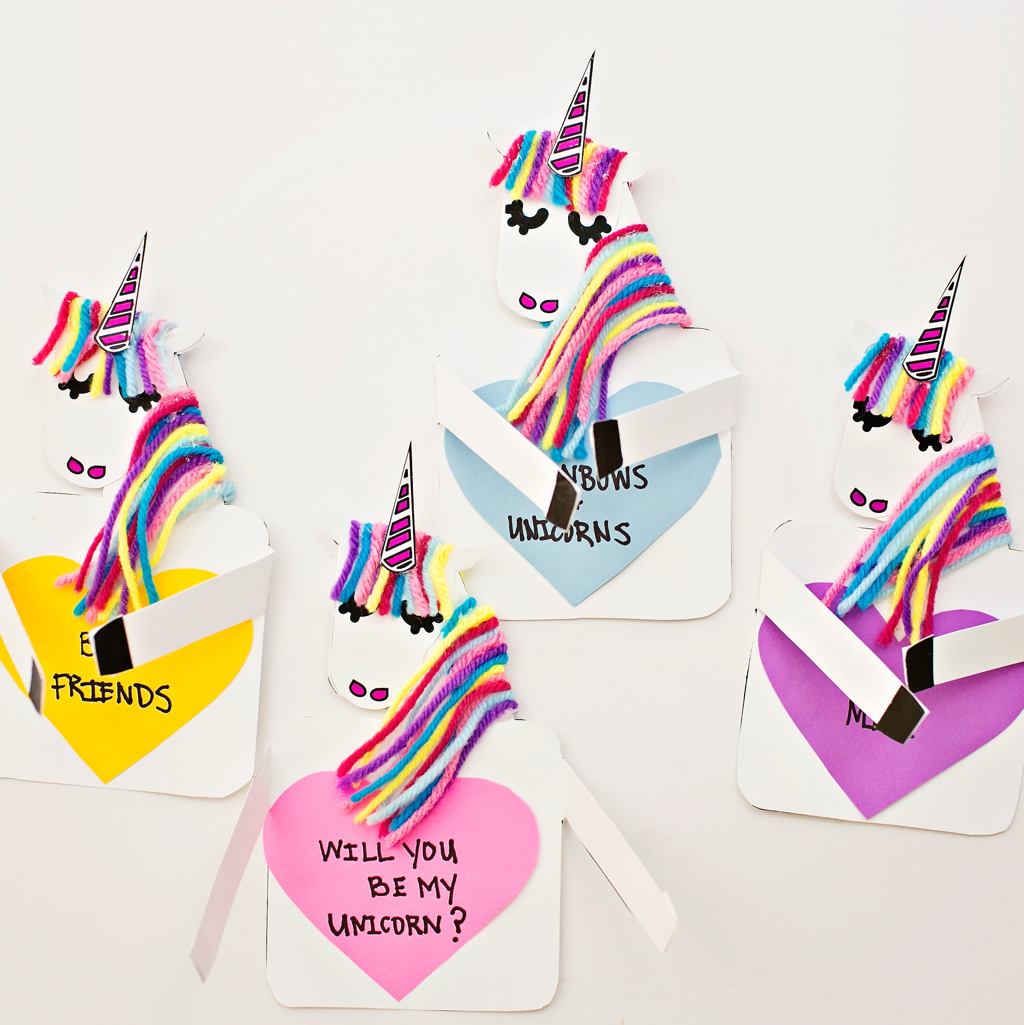 Unicorn Cards Made by Agnes Be sure to add your own special features to these cards, for example I glued on some extra long yarn to make a braid for one of my unicorns I think it looks awesome! Have fun and make lots of things! Super Bowl 51 Tom Brady & Matt Ryan Tube Craft PrintablesSuper Bowl 51 is here and it's between quarterbacks Tom Brady of the New England Patriots and Matt Ryan of the Atlanta Falcons, what a showdown, make these fun tube craft printables for your game day snack table! These guys are ready to kick off and I bet it's going to be an exciting game, who loves to place bets and watch the game with fun food and snacks? I do enjoy the excitement myself plus the halftime show and commercials, it's a few hours of pure fun! It'll be even more fun if you download these character tube crafts for free right below, you just need a few materials to get you to the touchdown! I even included faces with and without a helmet! 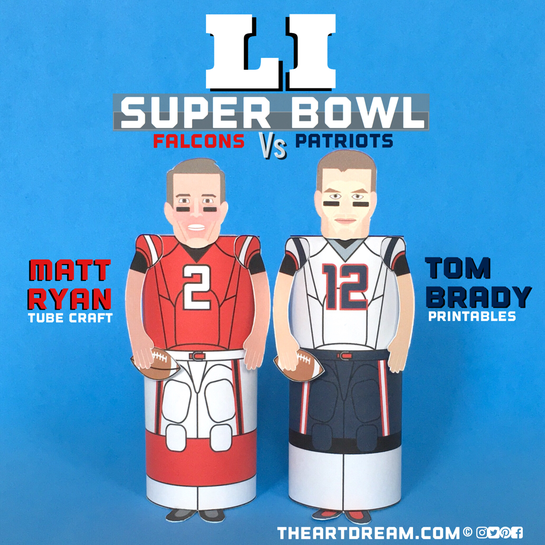 Matt Ryan & Tom Brady Tube Craft Printables Having a Super Bowl extravaganza this year? Well make these super cool and funny character tube crafts for everyone to enjoy, or maybe you're looking to get the kids involved? Have 'em make one for all of your guests! They'd look fantastic propped up on the food table or how 'bout presenting them on the tray with all the snacks, your friends will get a kick outta them! Perhaps they can guard the pool boxes too! Offer them as consolation prizes to the losers haha! Download the printables right here... and be sure to check out my shop for other cool printables!
Materials:
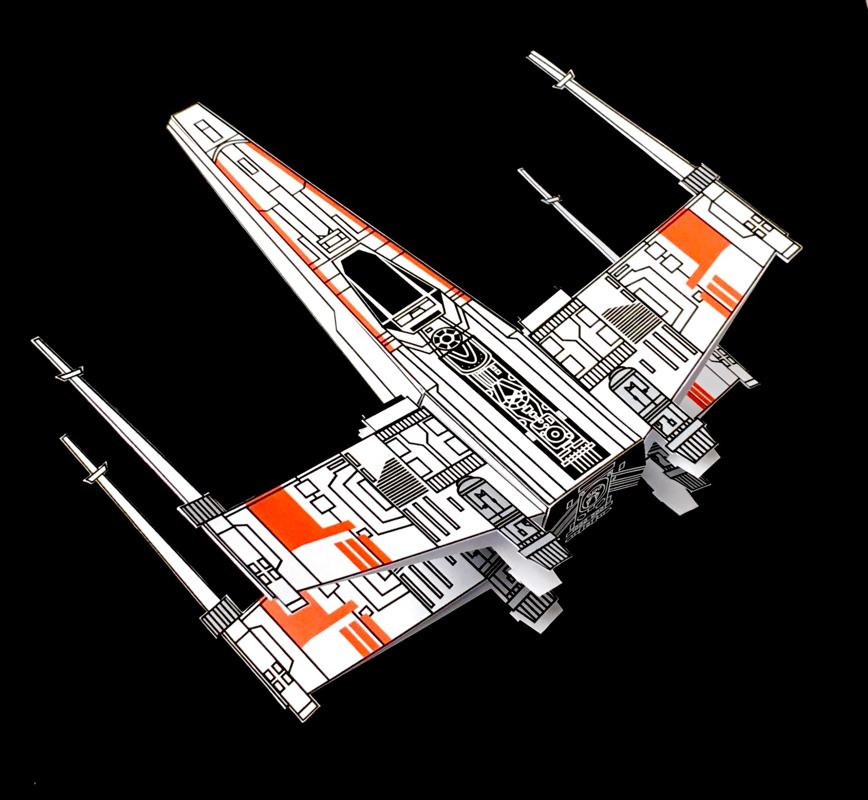
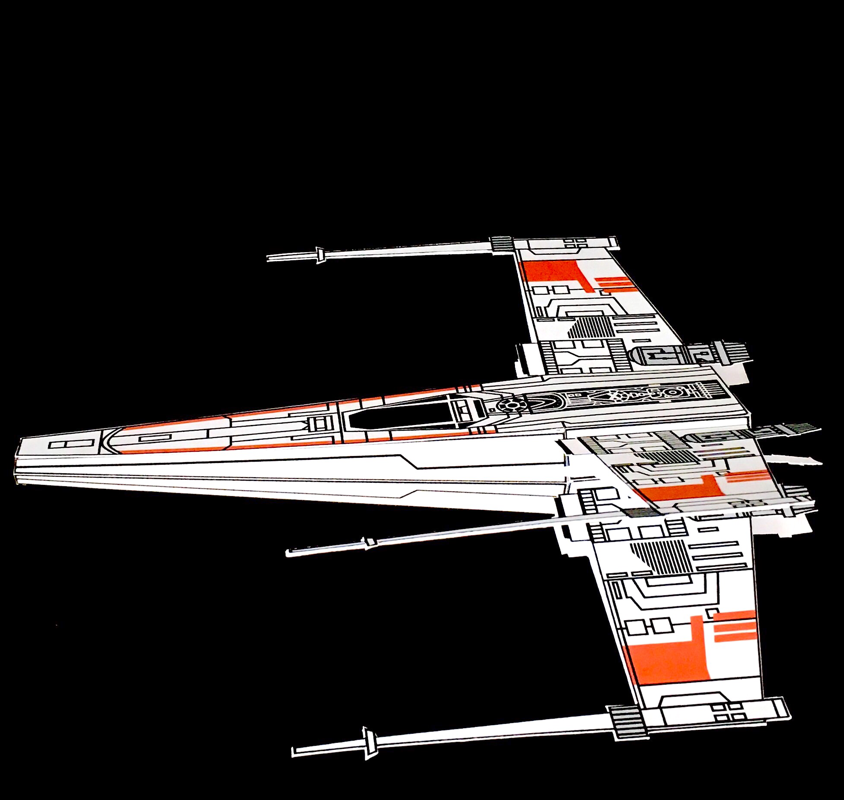
Directions: Step 1. Print out you character. Cut out all of the pieces, there are 6 pieces in total. Be sure to keep the tab for the head intact with the body. Step 2. Wrap the body around a toilet tube and staple in the back, if you don't want to staple it then use some glue. Stpe 3. Glue on the arms, head and football. Star Wars Rogue One X-Wing Printable CraftUpdate 5/3/2017: It's "May the 4th be with you" and I'm celebrating by sharing this free x-wing printable, and boy has the "resistance" come out in full force over the last few months, not only am I showing my love for Star Wars but I'm showing my support for the resistance against our newest administration as well. I want to live in a world where the truth matters and where we teach our children that there is a difference between right and wrong, and that no matter what we should always choose what is right! The rebel alliance has assembled and it's time for the resistance to begin. Fight the good fight against the Empire and bring justice to the galaxy with the help of the X-wing. This papercraft will surely blast you into a galaxy far, far away! 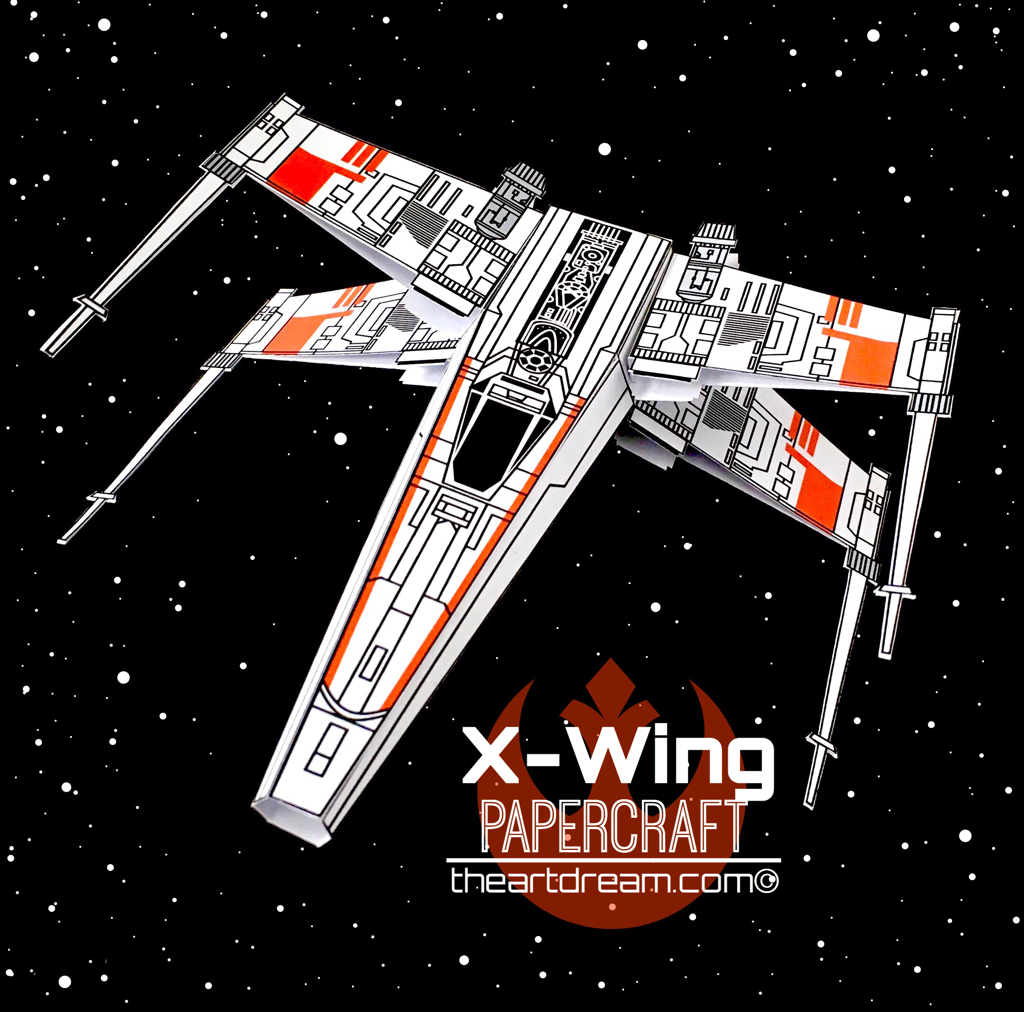 Star Wars X-wing Papercraft Ok, so this design is probably my most detailed of all of my papercrafts so far, but it still is only 5 separate pieces, with a bit of determination and patience you could put this rebel, stormtrooper crushing cruiser together too! How cool would this be to have as a hanging decoration in your son or daughter's Star Wars themed room, I know I would, and best part is this download is free. Putting it together is pretty self explanatory but I will try my hardest to describe it to you in the directions below. Besides being a huge Star Wars fan, I wanted to create this papercraft as a symbol and reflection of the state of our country. To compare our state of being to a movie does seem super silly, but I do believe in the power of storytelling and I do believe that great stories are inspired by true life in the first place. I've always found so much truth in the notion of good vs. evil and the journey our beloved heroes go on to triumph over it. The success of a protagonist gives us all hope that good will conquer all, and if they don't exactly succeed, well then there's always going to be someone with the courage to challenge what isn't right. I'm not saying that what we face is the doing of one man but it's the bigger picture we face, suppression, being told what we should believe, losing our freedom to be free thinkers and make decisions for ourselves. These are the evils we face and it starts by educating ourselves and educating each other. Don't rebel for the sake of rebelling, do it because you are passionate about finding the best solution by doing it with the best attitude, by doing it with compassion, strength and knowledge. Fight for what's right, because there is such a thing as right vs. wrong and we all have to start choosing to just do what's right. Download this X-wing papercraft below and check out my shop for more fun papercrafts!
Materials:
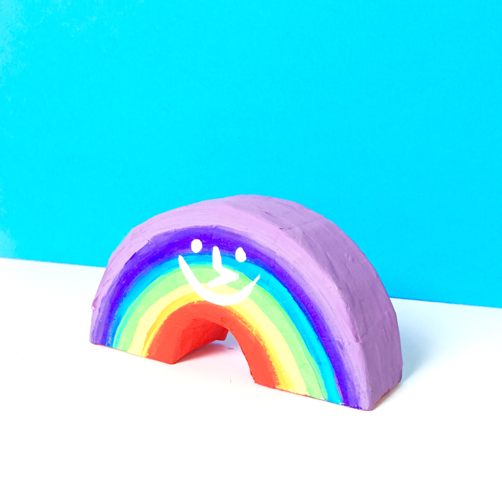
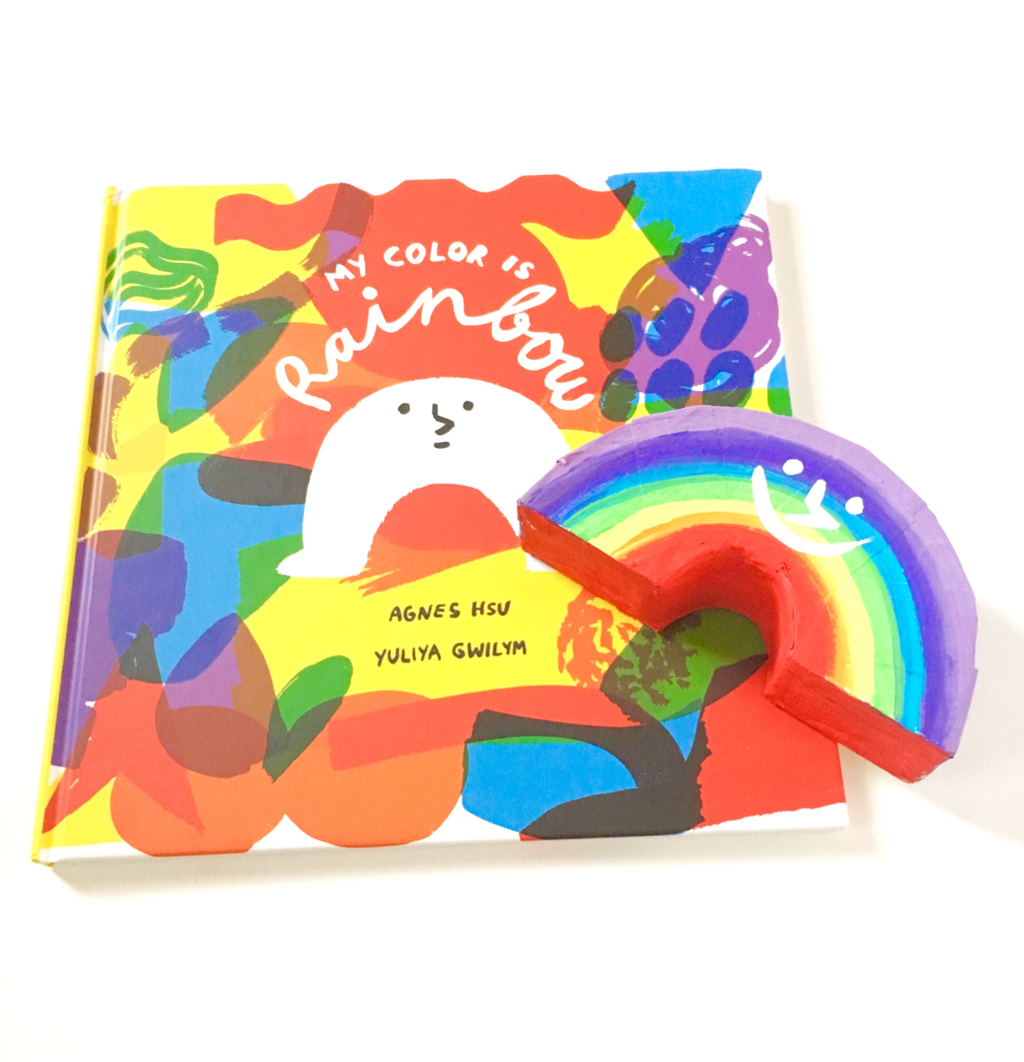
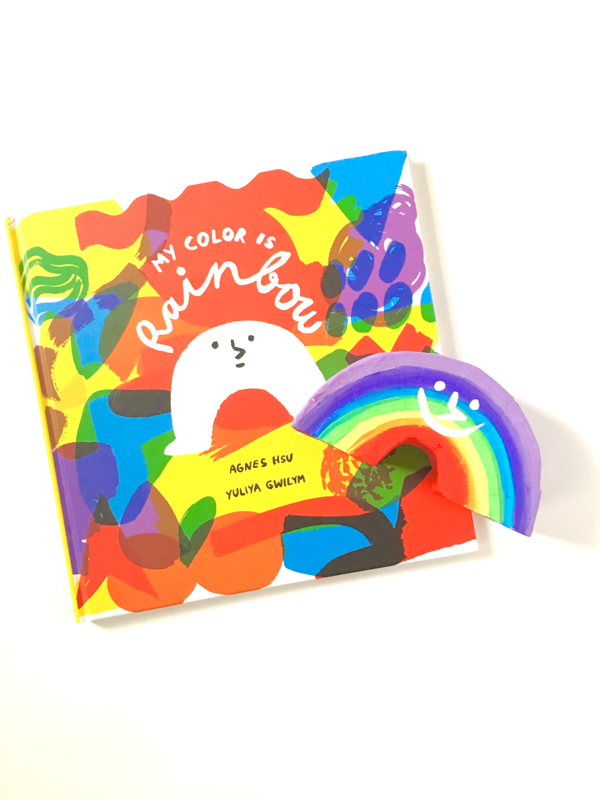
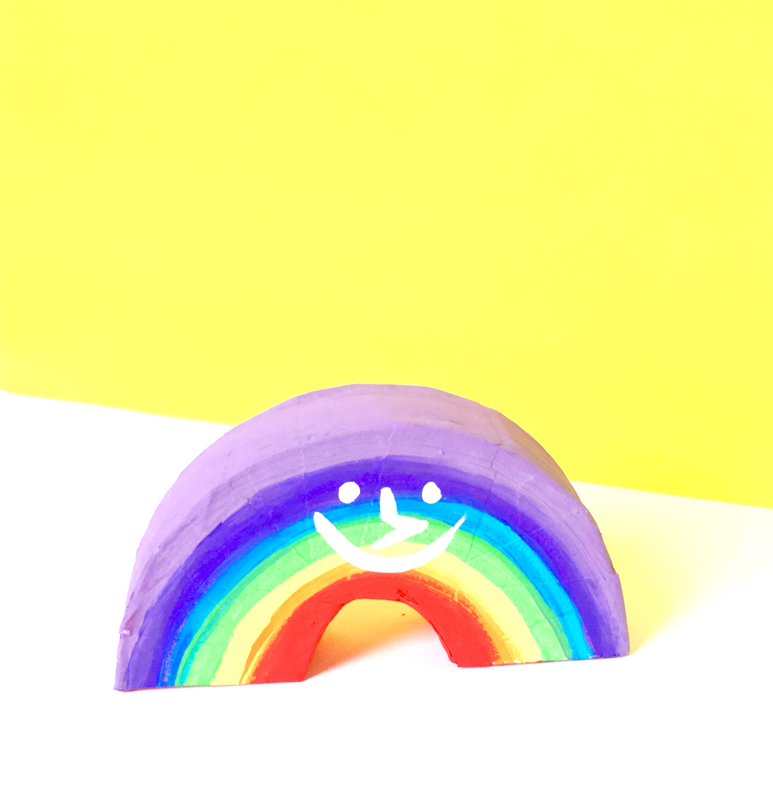
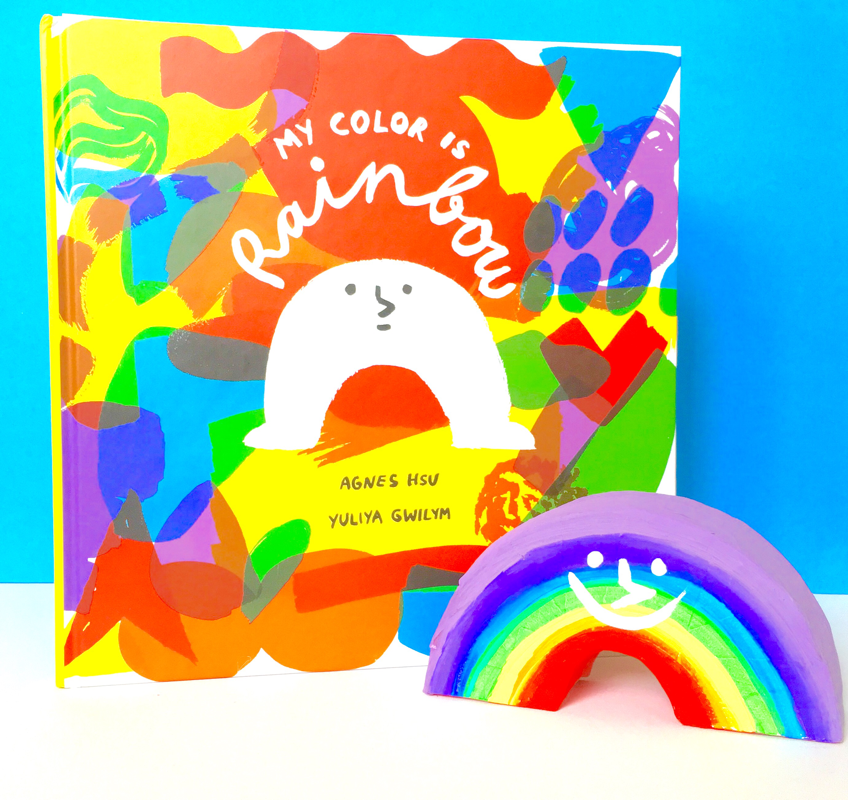
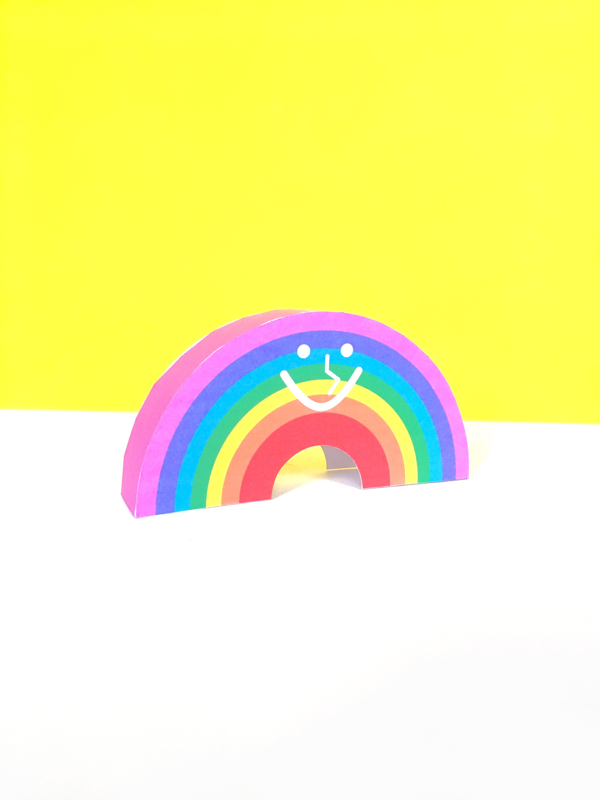
Directions: Step 1. Be sure to print out the wings twice so that you have four in total. Start by cutting out all of the pieces, there's a total of 7. Step 2. Next make score lines on all of the flaps and dotted gray lines, use your craft knife or the corner of a credit card to score the lines. Step 3. Start by glueing the flaps towards the back of the body of the X-wing to the 6 sided black shape which is the back panel. Add the separate two panels next. Step 4. Bend the longer side panels around and glue them to the matching flaps. Step 5. Fold the wings on the dotted lines and overlap them evenly, glue them together along the end. Step 6. Glue the wings to the sides of the X-wing. See more photos below to see how the X-wing gets assembled. My Color is Rainbow Book Review and Papier-mâché ProjectThis beautiful story is not only vivid and bright, it shares a special message about unity and peace. I recommend this book to any teacher (especially art teachers) and parents looking to show kids that diversity is a powerful thing. 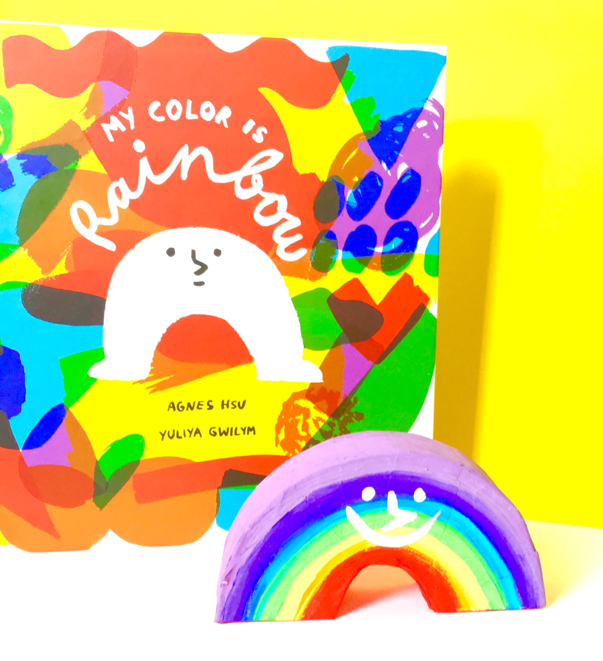 Rainbow Arch Papier-mâché project and My Color is Rainbow by Agnes Hsu Right now, at this moment I think we as creative thinkers and artists have become so very important, it's our job to paint the world in a better light, to teach our children how to be critical thinkers, to be problem solvers, to find the beauty in ugly, to unite on the foundation of what it means to be a human being. Our creative ways pave a path down a righteous road so let's make it the most colorful one we've ever seen! "My Color Is Rainbow" by Agnes Hsu is a magical story about the journey of little white Arch who's trying to decide which color he wants to be. The pages are filled with beautiful, vivid colors that instantly pull you into a rich palette, colors so perfectly chosen it keeps you wondering how little Arch could pick just one. For an art teacher this book could be a fantastic start to a lesson about color, how we choose them based on feelings and what message they convey to the viewers of our artwork. As the story unfolds each color is described, some of them as loving, peaceful and majestic, these descriptions give examples of how to personify colors and give them new meaning. A descriptive representation of color lends new vocabulary and deeper critical thinking skills to a child's creative process. Think of how they could apply these ideas to artwork, a field of red flowers to show love or painting a portrait of a person with yellow skin to show happiness. This story opens the door to explore diversity, to show that the world isn't black and white, that color can overshadow the gray. It helps us to plant the message of acceptance in our children, to show them that we don't have to choose to be just one thing, that we can be many things, it shows them that love, peace and happiness are far more powerful than its opposite. My hope is that a piece of the rainbow is somewhere deep inside all of us. Below you'll find a fun papier-mâché project with tutorial modeled after little Arch.
Materials:
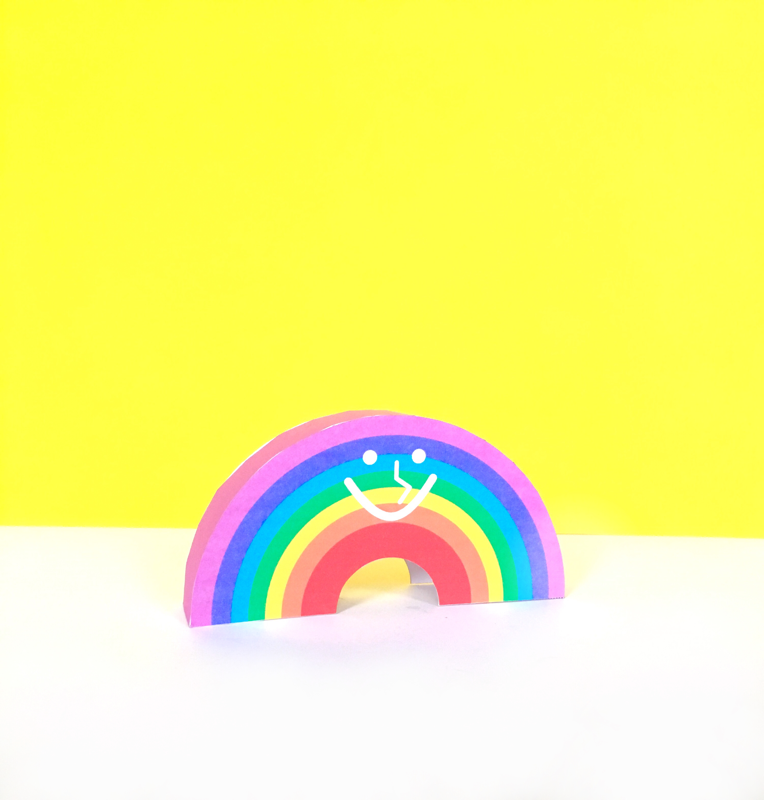
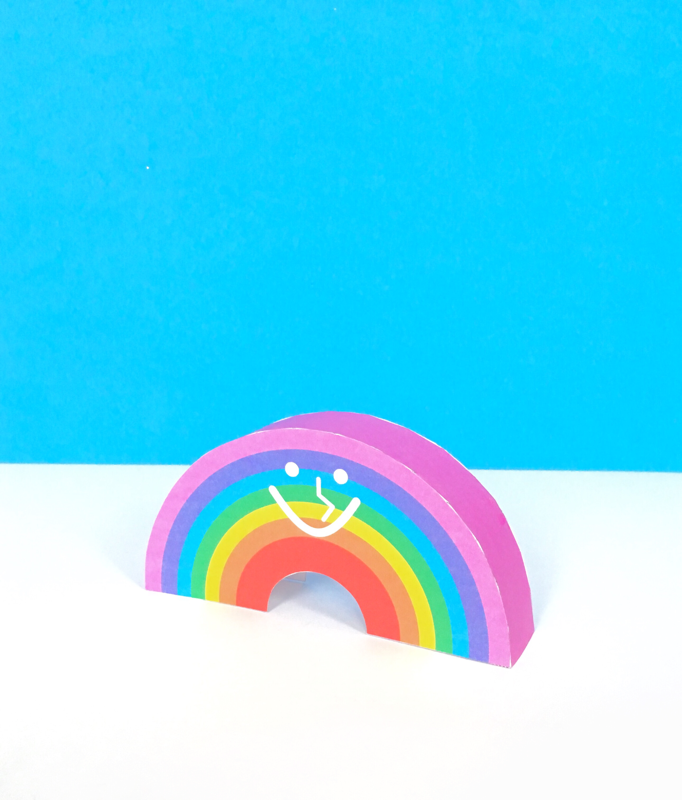
Directions: Step 1. Print and cut out one of the rainbow Arch patterns from my rainbow Arch printable in my previous post below. Step 2. Use the pattern to trace onto cardboard, you'll need two of these. Step 3. Next cut a long strip of cardboard, the width should be about an inch or so. 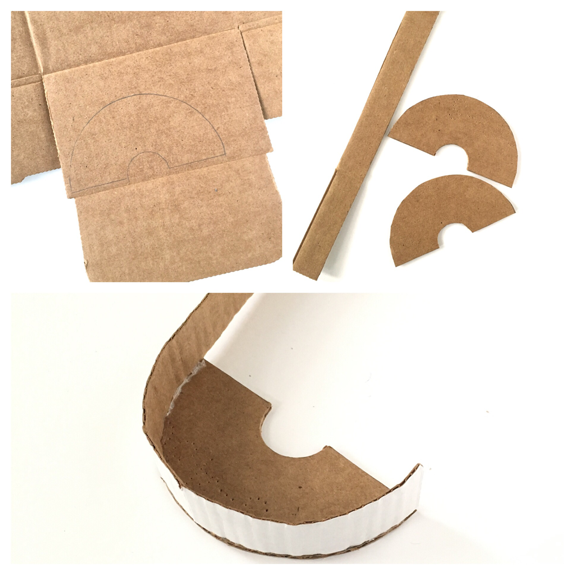 Step 4. Hot glue the long strip to the outer edges of the rainbow piece a little bit at a time until you've gone all around. Step 5. Next, glue on the other half of the rainbow. Step 6. Prepare a bowl with a water and tacky glue mixture, it's about 2 parts glue to 1 part water. Start to papier mâché your rainbow by dipping strips of newspaper into your mixture, be sure to wipe off the excess glue and then cover your rainbow completely. Your rainbow will need about a day to dry completely. 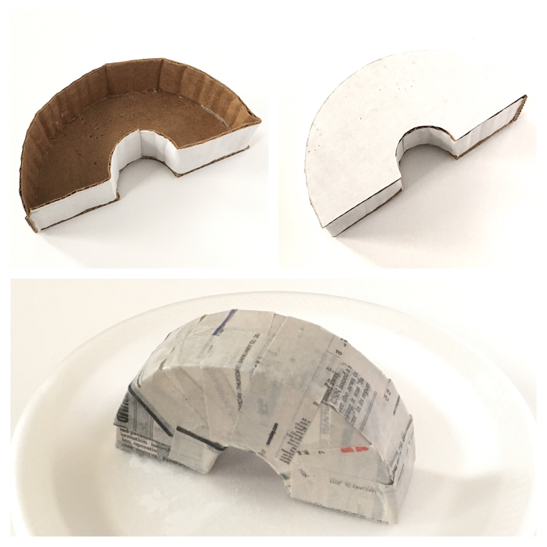 Step 7. You can sand down some of the rough points if you'd like but it's not necessary, when you're ready, paint your rainbow as you wish! My Color is Rainbow PapercraftI am lucky enough to be one of the people who got to view and enjoy the wonderful story written by Agnes Hsu of hellowonderful.co, be sure to read all about it in the post above! I've also designed this little papercraft inspired by the story's main character, Arch.  Rainbow Arch Papercraft with My Color is Rainbow by Agnes Hsu Put this super easy Rainbow Arch together and enjoy a 3D, standing paper toy of little Arch straight from the pages of this brilliant book! After cutting out the pieces you could even color the blank side and design your very own rainbow papercraft! 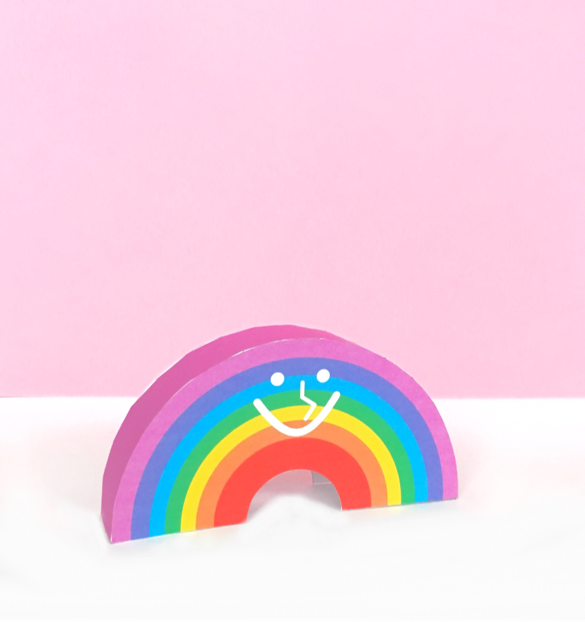 Rainbow Arch Papercraft Download the Rainbow Arch for free right below...
Materials:
Directions: Step 1. Cut out all of the shapes with a scissor or craft knife, the pieces don't have to be perfect. Step 2. Score all of the tabs on the long purple piece with a craft knife and ruler or you could use something like a credit card to make score lines. This will help fold back all of the tabs. Step 3. Add glue to a few tabs at a time and start adhering it to the upper part of the rainbow, make your way around gluing on all of the tabs to one piece of the rainbow. Step 4. Add glue to the tabs on the other side and place the other half of the rainbow on top. Valentine's Day Paper Tree ProjectA few years back I worked with children and young adults with autism, I provided them with fun and interesting projects during their art sessions. The activities had to be relevant to their IEPs, learning and physical capabilities, which was always a challenge. What I found to be most beneficial was art projects that had lots of pieces to glue on such as a collage. Here is a project that all of the students and teachers loved. This tree is filled with lots of love hearts and looks even better when you add more and more hearts. 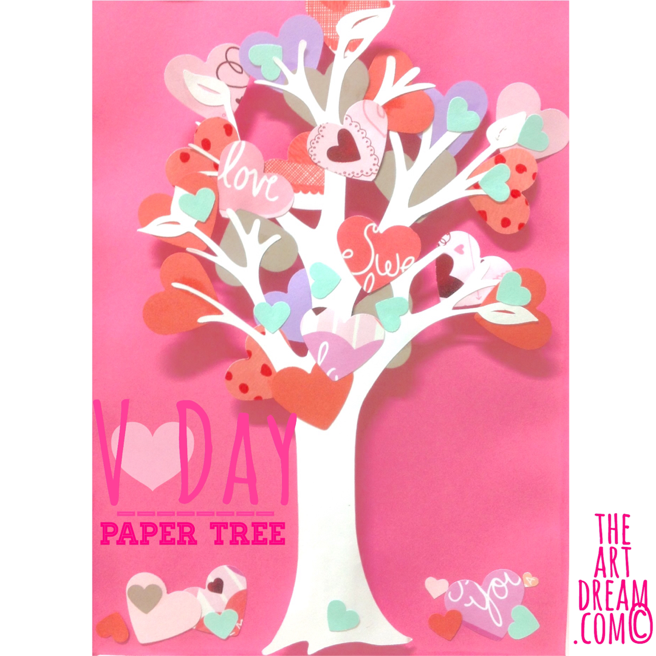 Pink Heart Tree You'll need a few simple materials to make this project. One of which is 3D foam squares that makes the tree literally pop from the page. If you don't have foam squares then you could just use small strips or pieces of cardboard to raise your tree up. I think this is such a great way to present artwork. Materials:
Directions: Step 1. The white tree itself I cut out using my Cricut, but you don't have to do this. I think a tree made from strips of paper or torn paper would look fantastic. Have the kids put the tree together using glue before adhering it to the background. Step 2. Using a craft punch cut hearts from solid and patterned paper, adhere the hearts to the tree. Step 3. If you'd like, add a ground to your background paper, you can paint one with a textured roller or glue on tissue paper squares. Step 4. Adhere 3D foam squares to the back of the tree. Then adhere the tree to your background. 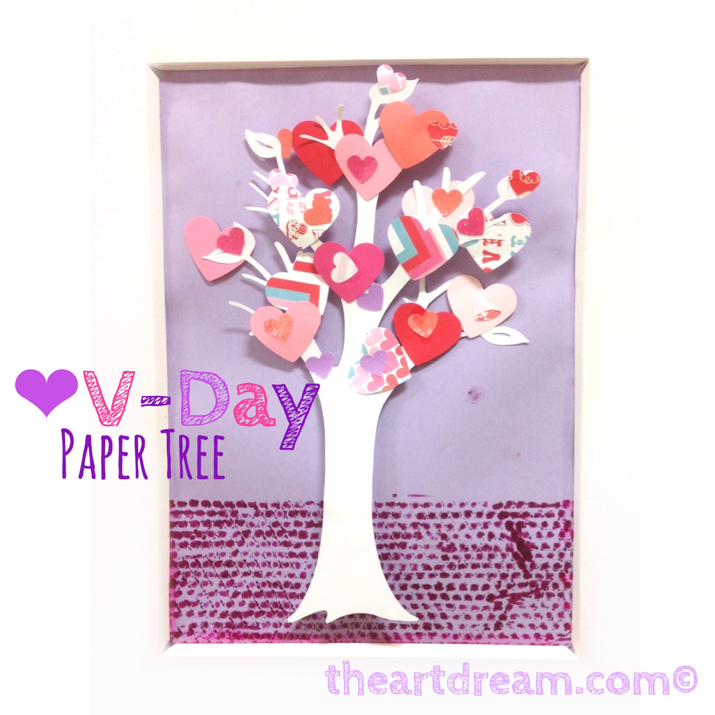 Purple Heart Tree Remember to add your own personal touches to a project like this, there are so many creative options and kids really love getting creative!
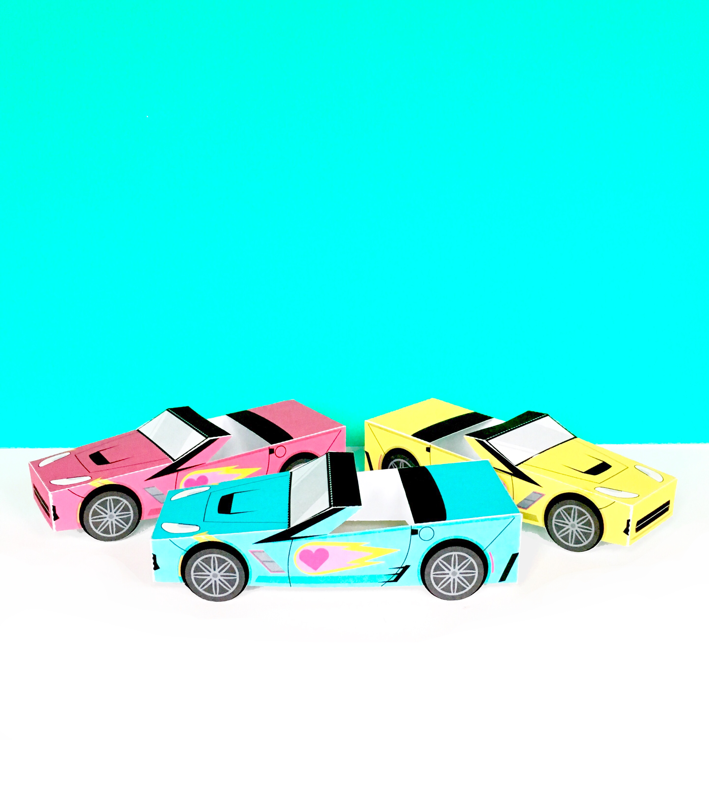
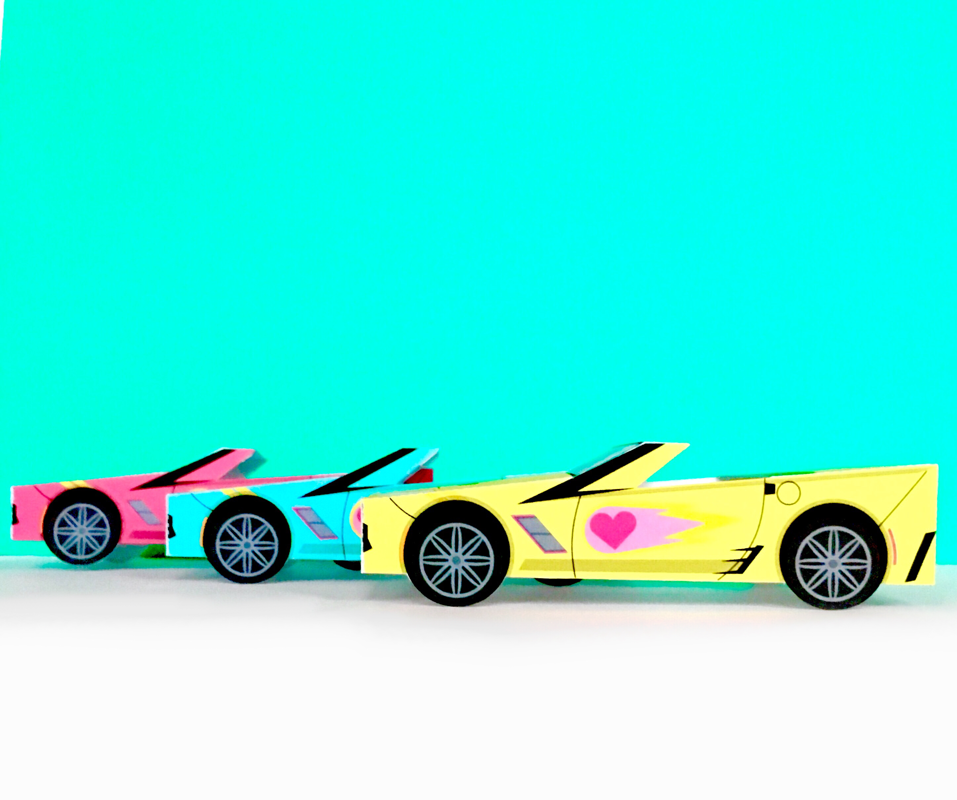
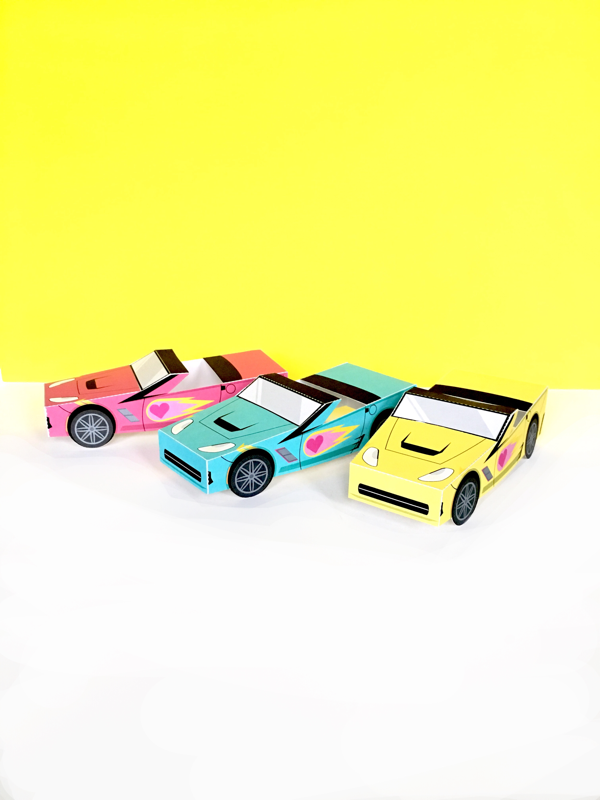
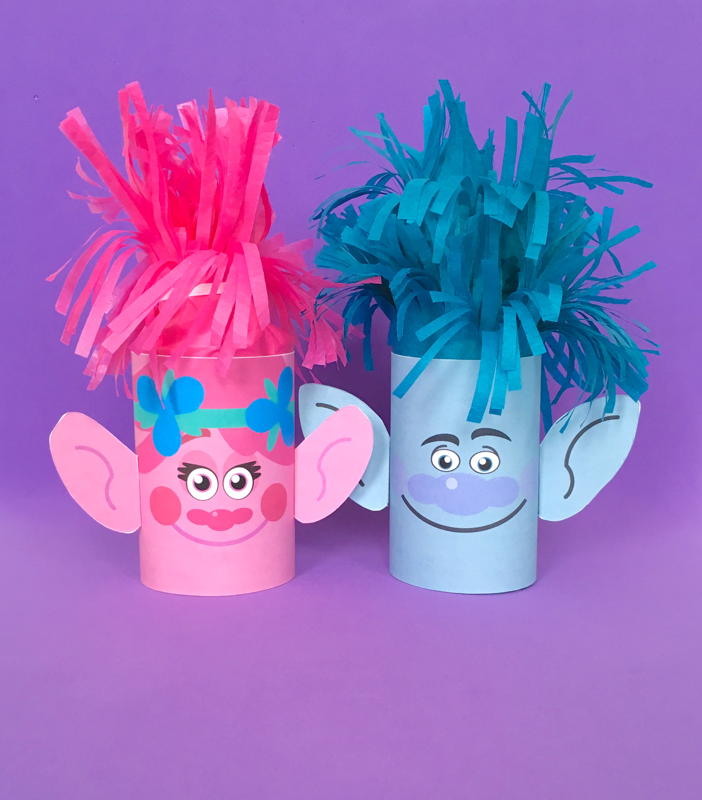
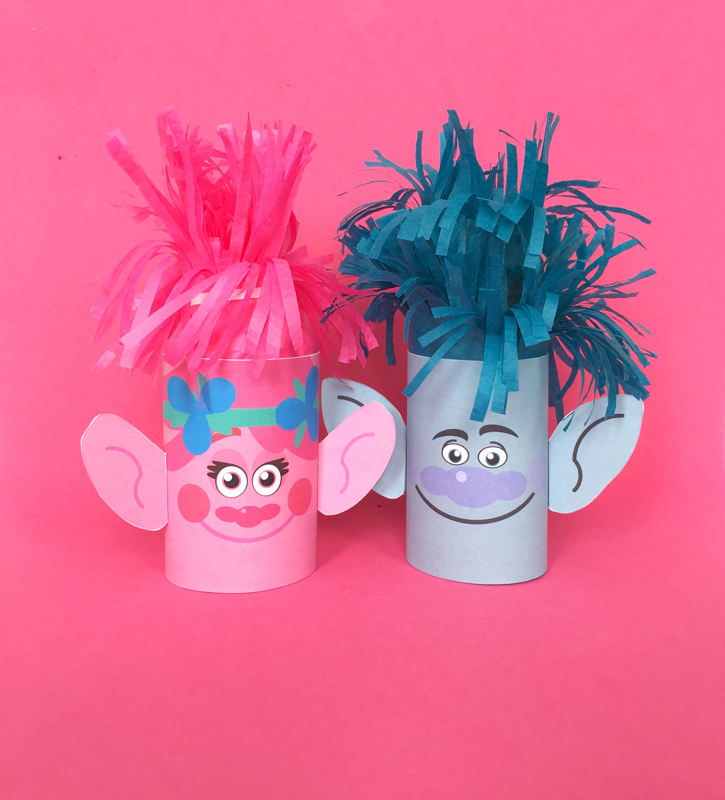
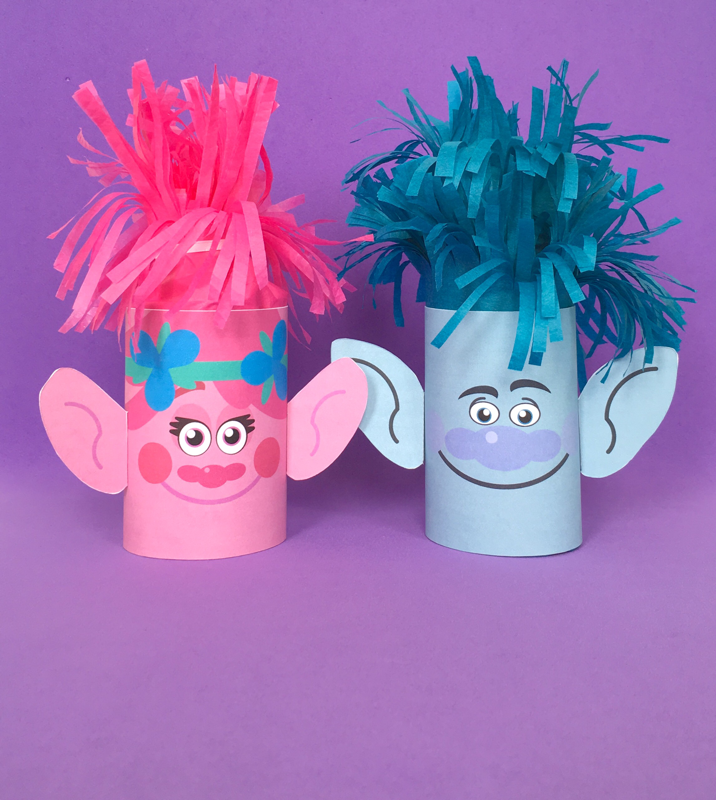
Sports Cars Valentine's Day Papercraft PrintablesI am pretty super stoked about these three sports cars, creating them has been on my mind for a long time and I thought that Valentine's Day would be the perfect opportunity to zoom into action! Haha. It started with one and then I thought I'd make it in different colors, who doesn't love seeing their car in all different colors? Plus it's always smart to have a variety. I also wanted to create something that boys could relate to, oftentimes crating isn't so much a boy activity but throw in a cool racer and you got a happy bunch. Valentine's Day is also one of those anti boy things, however today's modern kids are far more into it and it doesn't have to be a day to celebrate a lover but to celebrate your friends too, so why not check out this fantastic, fun sports car papercraft and give 'em out to all your friends (some assembly required ;-)). Y0u can purchase the set of 3 in my shop here at The Art Dream! 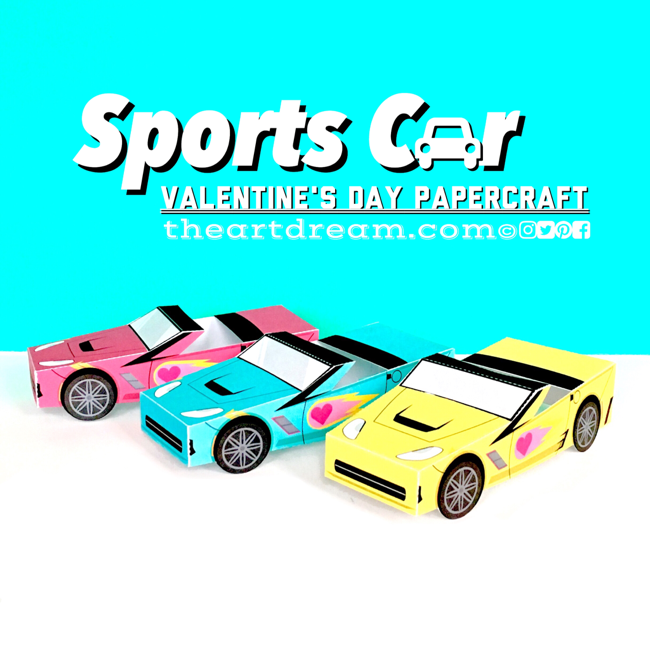 Pink, Blue & Yellow Sports Car Papercrafts This papercraft requires a bit of cutting and glueing but that is the fun part... when I'm in the process of getting these little designs together there's a feeling going through my bones that I can't quite describe, I just love seeing something flat, and seemingly uninteresting spring to life. Papercrafting is a fun and easy way to work on motor and conceptual skills. Show your kids that it is possible to create something amazing from a piece of paper, and who knows maybe soon they'll be creating their own three dimensional structures! Be sure to check out the shop where you can find this exciting paper craft along with many other cool designs! Take a look at some more photos below of my speedy, sporty, souped-up sports cars! Poppy and Branch have been "tubified" because I couldn't resist working in that fabulous hair. Give out Poppy and Branch as Troll-tastic Valentine's for Valentine's Day! A couple of months ago I posted a Trolls movie paper craft and it seemed to be a hit. I thought it would be great to make these guys into Valentine's for kids to give to their friends, plus it gave me the chance to do something fun with their iconic Troll hair! Poppy and Branch Tube Craft Printables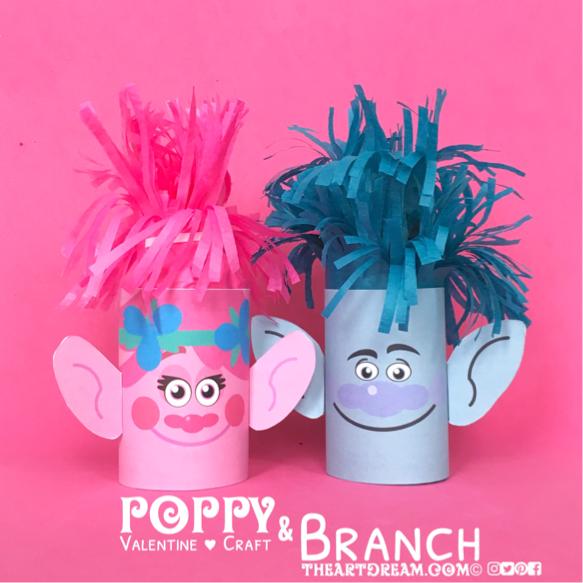 Poppy & Branch Tube Craft You can download this Troll craft right here at The Art Dream!
Materials:
Directions: Step 1. Print out your choice of Poppy or Branch or both, then cut with scissors or a craft knife. Step 2. Cut a cardboard tube the correct height. Poppy and a branch are shorter than a standard toilet tube. Step 3. Wrap your tube with tissue paper twice the height of the tube, fill with treats, twist to secure the ends. Step 4. Wrap with more tissue paper and cut fringe to create the hair. Step 5. Wrap the face around the toilet tube. Secure with glue, tape or a stapler. Step 6. Bend the tabs back on the ears and glue to the sides of the tube. For Poppy, I tied her hair up like she wore it in the movie but you don't have to, that's up to you! Have fun making your Trolls crafts I hope all of your friends enjoy this activity as much as I do. Be sure to also check out my shop where you can purchase more fun papercrafts! |
AuthorI'm John, an artist and art educator. The Art Dream is here to spark creativity and inspire the little artist inside of you! Archives
October 2021
Categories
Ice Dragon Head Printable
$1.00
Feel the icy breath of this mighty dragon, it’s a dance of fire and ice that’ll leave you in awe. Just add your own streamers to create that blast of blustery snow!
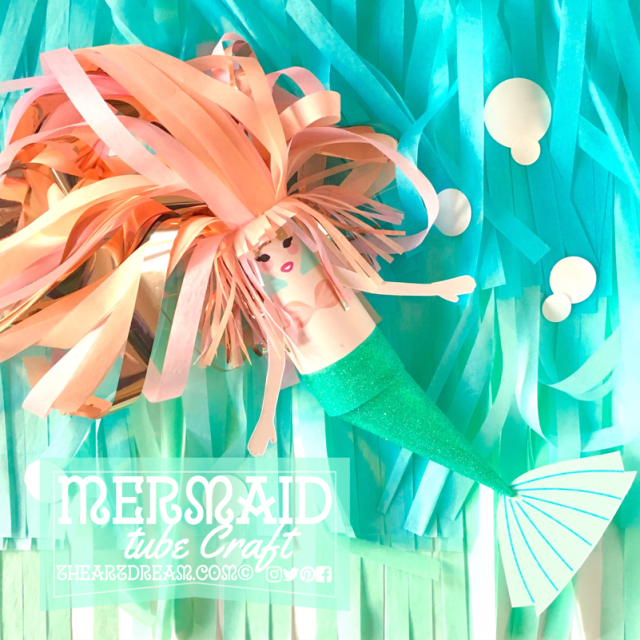
Mermaid Tube Craft Printable
$1.00
Who would dream about the world above the sea when you could dream about the world that is under the sea, where such beautiful creatures like this mermaid must exist! Don't they? I've started your journey of crafting this beautiful sea creature, it's up to you to add magical hair and dress up her fins!
|
||||||||||||||||||||||||||||


 RSS Feed
Proudly powered by Weebly