Egg Carton Flower BouquetIt’s always a great idea to use found and recycled materials for art making, especially if you’re stuck in the house with spring on the way. Make this lovely flower bouquet with paper egg cartons. 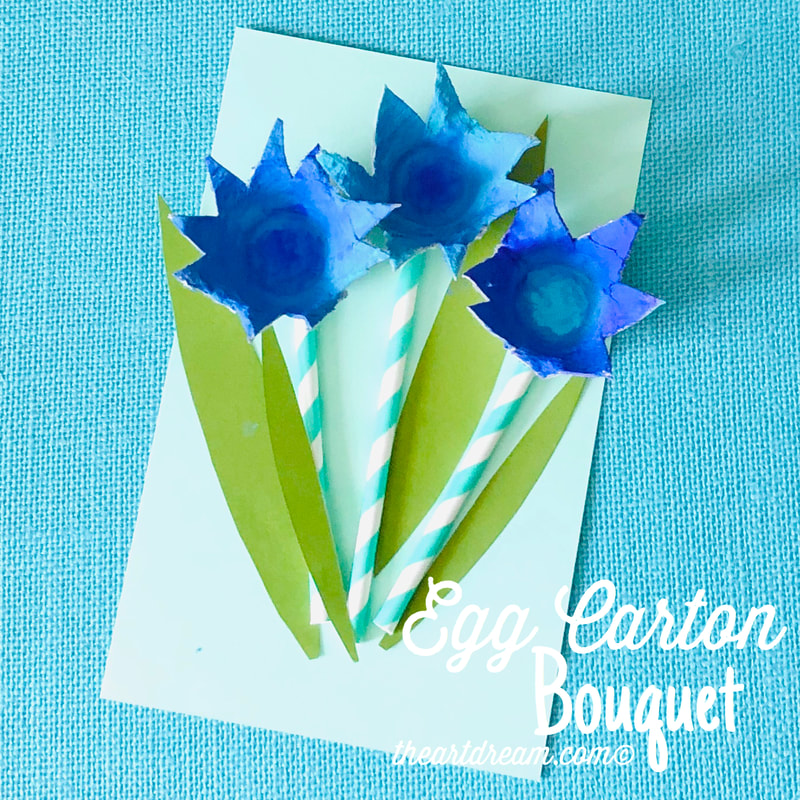 Egg Carton Flowers This project is such a great way to get creative, especially if you’re trying to use the materials you have on hand. I of course always have colored paper around but if you don’t, you could always use things like old folders, gift bags, wrapping paper or old party napkins, don’t be afraid to scrounge around for useful art materials, there’s always an opportunity turn nothing into something. So again I’m sharing a few spring projects all at once here on the blog because like many Americans and people around the world, I’ve been in the house and trying to come up with something creative for my students to do at home as well. Just check out my video tutorial below for instructions on how I put this together and have some fun! Materials:
2 Comments
Pop-Up Bunny CraftMake this incredibly charming pop-up bunny card for spring! You’ll love how fun and easy it is to make your own pop-ups with this simple technique! Hello all, it’s been a while and I’m glad you’re still finding the time to visit The Art Dream. I’ve been super busy lately with the shift to remote learning (I’m a teacher). I still wanted to get on the blog and share a few craft projects because I know there are a lot of you home these days. So, here’s the first project, a pop-up card style “hopping” bunny. See my full video tutorial below! 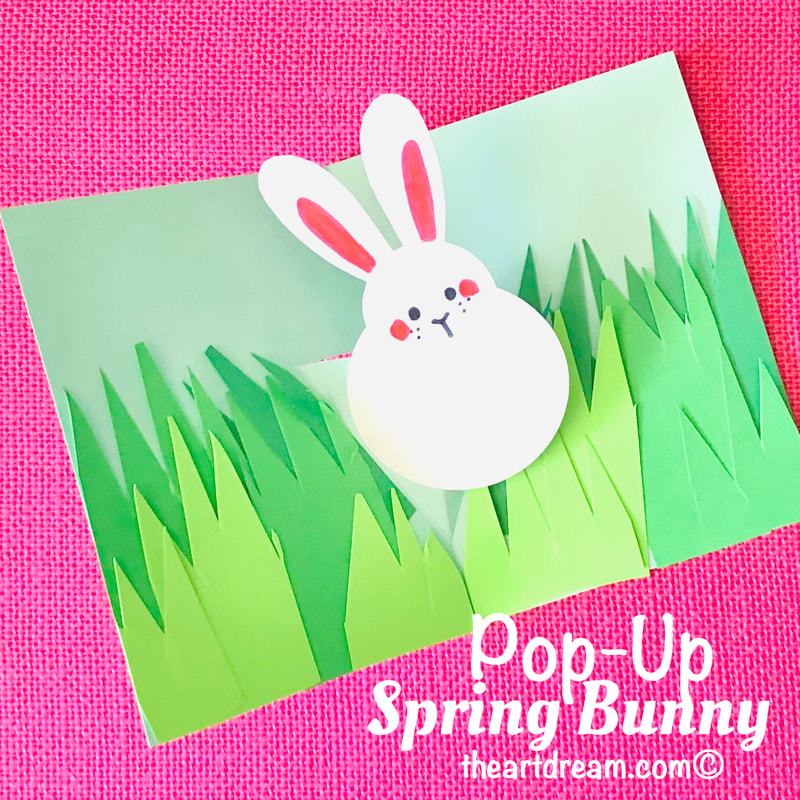 Pop-Up Bunny Here are the materials that you’ll need... Materials:
Just follow along with my video below and enjoy, I hope you make a cheerful little bunny like I did! Valentine’s Day Heart Envelope PrintableLove letters never looked so cute with this super fun and easy little double sided printable for Valentine’s Day. Print, fold and add your message to this lovey little envelope. I’m happy to be sharing this guest post and printable by Gabrielle Gardiner, it’s right up my alley when it comes to easy DIY printables to do at home with the kids, in a classroom or just to give to someone special! Read below to find the link to download this cute heart craft for yourself.  Heart Envelope Printable by Gabrielle Gardiner With Valentine’s Day coming up fast, it’s the perfect time of year to express love and gratitude for each other. What better way to make someone smile than with a thoughtful handmade Valentine’s Day card? This printable folding heart card is perfect for the whole family because it’s easy to make and provides just enough space for customization. Don’t forget to print the card front-to-back to make sure the pattern is on both sides (preferably on card stock). You can write a sweet note in the center and jazz it up with glitter, jewels, or some other kind of appliques. Experiment with different materials to give the card some texture and dimension. When celebrating any holiday, some of the best memories are the simple moments spent together being creative. At the end of the day, put on your favorite pajamas, grab some colorful art supplies, and get crafting! It’s the quality time together that counts. If you’re feeling extra festive, put on some music and turn the activity into a Valentine’s Day pajama party. You’ll be making memories as a family in no time. You can click here to download the free printable card now. 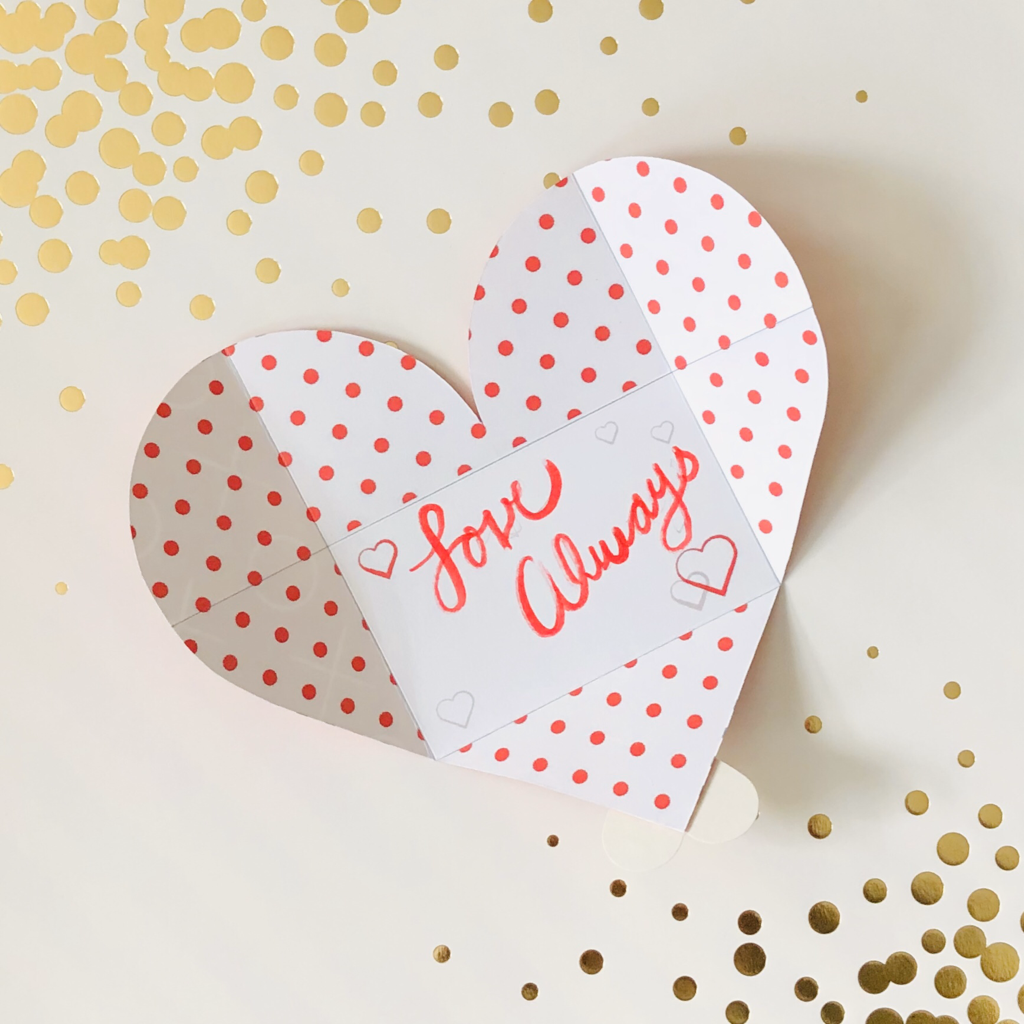 Heart Envelope Printable by Gabrielle Gardiner Frozen 2 Elsa Standing Papercraft“You are the one you’ve been waiting for...” is the moment Elsa realizes she’s the fifth element! What a cool role for Elsa, no pun intended! The creators did such a great job at depicting a free and knowledgable Elsa in the final moments of Frozen 2. If you haven’t seen the movie then I totally suggest you do, it’s a sophisticated tale of adventure and seeking inner strength, something we could all use from time to time. I always felt it was important to tell stories like this, it reminds us that we don’t have to go it alone, that there’s always support and help along our own personal journeys. Elsa’s final transformation is quite detailed and intricate, there’s also a ton of symbolism, I tried my best to capture the beauty of Elsa here, but there’s just no justifying the beautiful graphics Disney can achieve, but here is the next best version! Try this standing papercraft with your little ones, when it’s all done, she stands up, ready for her next icy adventure. 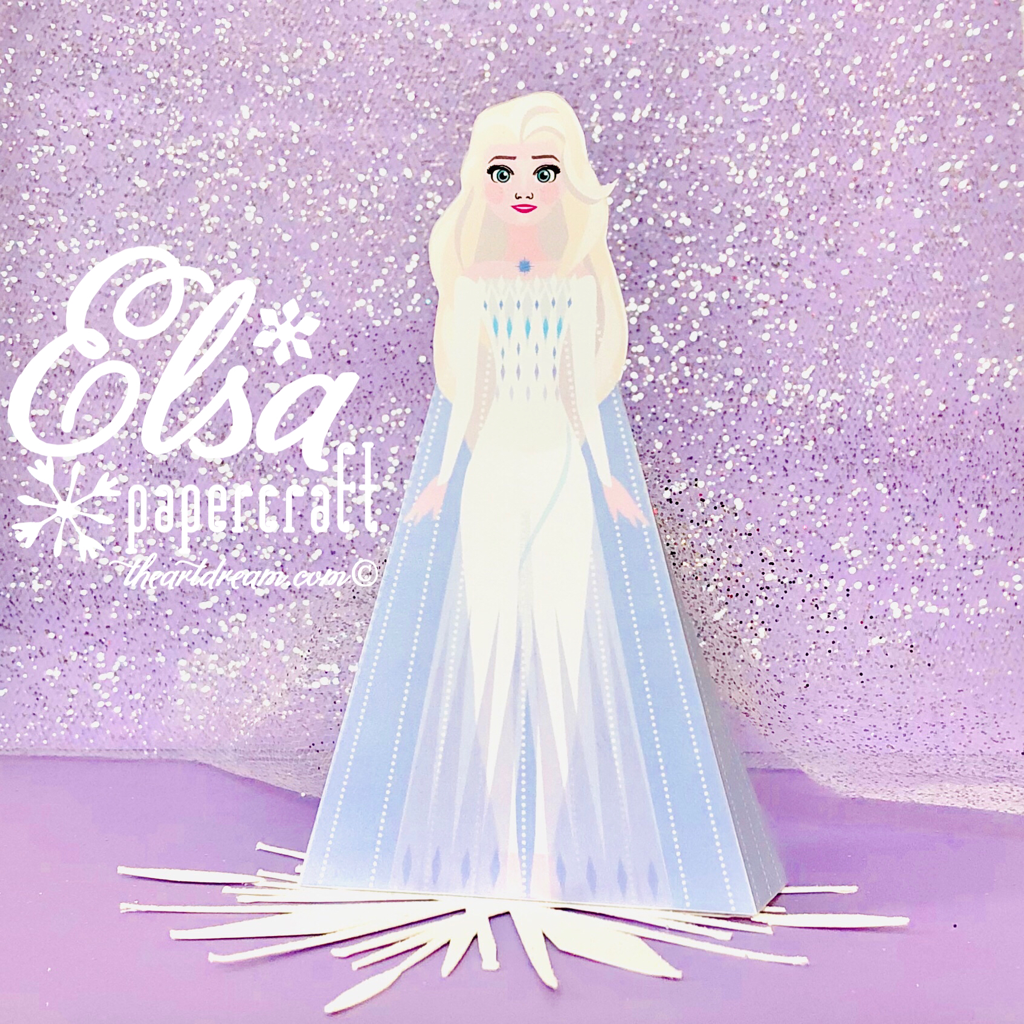 Standing Elsa Papercraft This Elsa papercraft is definitely an easy one and I provide you with my printable down below in this post and if you like Elsa then check out my Frozen 2 inspired shadow box one post below! Papercrafting is such a great way to do a quick and easy project either with a group or just for fun, I have put my paper Elsa on display with white string lights and she looks just as she does in the movie. Check out my free pdf below and be sure tell me all about how you made your Elsa!
Materials:
Directions: Step 1. First print out my template on white cardstock then cut it out along the edges with a scissor or craft knife. Step 2. With a ruler score on the gray dotted lines using a craft knife or you can use a blunt edged item like a popsicle stick or credit card. Scoring really helps to fold the paper exactly in the right place. Step 3. Next fold all the sides around like a little box, put glue on the flap and attach it to the corresponding side of Elsa’s dress. Be sure to add your own little details like gems or ribbon! 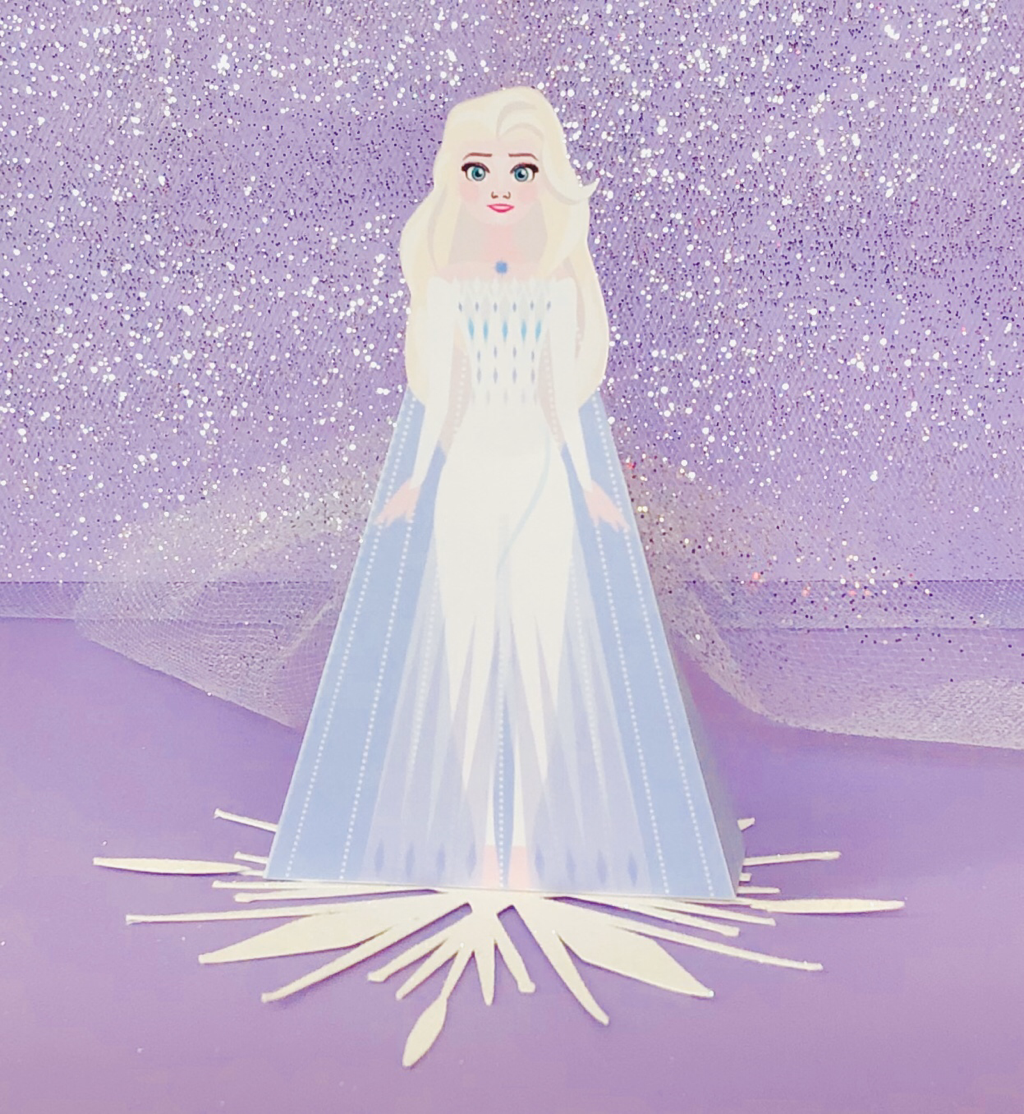 Standing Elsa Papercraft Thank you for going into the unknown with me to make this little papercraft I hope you enjoy it as much as I do. If you have any projects to share please do so in the comments below!
Frozen 2 Enchanted Forest Shadow BoxIt’s back, the phenomenon that swept the nation, Frozen 2 is enchanting us with its frosty blast of excitement and beautiful storytelling. Disney has done a fine job with this cinematic awesomeness and what better way to enjoy the magic this movie brings than with this enchanted forest shadow box project. Here you’ll find my tutorial for how I made this little box that you can put on display anywhere. Did you guys enjoy the new music in Frozen 2? I think it’s even better than the first and what a fantastic message this movie sends about family and friendship, about discovering your strengths and battling on even when times get rough. 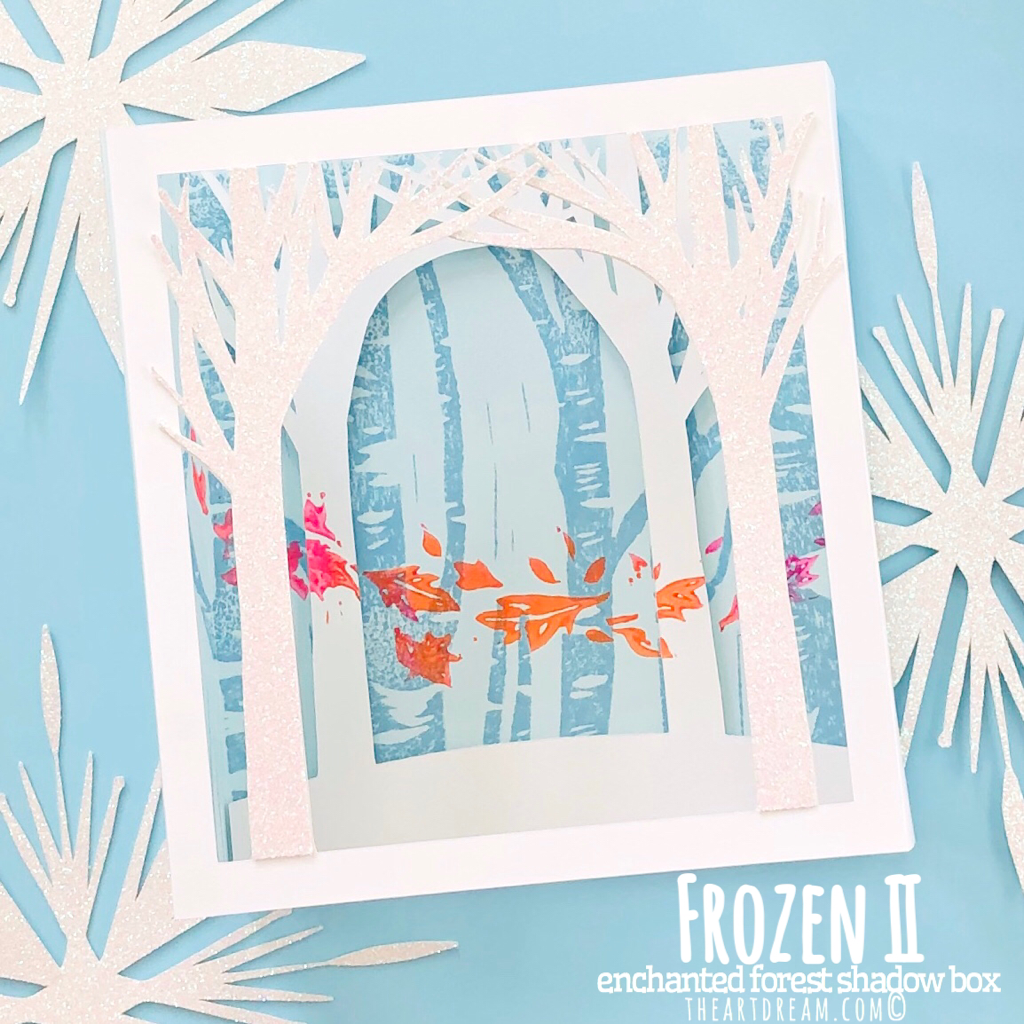 Frozen 2 Enchanted Forest Shadow Box There is so much thought and creativity that goes into making a movie like Frozen 2 and I find that the themes are getting more and more “adult like”, from dealing with your mistakes of the past, accepting getting older, taking risks and discovering your full potential. These are such important values in a child’s life, adults as well, and it reminds us to work hard and face challenges because who knows what we’ll find if we go into the unknown! Ok, so before you go on I will note that for this project I created some unique stamps using a Speedball rubber carving block and linoleum block carving tools, and designs I made with my Cricut machine. I have provided my templates here in this post if you’re skillful enough at importing them into your design space, or you can simply print the templates onto cardstock and cut them out yourself with scissors or a craft knife. Check out my photos below for a more detailed look.
Materials:
Directions: Step 1. First you will have to design and cut your stamps for the background if your are choosing to do so. You could simply paint on your own designs as well. I had created this birch tree stamp years ago and it has been used for many projects. I’ve also created a new leaves pattern stamp to mimic the designs used in Frozen 2. Step 2. Next you will have to cut out the template for the shadow box and fold on the dotted lines. Step 3. Next, paint your stamp with your desired colors and stamp the background piece of the template, be sure to check that everything is lined up in the right direction. Step 4. I used some three dimensional foam square to attach the trees in the background but this is optional, you could simply glue them on. The foam risers give the appearance of more depth! 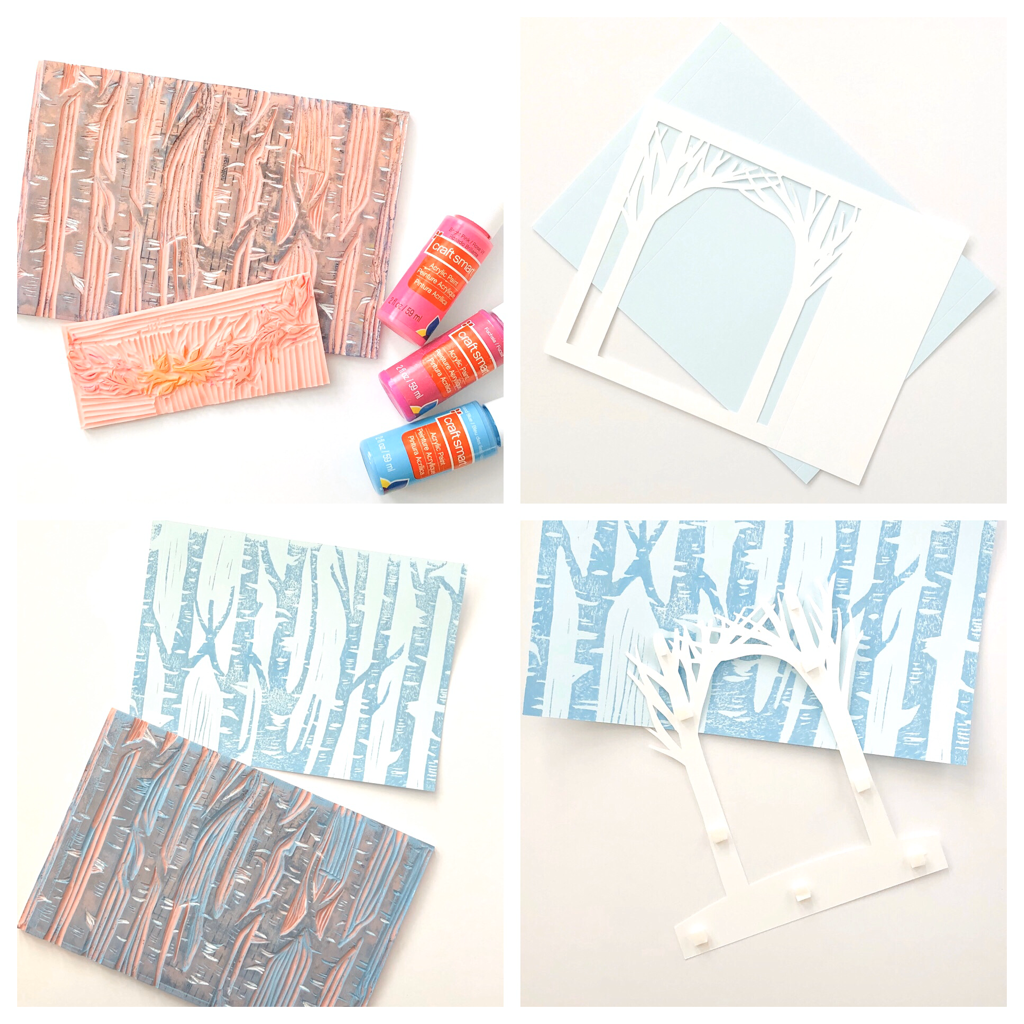 Step 5. Attach the trees with the base to the background, be sure to put it in the right spot. Step 6. Stamp on some leaves or simply paint them on with a brush. Step 7. Finally, assemble your box by folding in the flaps and adding glue. Let it go! And enjoy your work. 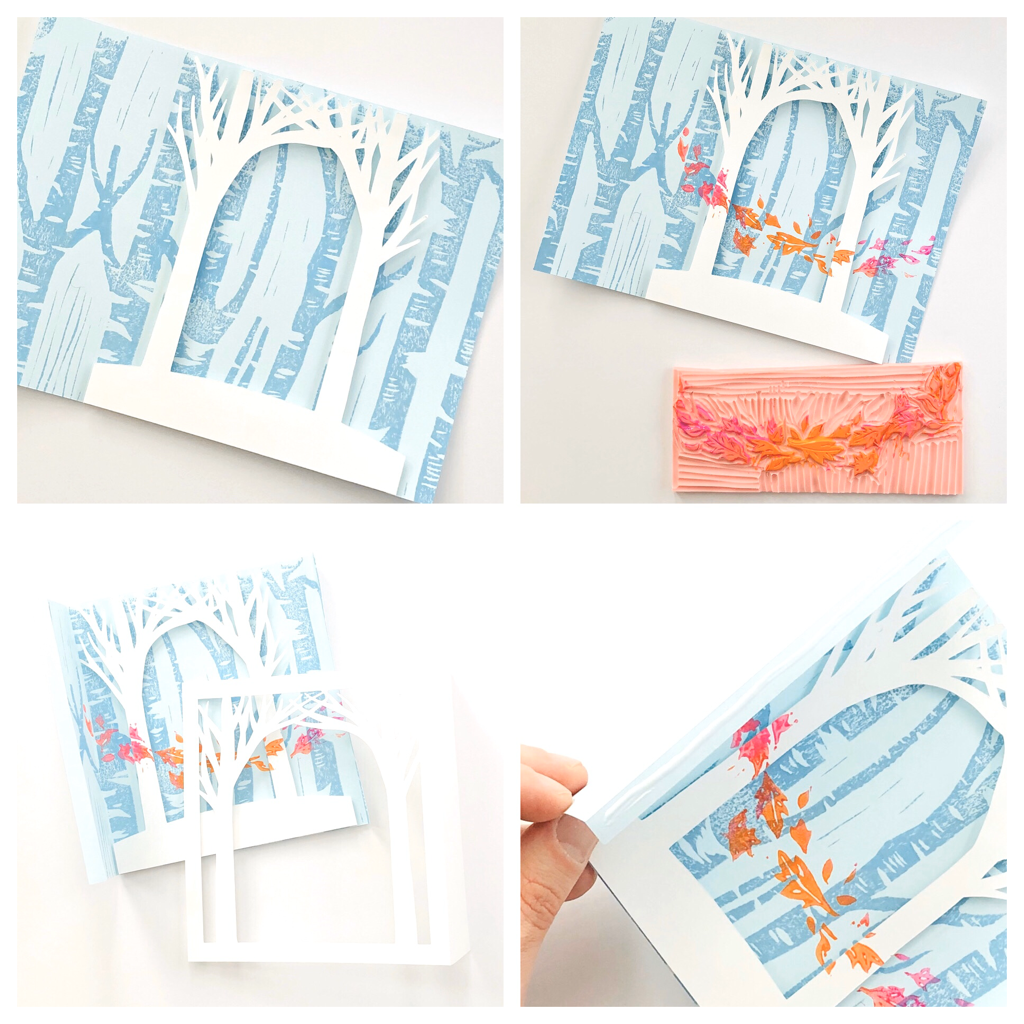 I added some glittery trees to the front of the shadow box as well, you can cut these from glitter paper or add your own glitter if you’d like! Be sure to add some small figurines or a battery operated tea light for a wintery glow effect! 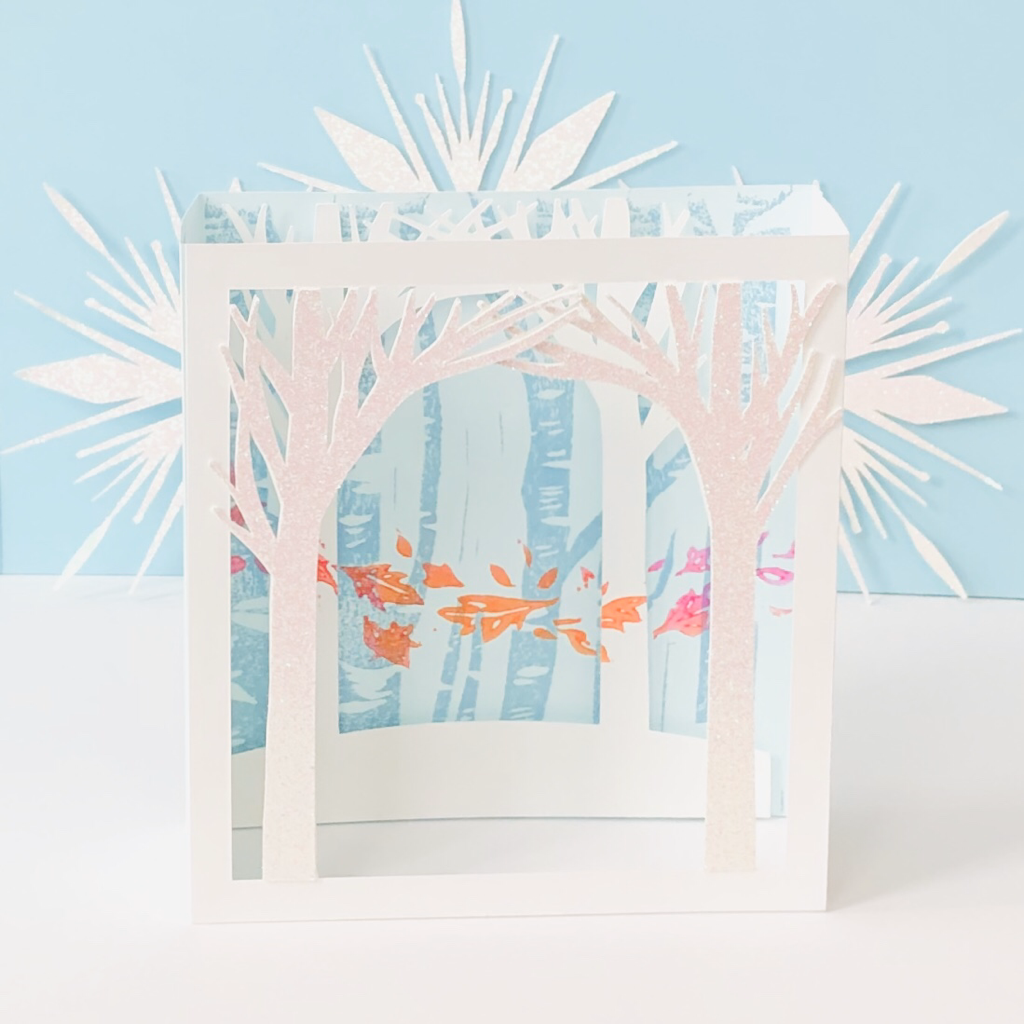 Frozen 2 Enchanted Forest Shadow Box If you enjoyed this craft project then let me know in the comments and be sure to share this idea with your family and friends!
Skeleton Hand Mason Jar CraftUse Crayola Model Magic to make this lifelike skeleton hand holding a mason jar, add a candle to complete the look for a perfect, creepy glow! It’s a cold, rainy October day here in New York and I’m getting all the scary, spooky vibes from the heart of the season! This skeleton hand holding a jar came out spooktacular and I’ve already put it on display, the warm glow from the candle shining through those bony fingers is so cool. 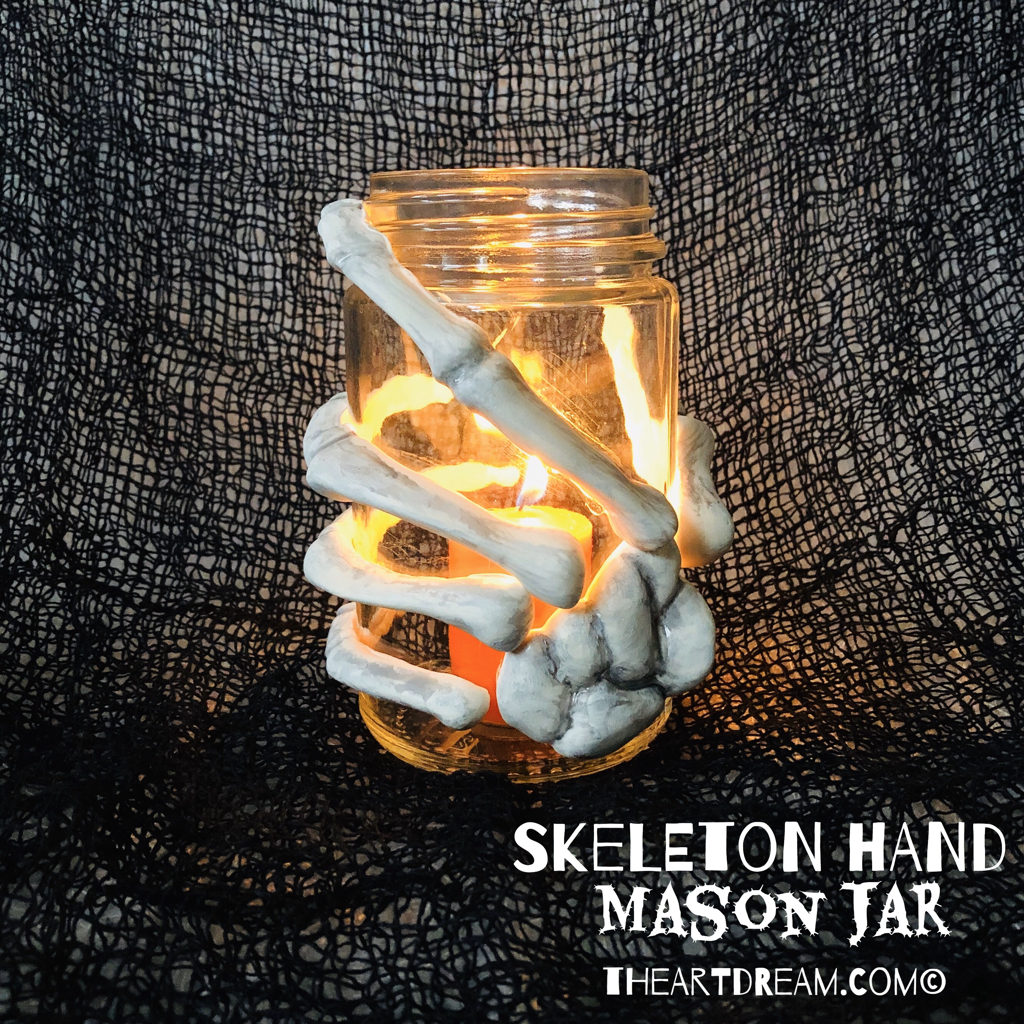 Skeleton Hand Mason Jar You only need a few materials and a little bit of time to make this eerie Halloween craft. First, I use Crayola Model Magic for projects like this, it’s the coolest material and alternative to clay, plus it comes in white which makes it very easy to paint or mix with paint as well. I also used a silicon mold that I purchased from Michaels to make the skeleton hand. Check out my photo tutorial in this post to see how I made this project. Materials:
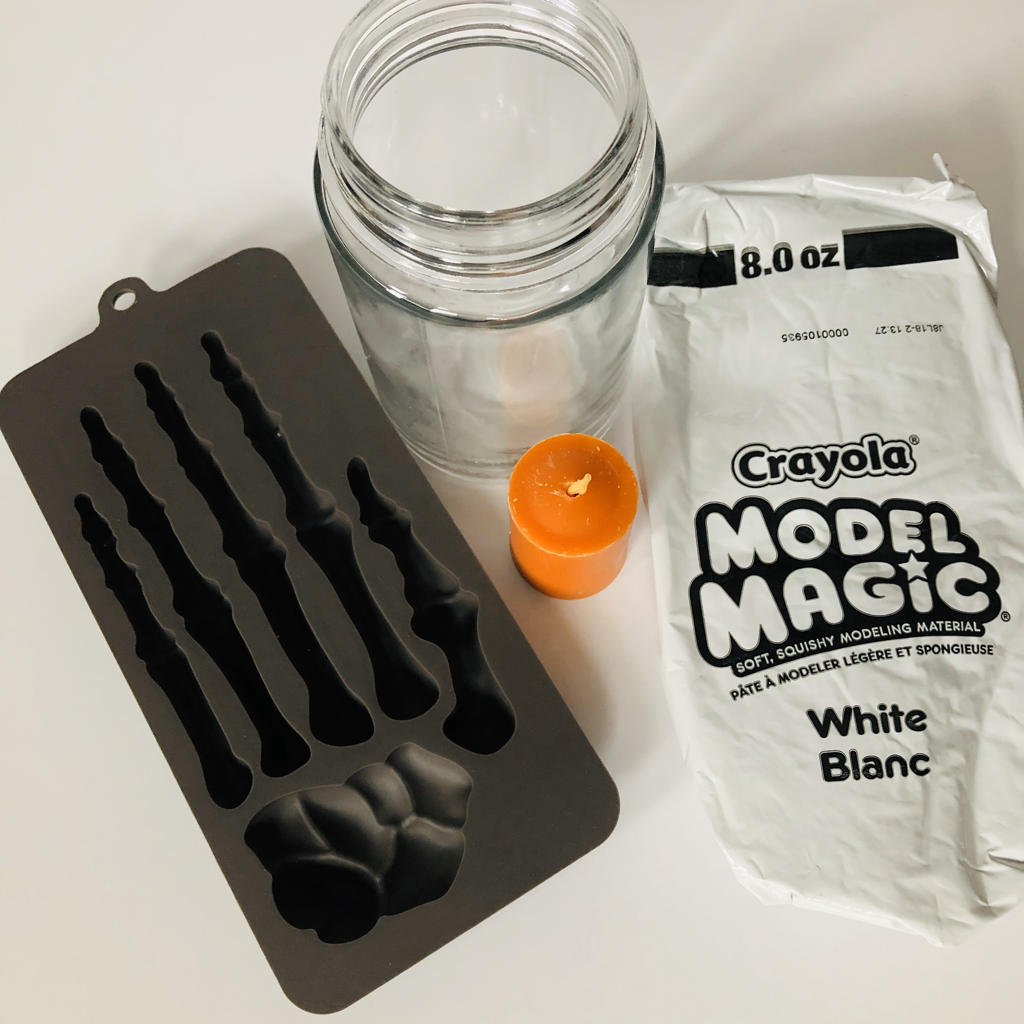 Directions: Step 1. First knead your Model Magic a bit to warm it up and make it a bit more malleable, then press small pieces into your mold. 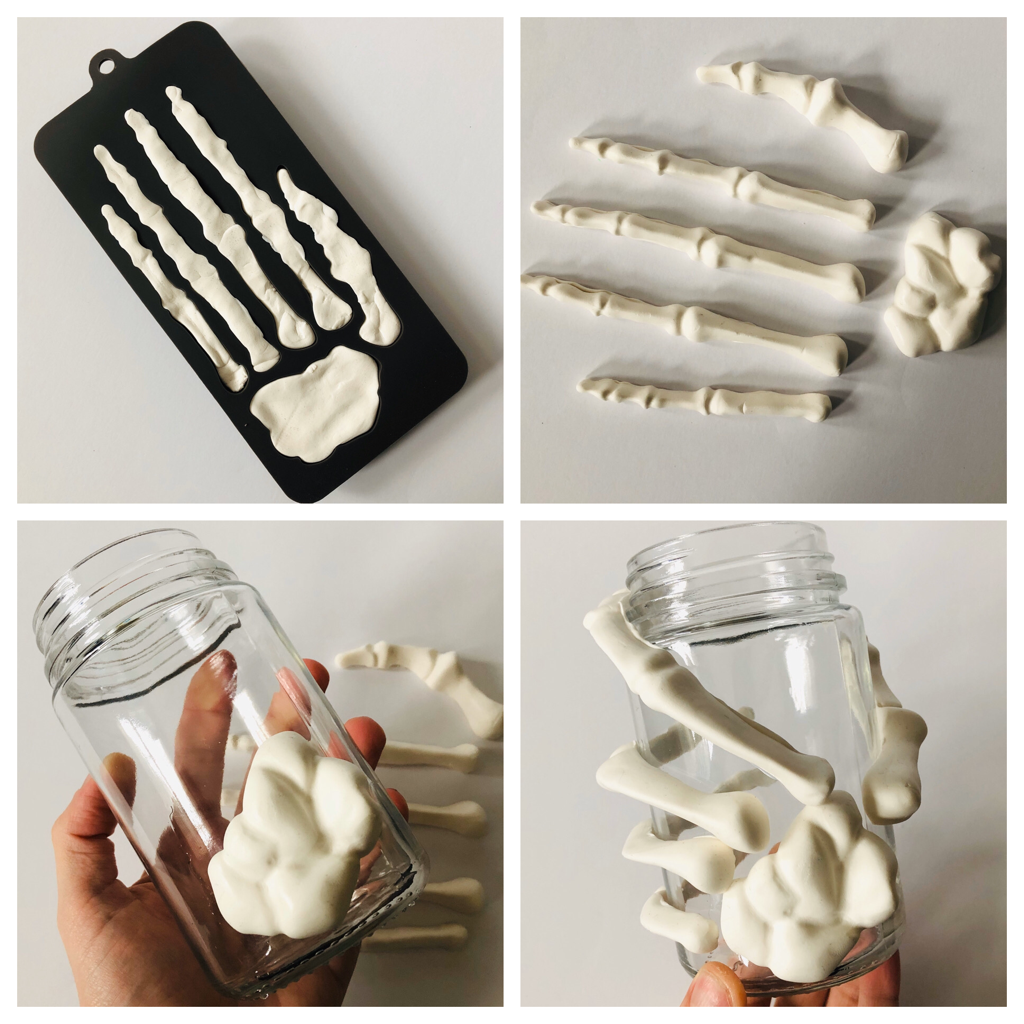 Step 2. Carefully remove the molded pieces from the mold, loosen up the edges if you have to. Be sure to keep the fingers in the right order. Step 3. Use clear tacky glue to adhere the hand to your mason jar, try to pose the fingers like it’s naturally or realistically holding the jar. Step 4. Allow your Model Magic to dry, you should really wait at least a day for the surface of the clay to set before painting. Step 5. Paint on some scary details to make your bones look spooky! Add a candle and enjoy! Take a look at my skeleton hand from all different angles below, and if you make this craft be sure to share your experience with me! Happy Halloween everyone! 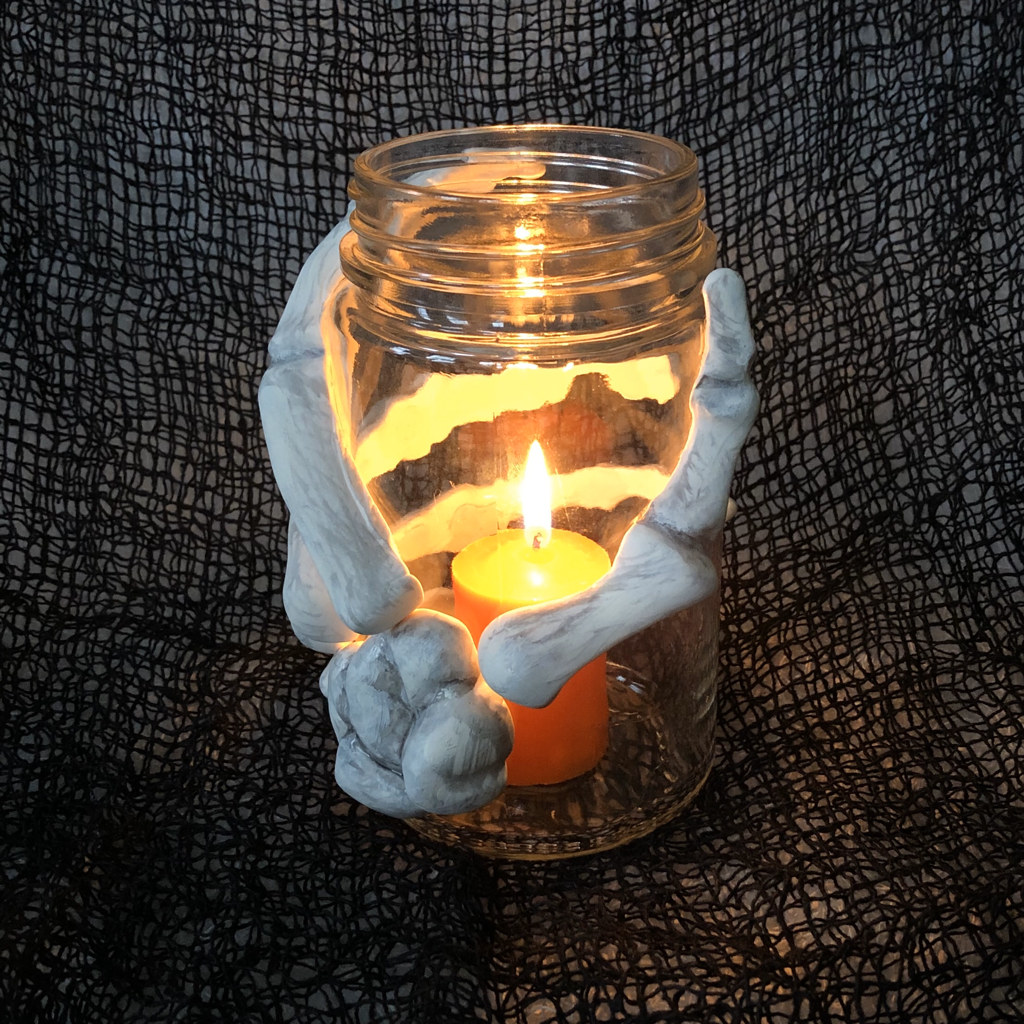 Skeleton Hand Mason Jar 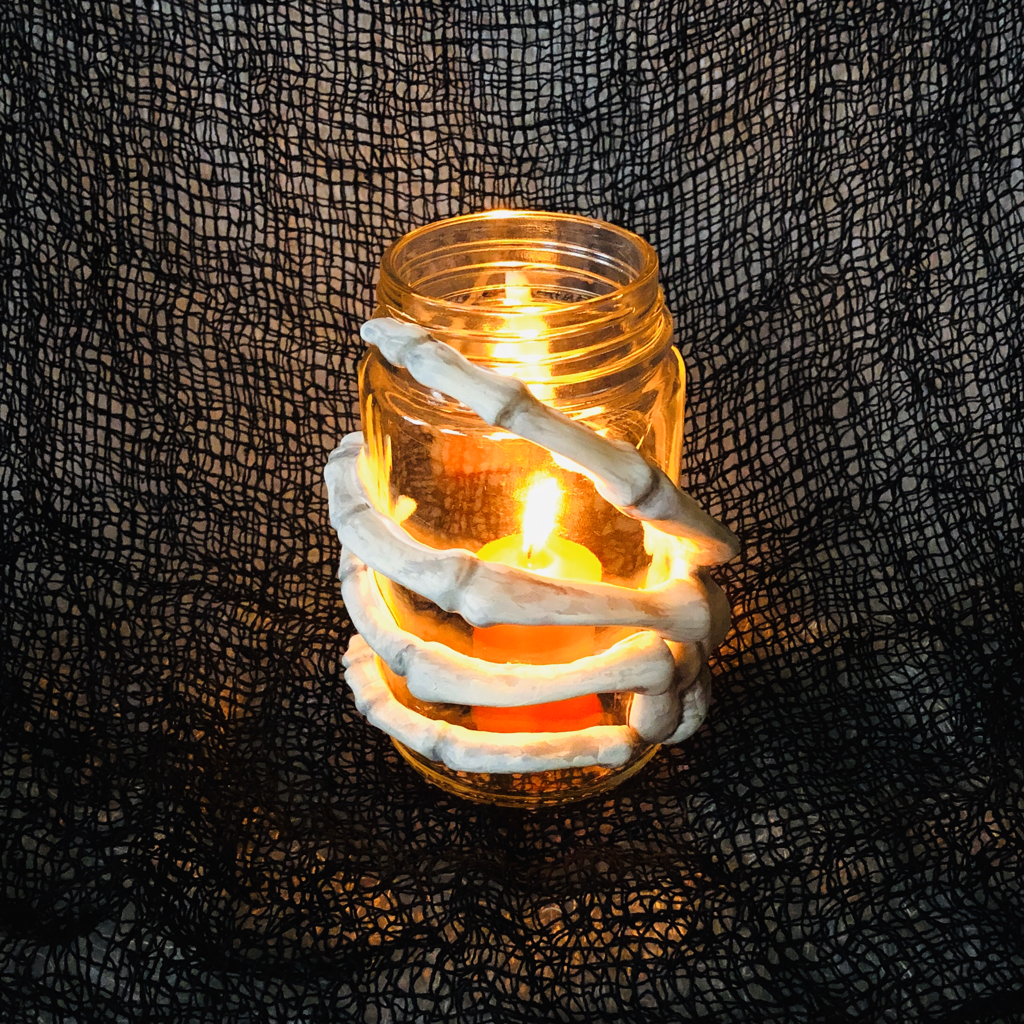 Skeleton Hand Mason Jar The Art Dream Enamel PinI am so happy to introduce an original enamel pin designed by me, The Art Dream’s unicorn logo! It is a beautiful combination of purple and blue hues gradually changing across the body of this geometric, majestic animal. The supply of this pin is limited so get yours today! Find it in the shop here at The Art Dream! 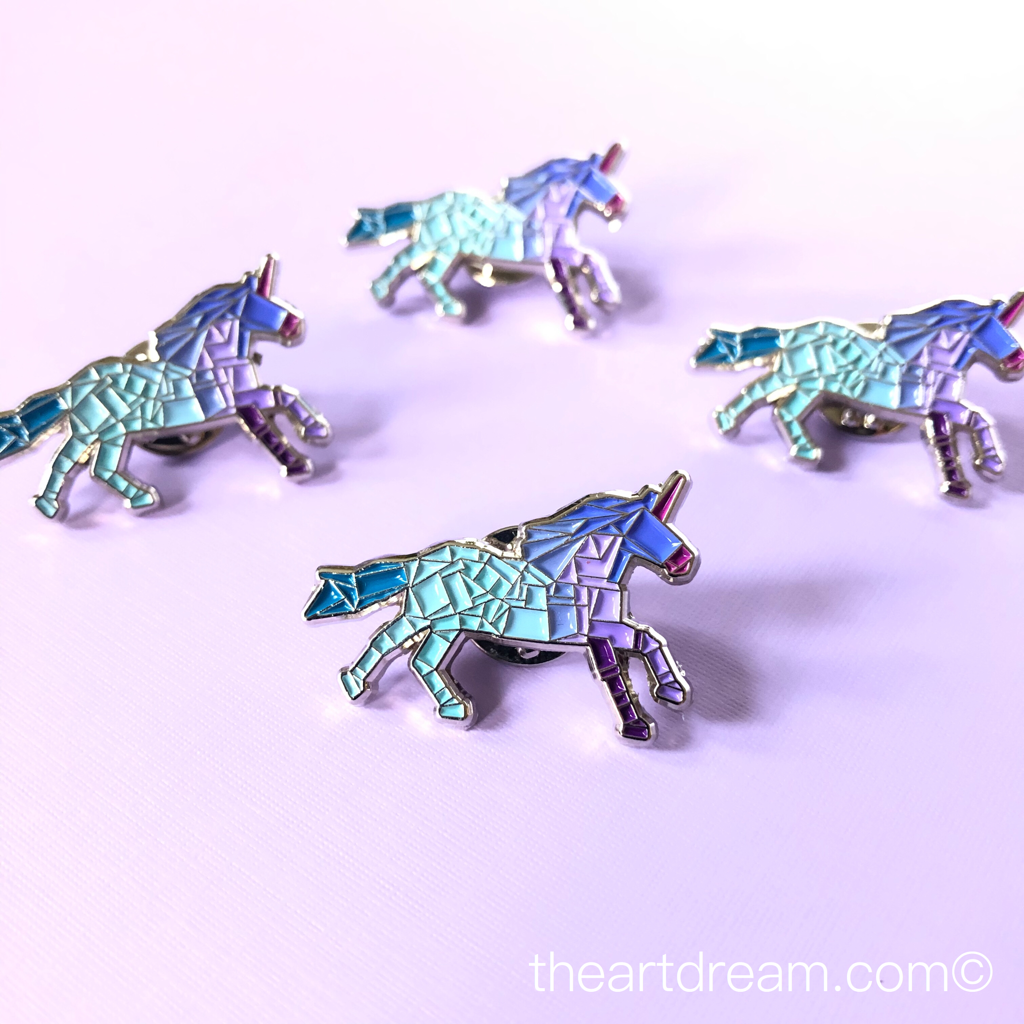 Unicorn Enamel Pin Enamel pins are so trendy these days and there are some really clever designs out there, I think I’m going to get into creating a collection for myself! If you’d like to do the same then start here with this super cool enamel pin. Find it in the shop along with my original printable designs as well. 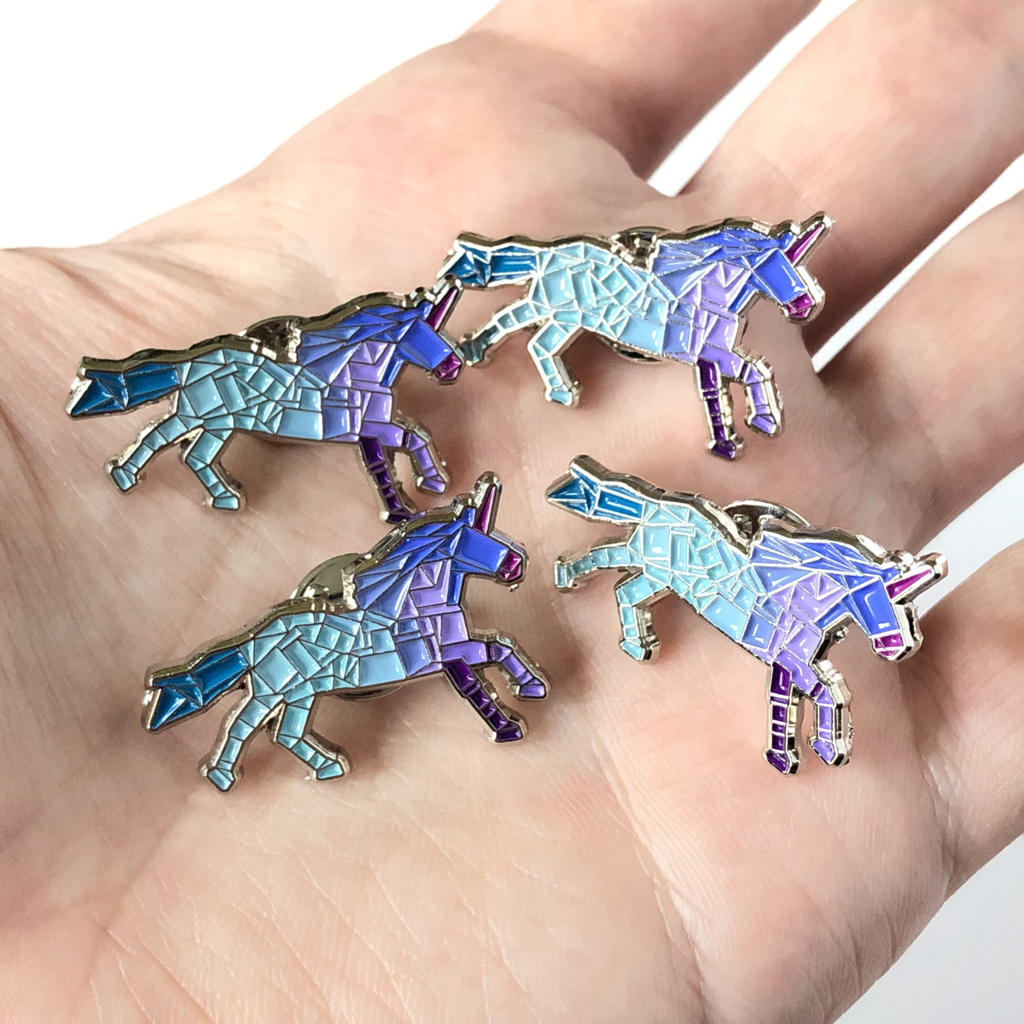 Unicorn Enamel Pin These enamel pins come with a butterfly clasp in the back and are designed on a silver backing with silver details. Each pin features ten different colors all working together to create this beautiful unicorn! I think I’m going to pin mine to my ties and use them as tie clips!  Unicorn Enamel Pin Of course you can wear your pin on your lapel, hats, backpack, the strap of a bag or any other accessory you’d like. Be sure to check out the shop to get your hands on a fun, unique pin like this!
Fire Breathing Dragon Tube CraftGo on an epic journey with this fire breathing dragon craft! Use a cardboard tube as the frame for this fiery guy. Dragons are a totally “in” thing right now and they are one mythical creature you don’t want to mess with, however you can download and print your very own friendly pet dragon right here in the shop at The Art Dream! Add your own orange, yellow and red tissue paper to create the illusion of a mighty fire being exhaled from this super cool craft! 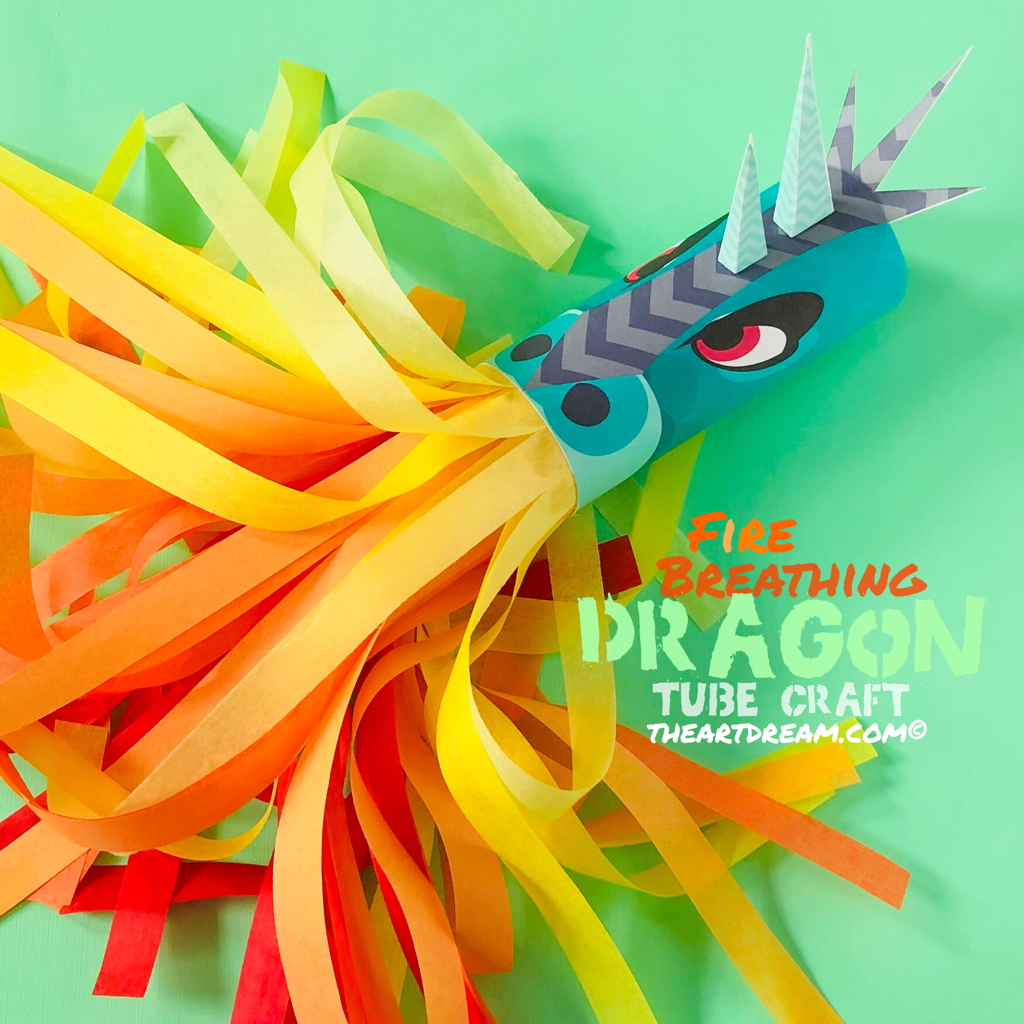 Dragon Tube Craft Kids will love running around pretending their arm is the body of a fierce dragon while his hot fire brings doom to all of the bad guys. I especially love the horns on the top of his head they really bring this craft to life. If you like this project then check out some of my other printables in the shop! I’m also going to give you a super quick tutorial on how to put this craft together in this post! You’ll just need a few simple materials. Materials:
Directions: Step 1. Print out the dragon printable on white cardstock paper and cut out all of the pieces with scissors or a craft knife. 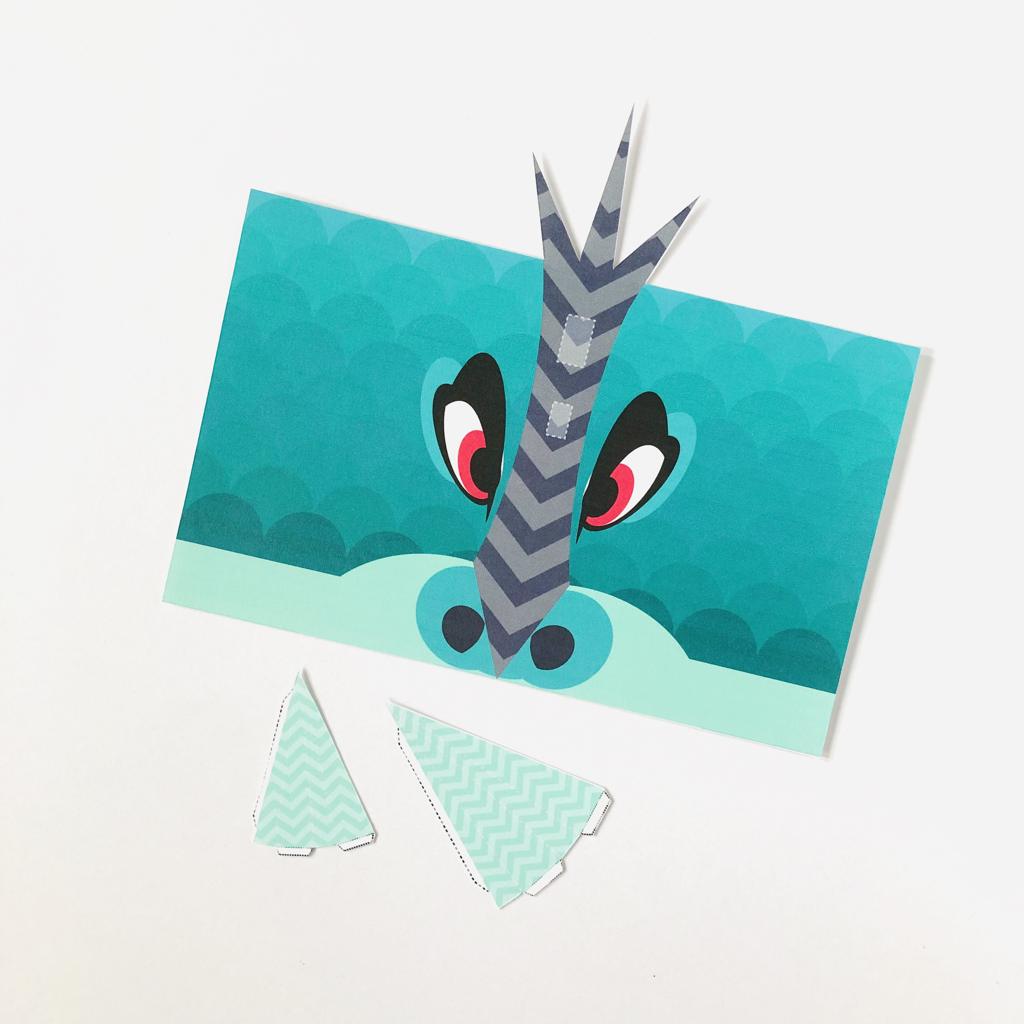 Step 2. Construct the horns, score all of the lines with a craft knife or you can use something like a popsicle stick or the corner of a credit card. Scoring helps tremendously when folding small flaps and executing fine details. Glue the flap to the corresponding side. 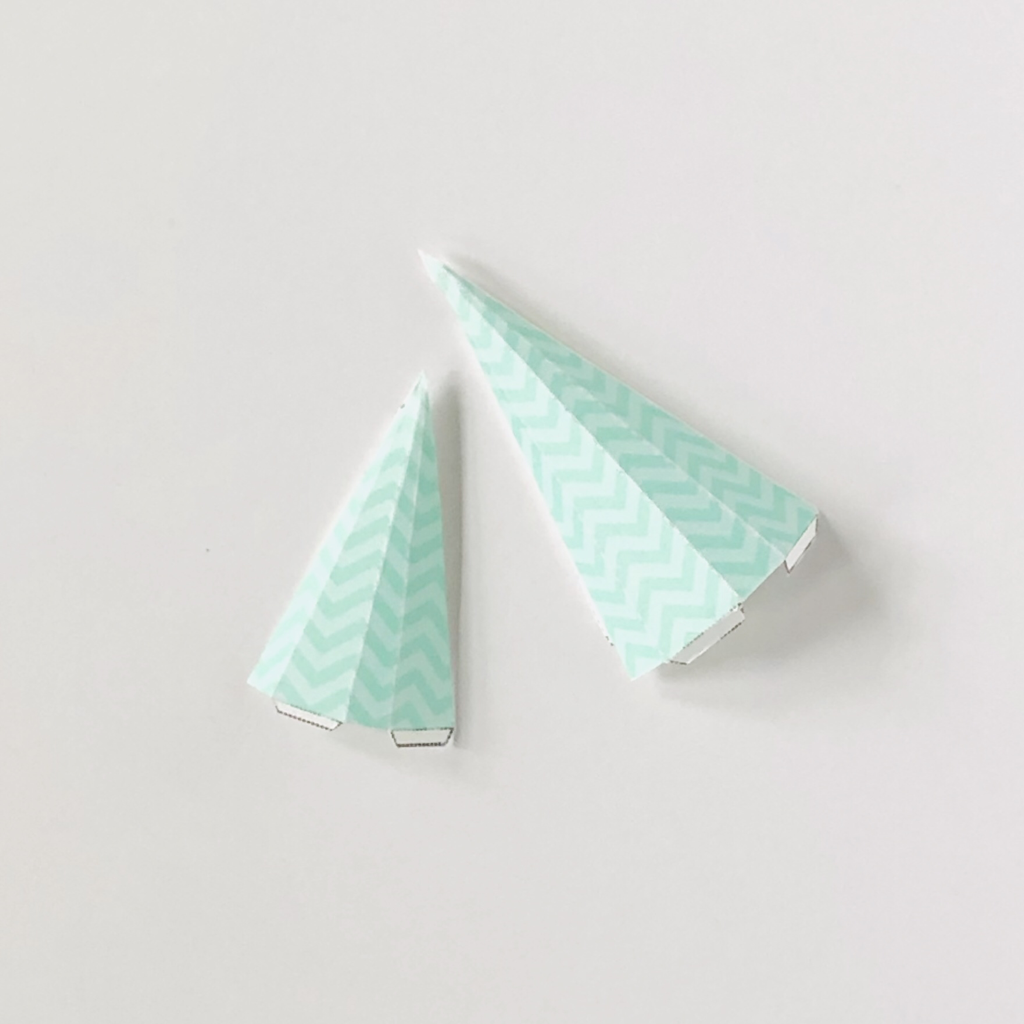 Step 3. Prepare your streamers however you wish, mine are tissue paper but you can use ribbon, yarn or even wrapping paper. Glue the streamers to the back of the dragon printable, be sure to use the side with the mouth. 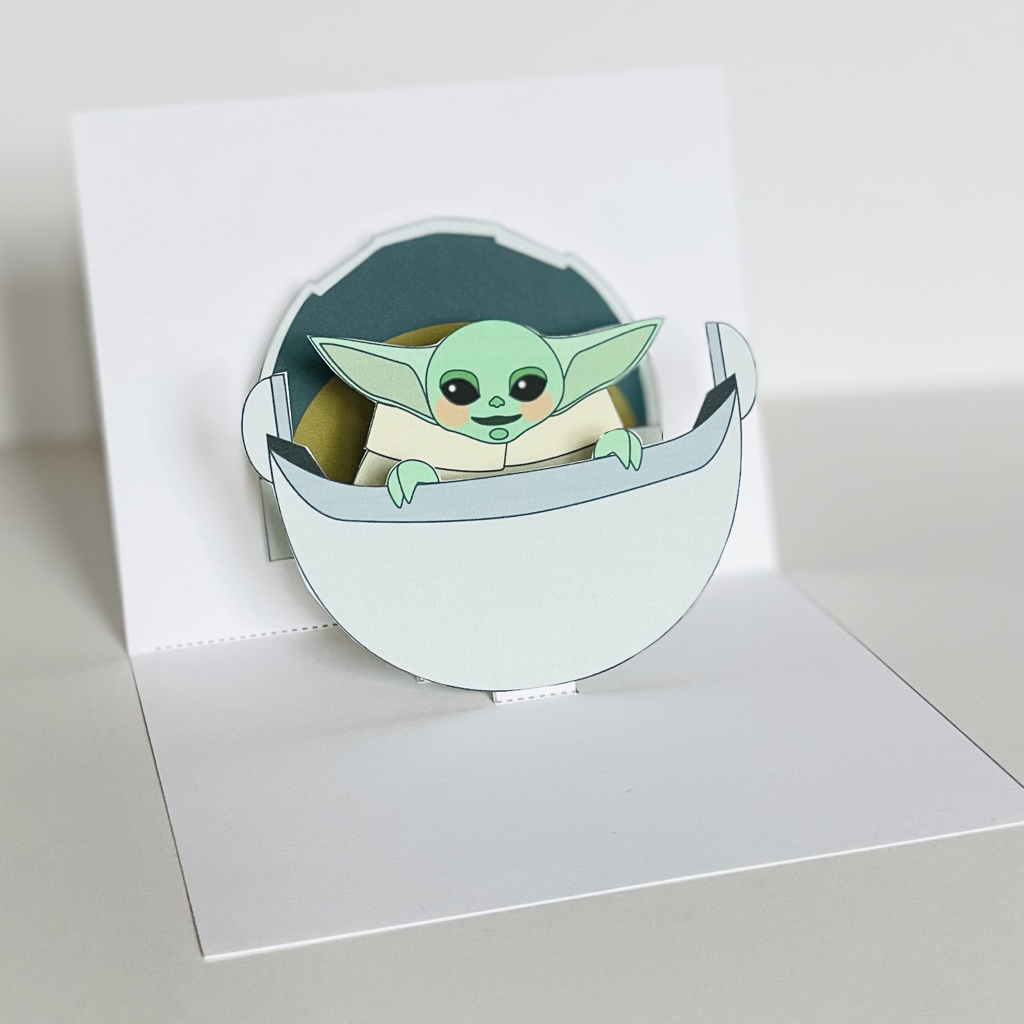 Step 4. Wrap the dragon around a toilet tube and secure with glue or a stapler.  Step 5. Glue on the horns and bend the crown horns upward as well. 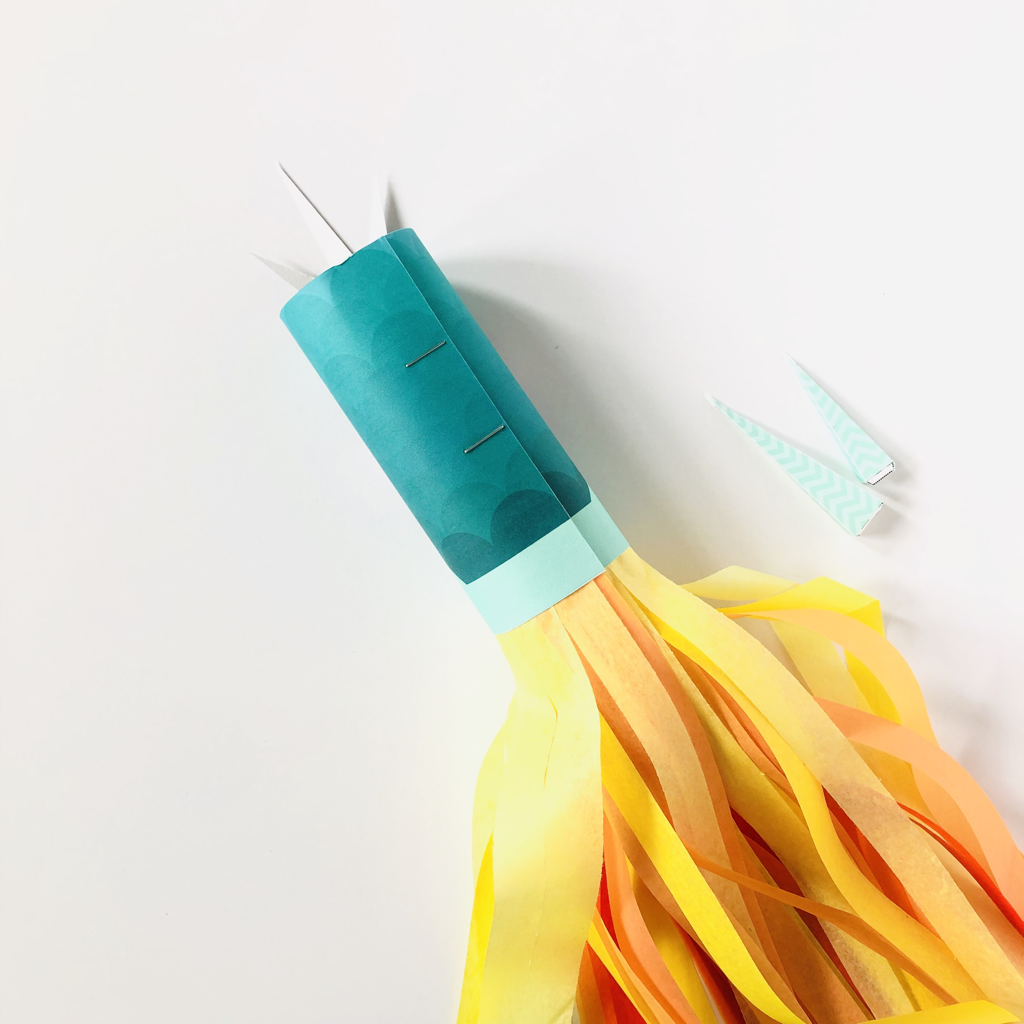 Be sure to share with me how your dragon turned out in the comments below! And if you love this dragon check out his icy friend and my adorable unicorn printables as well, hope you all have a great time crafting and creating! 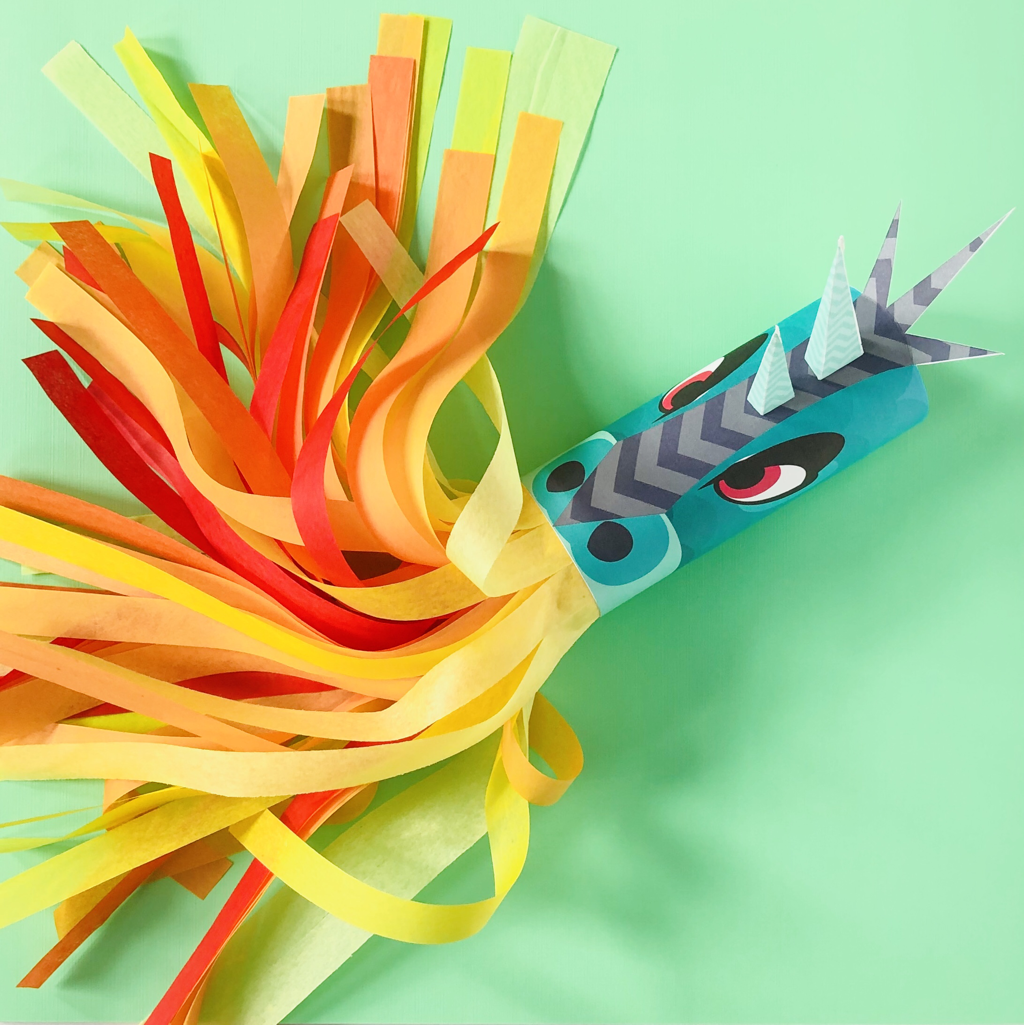 Dragon Tube Craft Simba Cardboard Tube Craft PrintableHe’s a mighty king for sure, Simba the brave lion is a tube craft printable for you to make in your own pride lands. It’s so easy and so fun, just download, print, cut and glue! Have you guys seen the new Lion King remake movie? I haven’t yet but the cinematography looks stunning, it’s truly amazing what they can do with visual effects. I really do love that Disney is giving classic animated movies a makeover for younger generations to marvel at and appreciate but despite these efforts my heart will always be with the original creations. The original animated movies have such charisma and beauty that I don’t think is possible to improve on. So, here’s young Simba as he appeared in 1994. 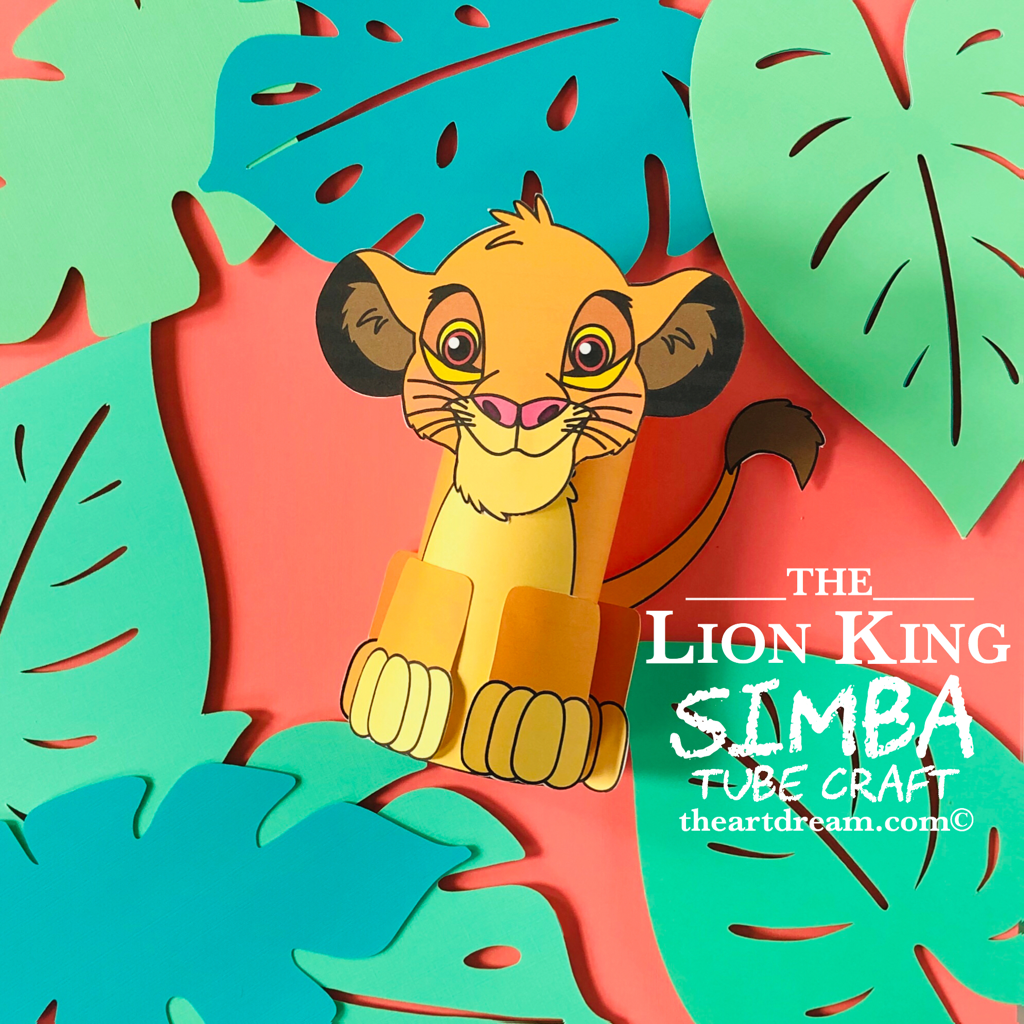 Simba Tube Craft Printable This craft is so easy to put together you barely need directions, but I will give you the details anyway. I really hope that you all enjoy making this project as much as I have. It’s always exciting to experience the process of creating something like this because when you make art from scratch you never really know what the final outcome will be. Will it be a flop? Will it be just “OK”? Or will it be a hit? Who knows, what I know is that I get such an indescribable feeling in my heart when I’ve created something that I think children and all people will love. So please enjoy and be sure to share your outcome as well! You’ll need just a few things to get started, first my printables which you can download in this post below the materials list. Materials:
Please right click the file and save it to your computer before printing. If you are having trouble with the printed size of the image, make sure that you select "fit to page" or "print actual size" in your printer options window. Do not print from the open window of your internet browser after clicking on the file, your printout will be very tiny! Directions: Step 1. I suggest printing out the files on white cardstock paper, it is stronger and durable. Then cut out all of the shapes with scissors or adults can use a craft knife. Kids can simply cut out the shapes very loosely, it doesn’t have to be perfect. Step 2. Wrap the large rectangular piece around a toilet tube and secure with glue or you can use a stapler. Step 3. Glue on the details as you like.  And the circle of life is complete! How did your Simba turn out? Isn’t he the cutest? I think so. Let me know how your projects turned out in the comments below! 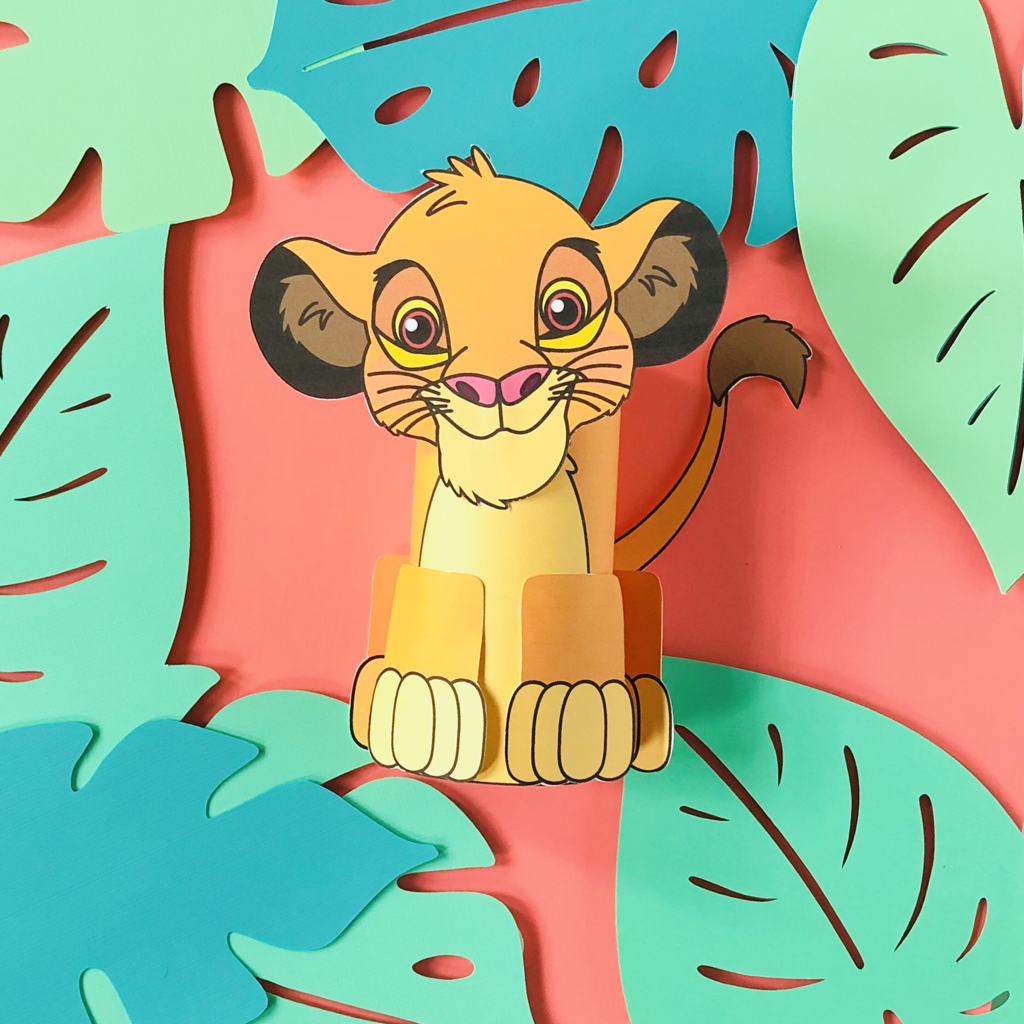 Simba Tube Craft Printable Felt Pencil PillowPencil pillows are always welcome in the classroom, who says you and the kids can’t be comfy? I replicated this pillow from this year’s Target dollar spot and I think I nailed it! Ok, so just like all the other teachers out there this time of year, I am beyond excited to be off for the summer but as soon as the stores put out their back to school stuff I can’t help but get exited! For the past couple years the Target dollar spot hasn’t disappointed, they really have some fun, useful and cool stuff, yep I’m a sucker for it. This year they have a pencil pillow for sale but I haven’t been able to find it so I thought why don’t I make my own and share how I did so. 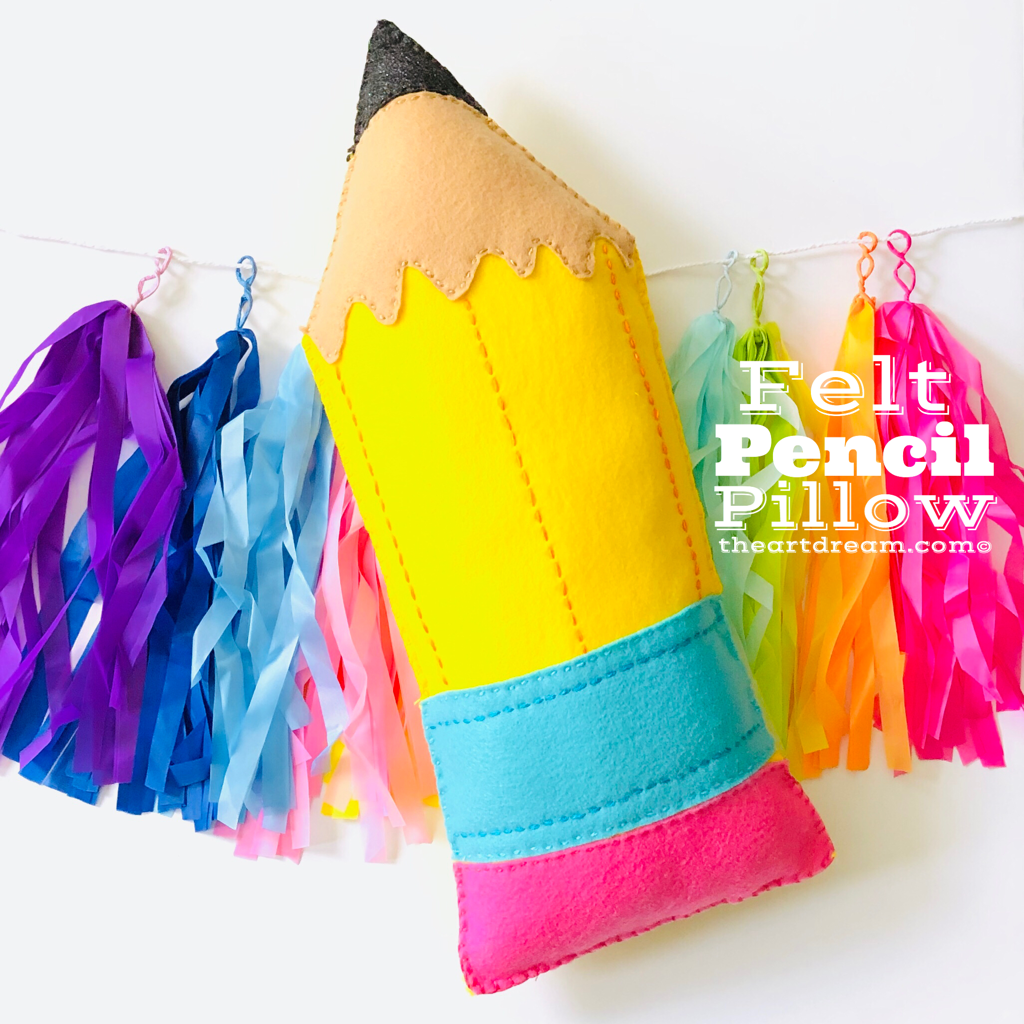 Felt Pencil Pillow I’ve also collaborated with the wonderful Trixi Symonds over at colouredbuttons.com for Sew a Softie month! It’s July and it’s time for you to pick up a needle and thread and learn how to make some simple stitches. You can learn a whole lot from Trixi because she’s the expert, check out this link as well... sewasoftie.com. Sew a Softie month is a campaign to encourage kids and their parents or teachers to make more art involving sewing, and for me this will alway be one of my favorites to make with my art classes! The kids really learn a unique skill, it helps them focus, stay on task and become better problem solvers on their own. So on behalf of Sew a Softie month I’ve put together this pencil pillow tutorial, you’ll be needing a few things including my pencil pattern which you can download in this post below. Materials:
Step 1. Fist you’ll have to decide how big you’d like your pillow, mine is about 18”x7.25”. My pattern is designed to print on 8.5”x11” paper so you will have to enlarge it if you’d like but it’s a very simple pattern and shouldn’t be an issue to just freehand your own pattern on a large piece of paper. 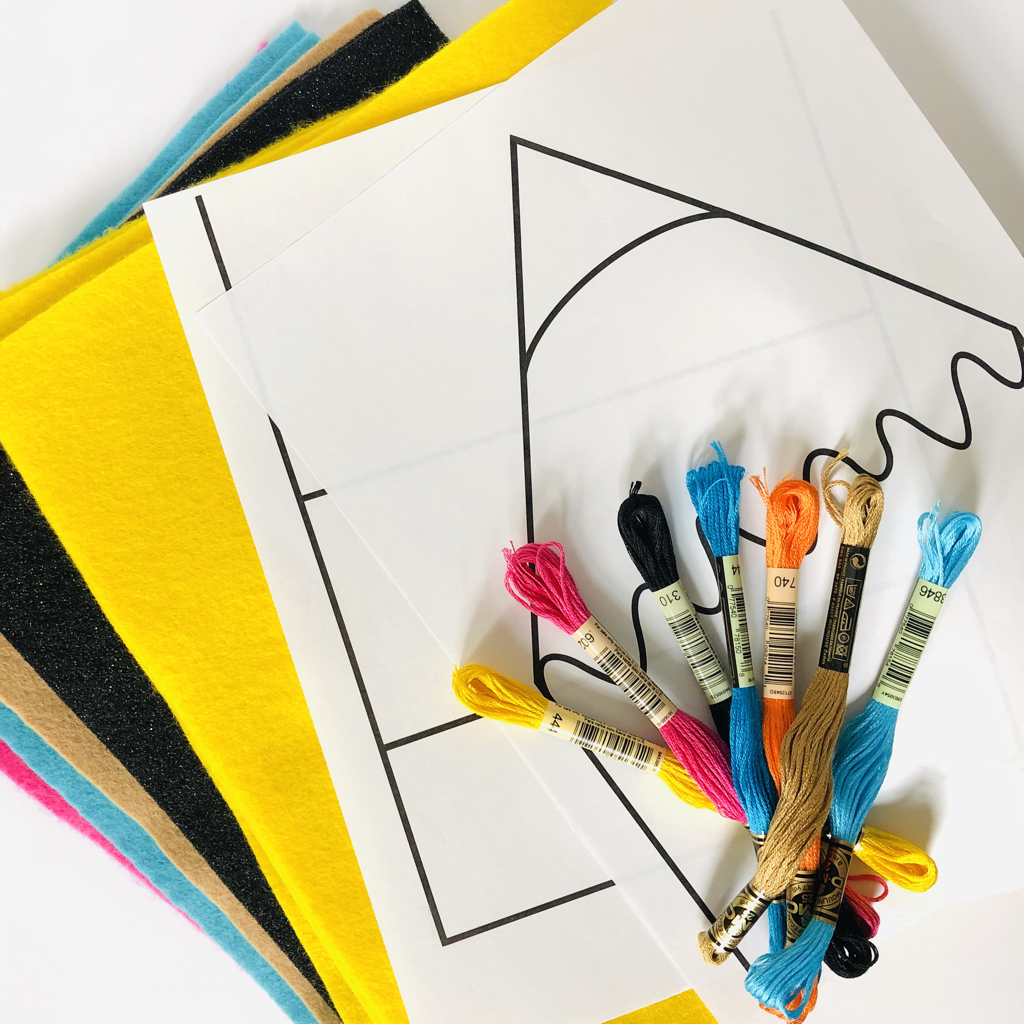 Step 2. Cut out your pattern and attach it to your felt, I like to just staple it but you can pin it if you like. Then cut out your shapes with fabric scissors they work best. Be sure to cut two layers of the large yellow piece. 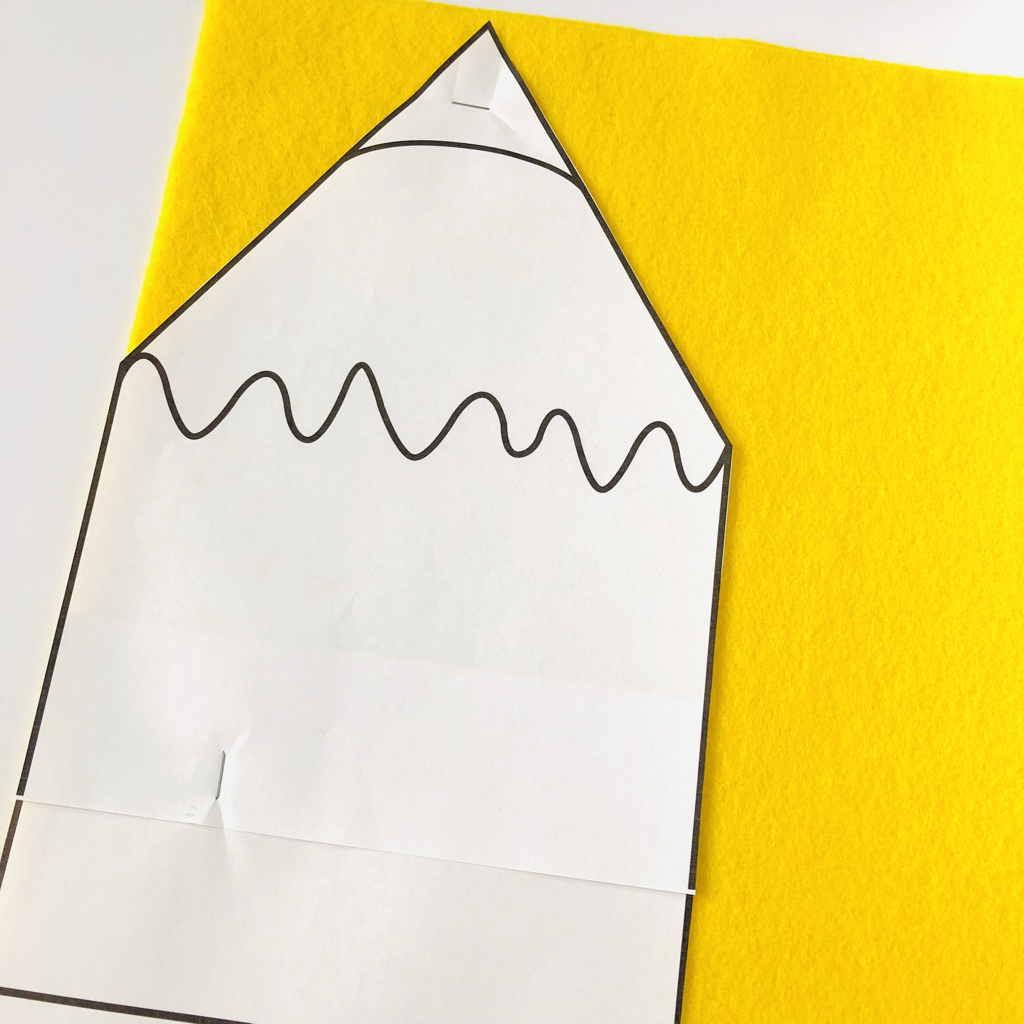 Step 3. Next prepare your needle and thread with the embroidery floss. Use a running stitch to attach all of your pieces to the top layer of yellow felt only. Be sure to stitch on the seems that are inside the shape, don’t stitch the edges. 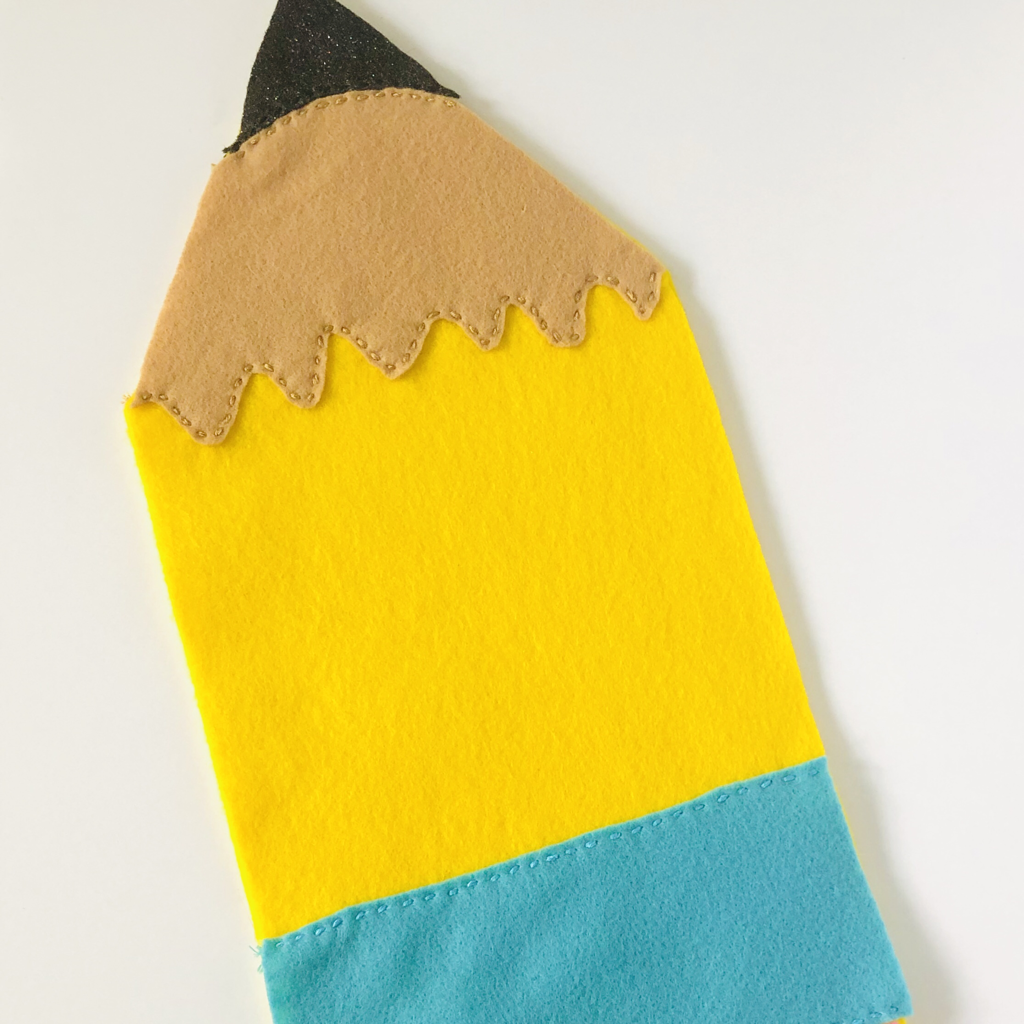 Step 4. Stitch on any other details you’d like, then stitch all around the edges, I used a blanket stitch for this, it’s much stronger and looks nice too. Leave an opening at the end to stuff with fiber fill.  Step 5. Fill your pillow and stitch up the remainder and bam! You have a cute little pencil lumbar pillow!  Felt Pencil Pillow Have you found everything you wanted from the Target dollar spot? Did you make one of my felt pillow projects? I’d love to hear about it in the comments below!
|
AuthorI'm John, an artist and art educator. The Art Dream is here to spark creativity and inspire the little artist inside of you! Archives
October 2021
Categories
Ice Dragon Head Printable
$1.00
Feel the icy breath of this mighty dragon, it’s a dance of fire and ice that’ll leave you in awe. Just add your own streamers to create that blast of blustery snow!
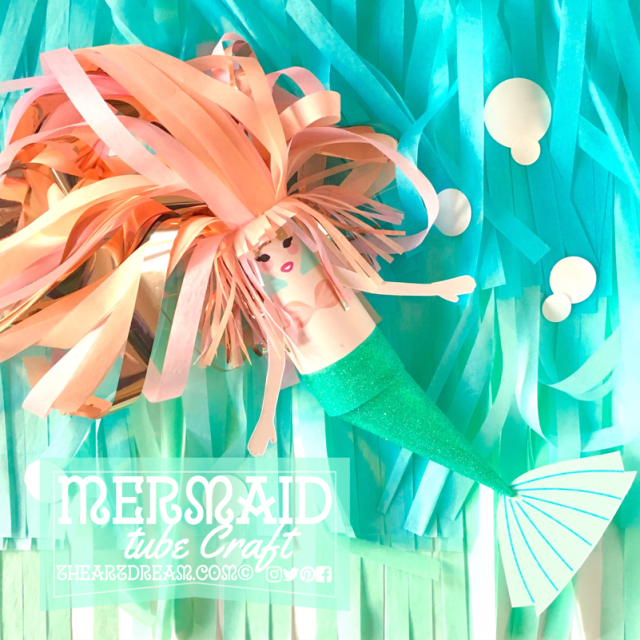
Mermaid Tube Craft Printable
$1.00
Who would dream about the world above the sea when you could dream about the world that is under the sea, where such beautiful creatures like this mermaid must exist! Don't they? I've started your journey of crafting this beautiful sea creature, it's up to you to add magical hair and dress up her fins!
|
||||||||||
 RSS Feed
Proudly powered by Weebly